While looking through the to build inventory I found Northern Refrigerator Line, NRC 17080, Red Caboose kit RC-442-6, a kit I had purchased in 2002. I am guessing I never built the kit because the car kit provided wood ends; however, that was about to change. I began my search for information and photos for the build.
I found the information and photos for my build in Roger C. Hinman’s book Merchants Despatch It’s History And Equipment (Signature Press, 2011). Merchants Despatch Incorporated (MDI) purchased the stock of Northern Refrigerator Car Company in 1928 and a new organization, Northern Refrigerator Line was set up. In late 1936 Despatch Shops Incorporated (DSI) was formed to produce new refrigerator cars.
The car I chose to build was built in DSI in 1941. A fine photo of NRC 17000 with the “B” end showing is in the book. The photo caption tells us NRC 17000 was transferred to MDT in 1962. Another fine photo of NCGX 1100 renumbered in 1963; however, built for Northern Refrigerator Line as NRC 17046 in 1946 with "B" end and underbody frame members showing is in the book. I used these photos for my build.
The car kit lettering on NRC 17080 is an excellent match to the prototype lettering on NRC 17000. The kit car body was also a fine match with the exception of wood ends. The ends not a problem as I could use resin 4/4 dreadnaught ends I cast in the Minneapolis & Northland Railroad Company (M&N) Shops using InterMountain ends for a master. I was also pleased the underbody frame matched the photo of NCGX 1100.
I began the build with the install of the underbody. Center sill, bolsters, crossties, were installed per kit instructions. A kit weight was attached to the floor with Permatex silicone general purpose adhesive and two tire weights (self stick) to weight the car to 3.8 ounces. Once weight adhesive set the underbody was installed. Bolster center plates and couple pocket pads were drilled and tapped for 2-56 screws.
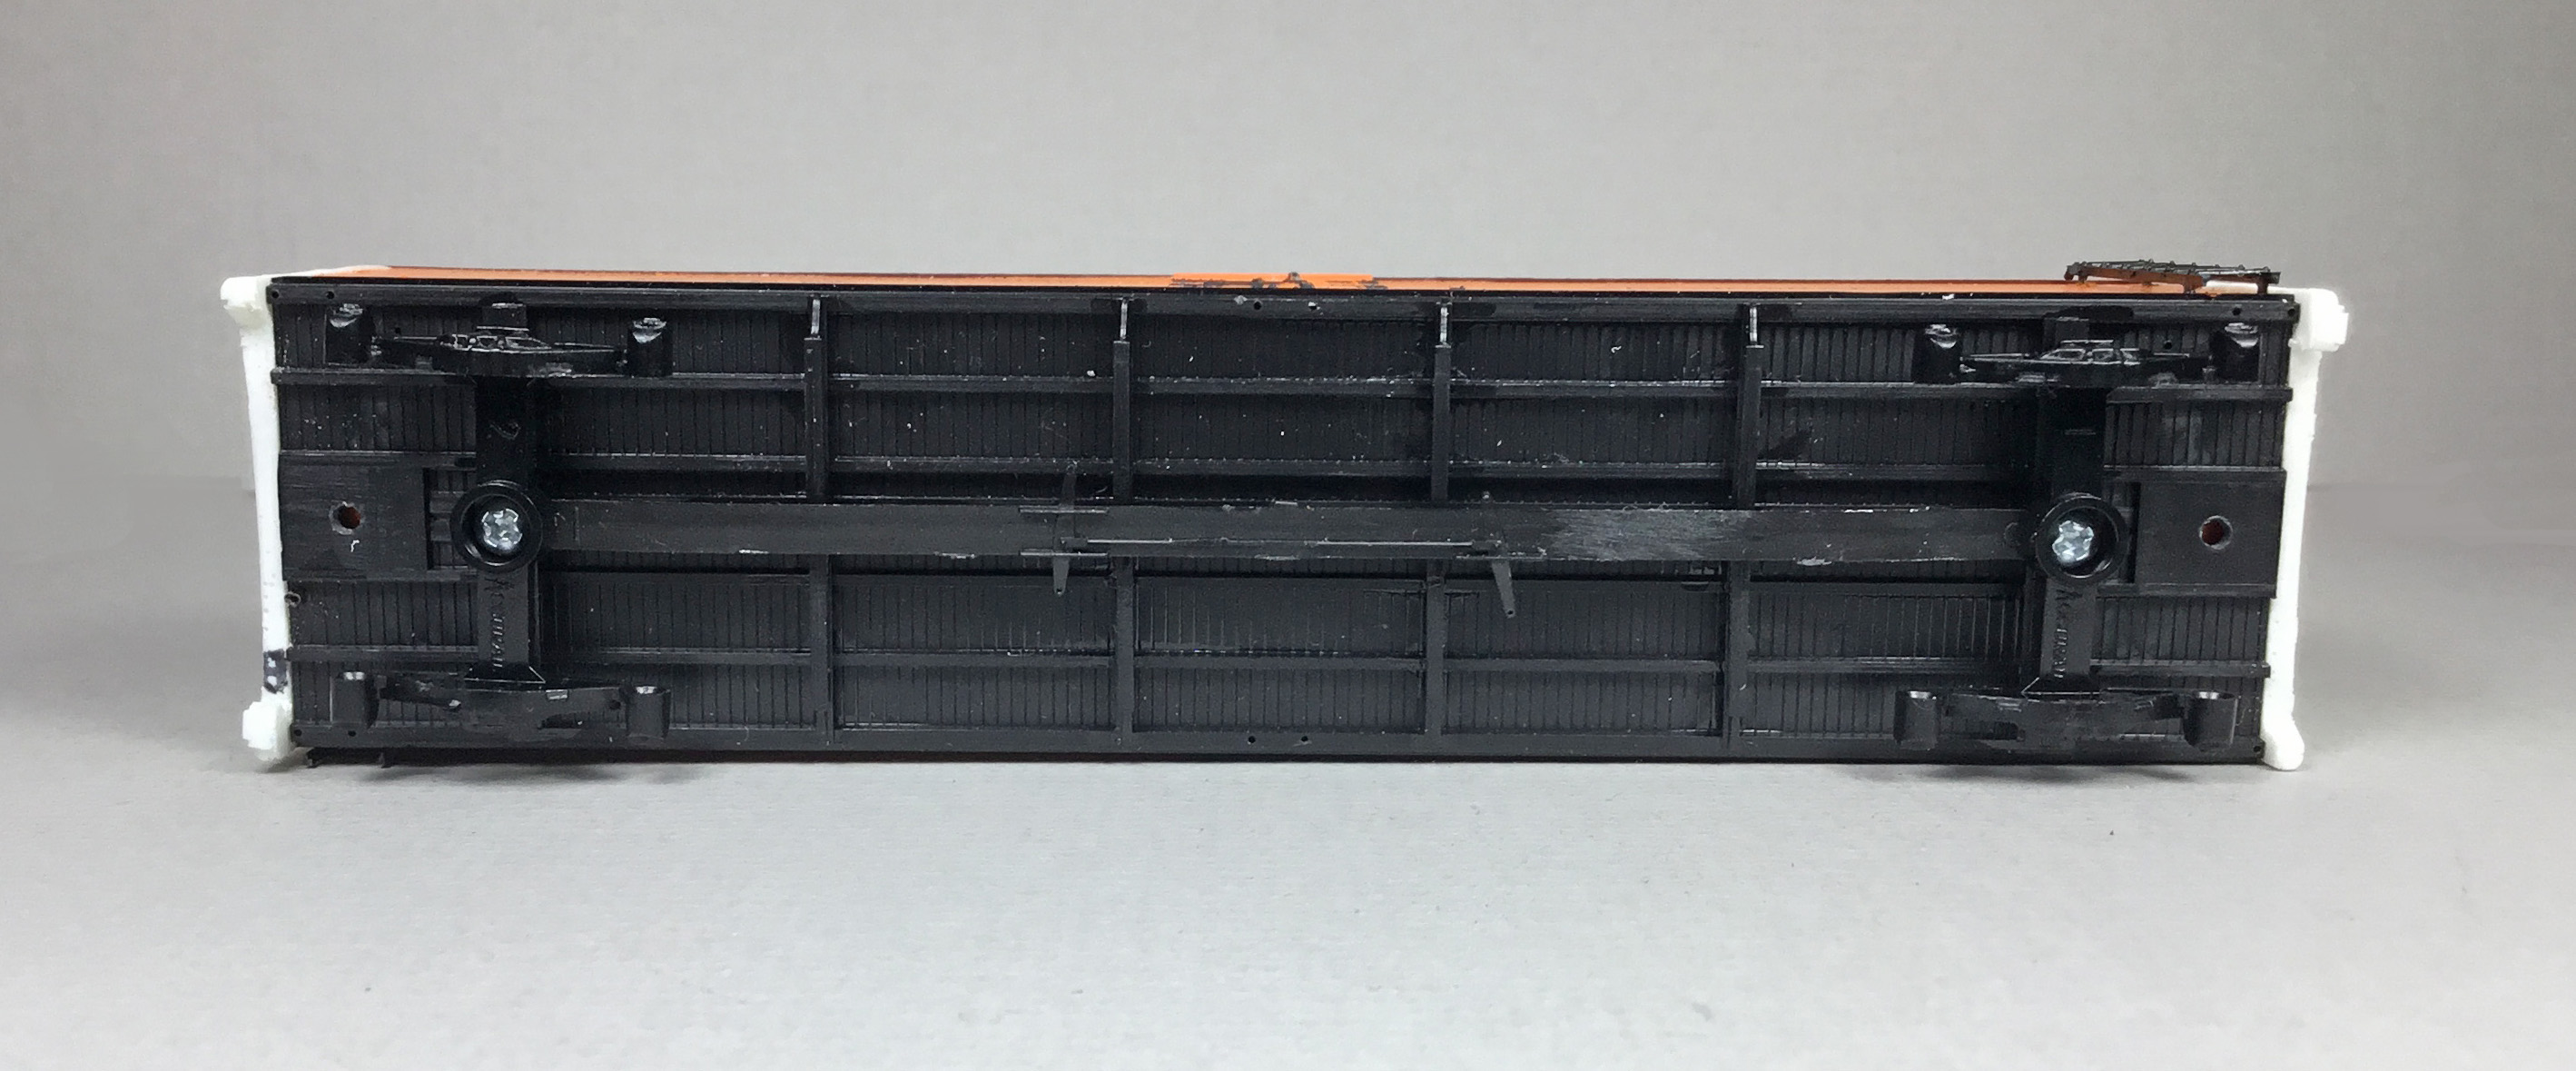 |
| Basic underbody work done. (Click on this or any image to enlarge) |
Next, the roof was installed. Now, the 4/4 dreadnaught ends were installed on the “B” end after fitting. I laid the kit wood ends on the cast resin 4/4 ends and marked the top with a pencil to cut off some material to get the proper angle for a proper fit. The cuts were made with a UMM-USA saw, razor blade with fine teeth type, sanded for final fit, and installed with super glue/CA.
 |
| Resin end cast in M&N Shops installed. |
 |
| 3/4 view of resin end installed. |
The install of kit ladders followed. The kit ladders were shortened to have six rungs to match prototype prior to install on sides and ends.
 |
| Ladders installed. |
 |
| Ladders installed. |
Onto the roof to install running board, ice hatch frames, ice hatches and ice hatch latches provided in kit. The running board was milled and scraped with single edge razor blade (SERB) to .025” before install. Kit extension running board brackets were installed on ends.
 |
| Running board and ice hatches installed. |
Roof grab irons were bent from Tichy Train Group (Tichy) #1101, .010” diameter phosphor bronze wire (PBW) and installed with Yarmouth Model Works (YMW) photo etched eye bolts without shoulder for corner leg. The final detail, ice hatch rests of unusual design were bent per prototype photo from .005” shim brass and installed with CA.
 |
| Ice hatch rests installed. |
 |
| Ice hatch rest installed. |
The addition of side details was next. The side grab irons were bent from Tichy #1101, .010” diameter PBW and installed. A-Line #29000 sill steps were installed; however, they were not double sill steps as on the prototype. Therefore, .005” brass was cut to create and add the second step with CA to create a double step.
 |
| Double sill steps made. |
I moved on to work on the underbody. Kadee #262 coupler pockets with Kadee #148 couplers were installed. Accurail trucks with InterMountain 33” metal wheels were installed. Fastenal 3/16” screws were used to install the former and Fastenal 1/4” screws were used to install the latter. Kit AB brake components and bell crank were installed. At this point, I hand painted the underbody Vallejo Black Grey 70.982.
 |
| AB brake components installed. |
Time for the “B” end work which included the following:
- Kit ladders
- cut off sill tabs with poling pockets off resin casting and on “A” end
- Poling pockets cut from Evergreen #223 3/32” styrene tube installed on sill per prototype photo
- Brake step and brackets in kit installed
- Brake gear housing and chain in kit installed
- Retainer valve in kit installed
- Retainer line and brackets, Tichy # 1101, .008” diameter PBW installed
- Brake rod clevis on previous installed bell crank (plastic brake rod cut off)
- Brake rod, Tichy #1102, .015” diameter PBW installed
- Drop grab irons, Tichy #3015, 18” drop type installed and on “A” end
- Placard board from part box installed and on “A” end
- Brake wheel, Kadee #2031 Equipco style
- Uncoupling levers bent from Tichy #1106, .0125” diameter PBW
- Uncoupling lever brackets, eye bolt bent from Tichy #1101 .010” diameter PBW
- Detail parts and ends of dreadnaught ends hand painted with Vallejo Cavalry Brown 70.982
 |
| "B" end details. |
 |
| "B" end details installed and painted. Note poling pockets have been installed. |
To finish the adding of detail parts, I moved to the underbody work. Parts added to the underbody were as follows:
- Train line .018” diameter flora wire
- Piping from air reservoir to AB valve, Tichy #1101 .010” diameter PBW
- Pipe from brake cylinder to AB valve, Tichy #1106 .0125” diameter PBW
- Dirt collector, resin cast in M&N Shops
- Universal slack adjuster, parts box
- Brake cylinder lever cut from Evergreen #8108, 1 x 8 strip styrene
- Floating lever cut from Evergreen #8106, 1 x 6 strip styrene
- Brake lever hangers, plastic grab irons from kit
- Brake rods, Tichy #1106, .0125” diameter PBW
- Brake rod clevises, Tichy #8021 turnbuckles
- Chain, A-Line #29219 black 40 links per inch
- Hand painted with Vallejo Black Grey 70.892
 |
| Underbody details installed. |
 |
| Underbody painted. |
Northern Refrigerator Line NRC 17080 was moved to the paint shop. The sides were taped off and remaining car body was airbrushed with Vallejo Cavalry Brown 70.892.
 |
| Car ends being airbrushed. |
NRC 17080 was left in jig for paint to dry overnight. The next day car body was airbrushed Vallejo Gloss Medium 70.470 to provide a gloss base for decal application.
 |
| Car ends and roof airbrushed with gloss. |
 |
| Car ends and roof airbrushed with gloss. |
After drying overnight, decals on the ends were applied. Reporting marks and number decals for ends of NRC 17080 were made by applying Clover House dry transfer lettering, #9600-11 Railroad Roman Condensed Bold-White, to decal paper. Once lettering was applied it was coated with MicroScale Liquid Decal Film complete the decal.
Decals were soaked off in distilled water and applied to the car body where MicroScale Micro Set had been applied with a brush. After the decal was applied in the Micro Set and positioned the edges had MicroScale Micro Sol applied. Any excess solution was sucked away with the torn edge of a paper towel. Again when dry, car body sprayed with Vallejo Gloss Varnish 70.510 to better hide edges of decals and protect decals during handling. Again when dry, the car body was sprayed with Model Master Acryl, #4636, flat to protect decals and provide a flat finish for weathering when applied.
 |
| End decal reporting marks and number applied. |
One more step before putting Northern Refrigerator Line refrigerator, NRC 17080 into service was to weather the cars with Artmatic eye shadow and Pan Pastels. An Artmatic eye shadow color like a Dark Box Car Red was applied over roof and car body ends. Pan Pastels used were Paynes Grey Extra Dark 840.1, on roof and over safety appliances on car body and Neutral Grey 820.5, on placard boards.
 |
| NRC 17080 weathered. |
 |
| End view NRC 17080 of weathered. |
Northern Refrigerator Line NRC 17080 ready for service on the Minneapolis & Northland Railroad Company, The Lakeland Route, “Serving today, Shaping tomorrow.” A car card was made for NRC 17080, the final step to put the a car in service on the Minneapolis & Northland Railroad Company Railroad.
 |
| NRC 17080 spotted at Kruger's at seen from rear of building. |
 |
| NRC 17080 spotted at unloading door. |
 |
| NRC 17080 spotted at unloading door. |
Thank You for taking time to read my blog. You can share a comment in the section below if you choose to do so. Please sign your comment with your name if you choose to leave one. Please share the blog link with other model railroaders.
Lester Breuer
.
.
No comments:
Post a Comment