Friday, June 23, 2023

HJ Heinz Pickle Tank Cars 73 and 78

When I showed a photo of Chicago And Northwestern (CNW) SS Box Cars 141260 and 141268 sitting on the CNW Interchange in Little Chicago, Minnesota on my Minneapolis & Northland Railroad Company (M&N) , one reply regarding this photo was, “The pickle car following them is worth a blog.”  Yes, I could provide that blog post and here it is.


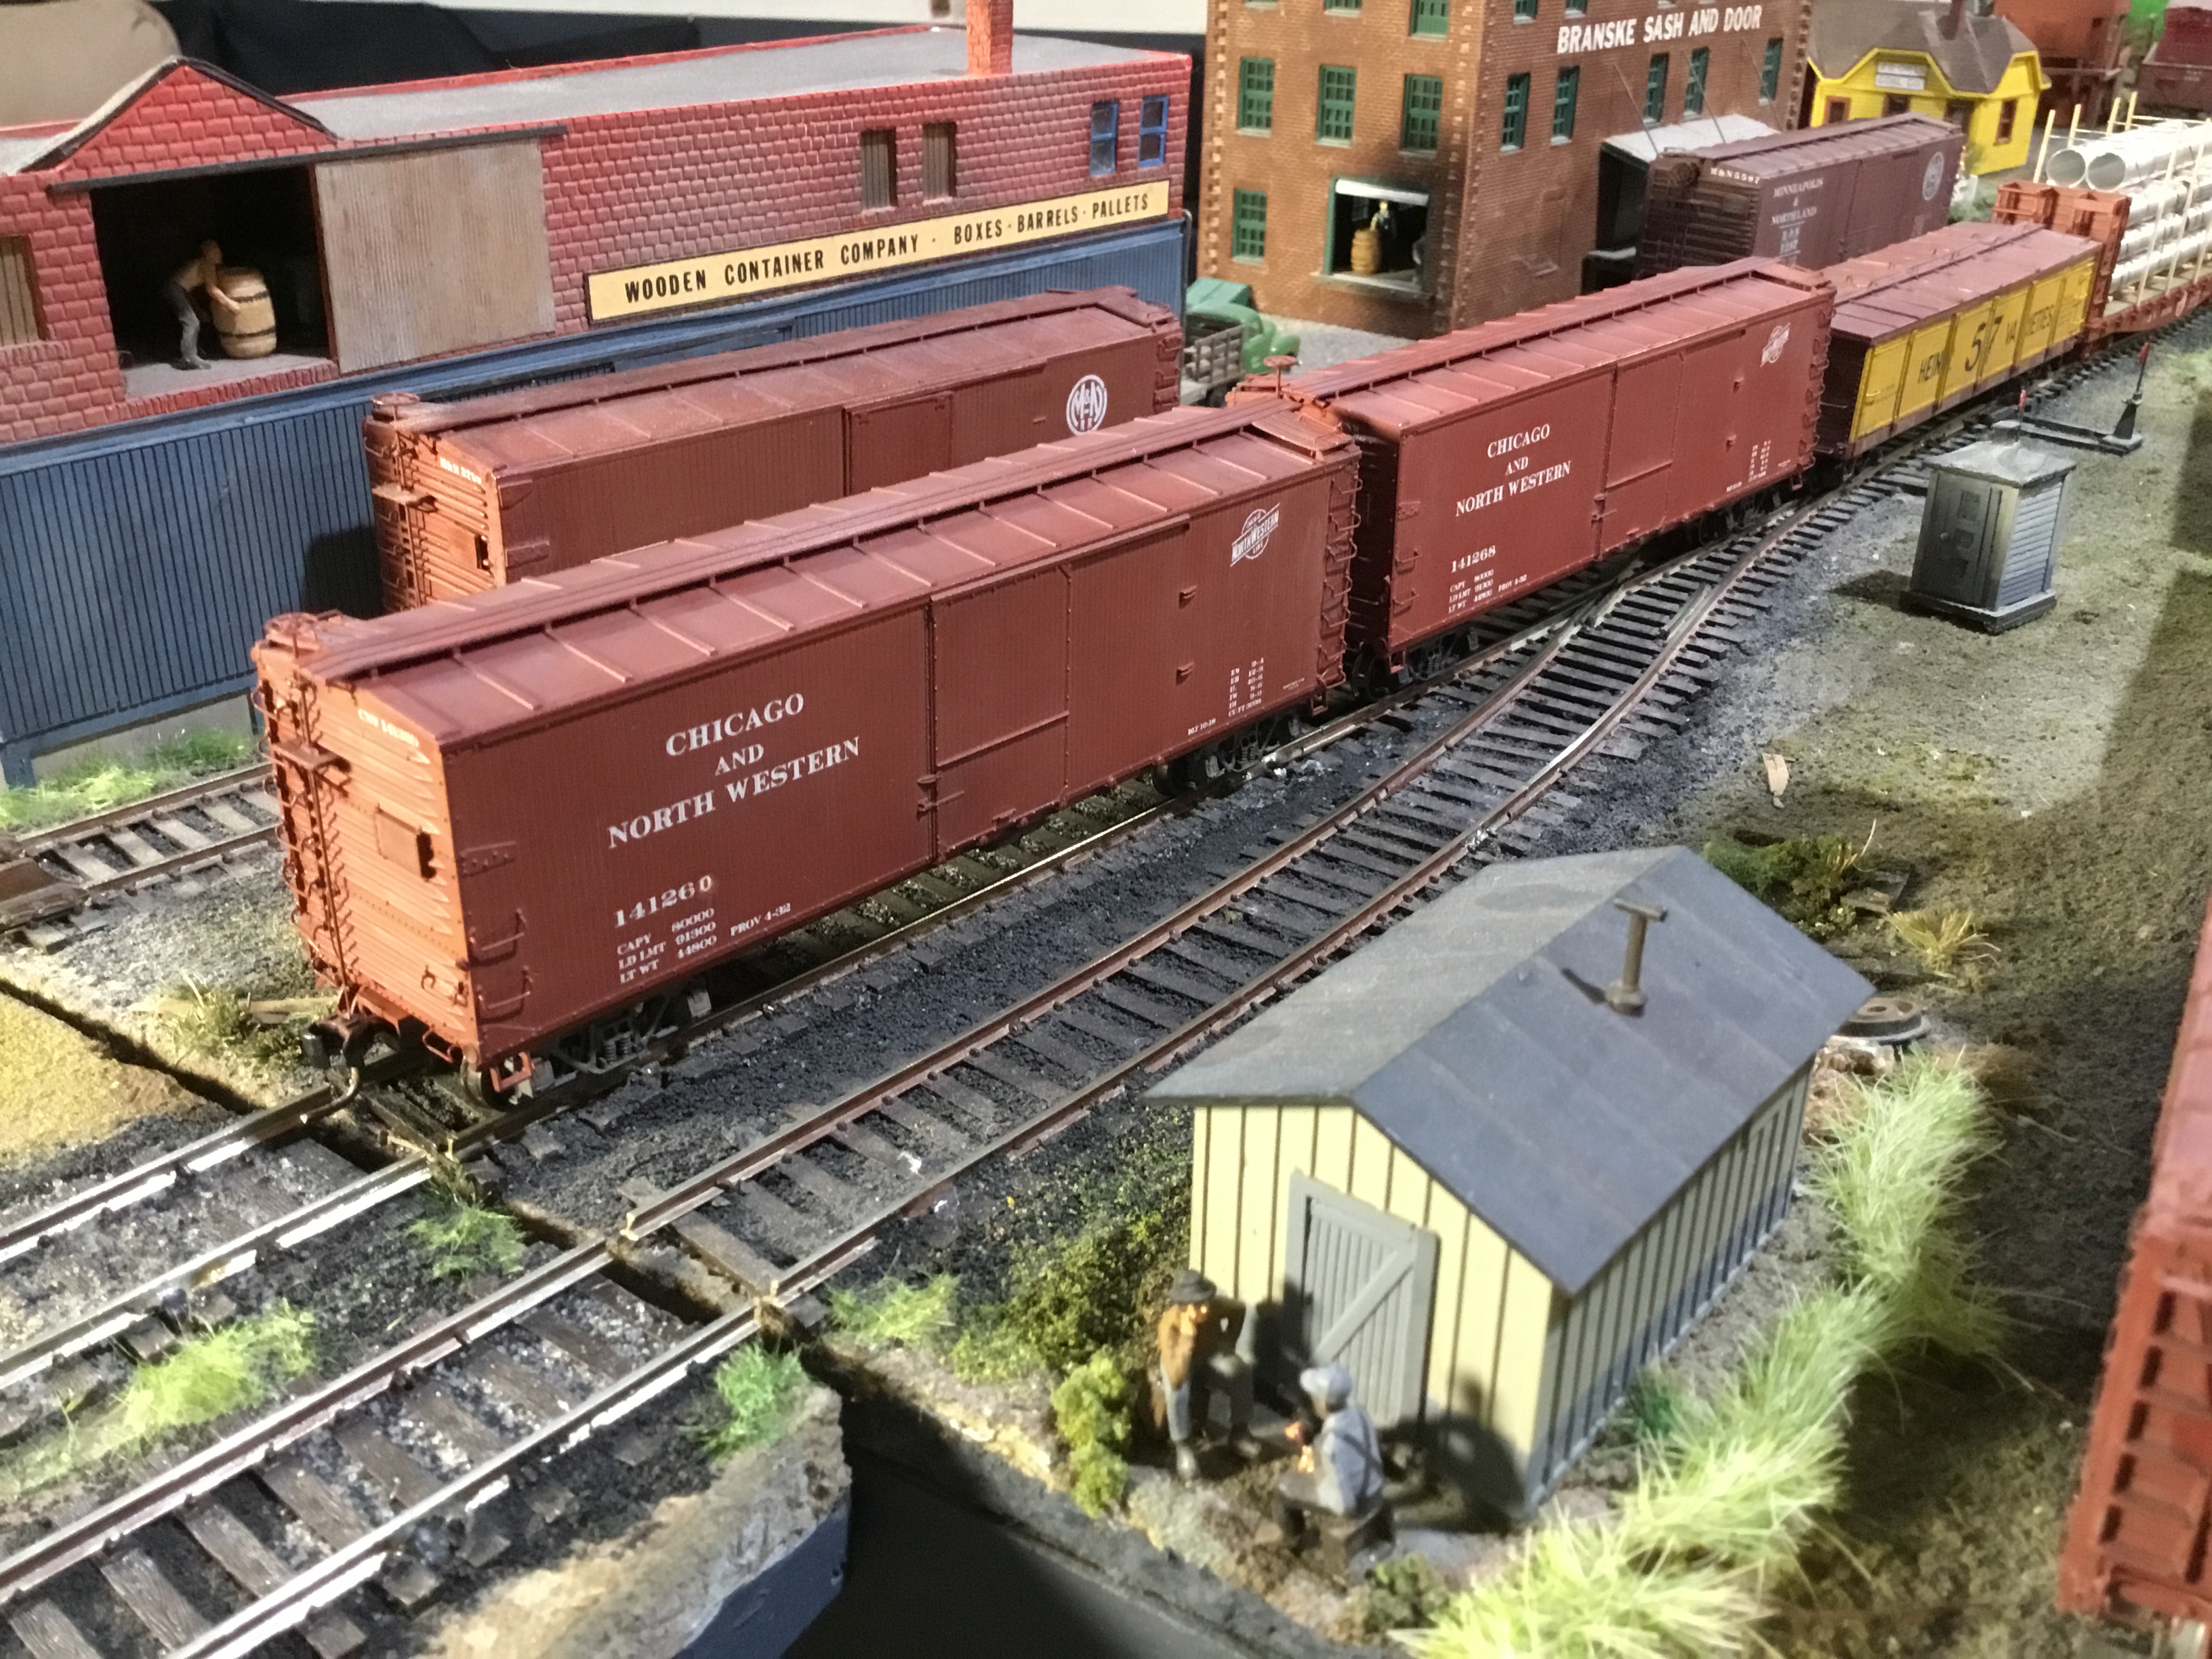
Heinz Pickle Tank Car 73 behind CNW box cars.
(Click on this or any image to enlarge)


Pickle Tank Car 73 on CNW Interchange
in Little Chicago, Minnesota.

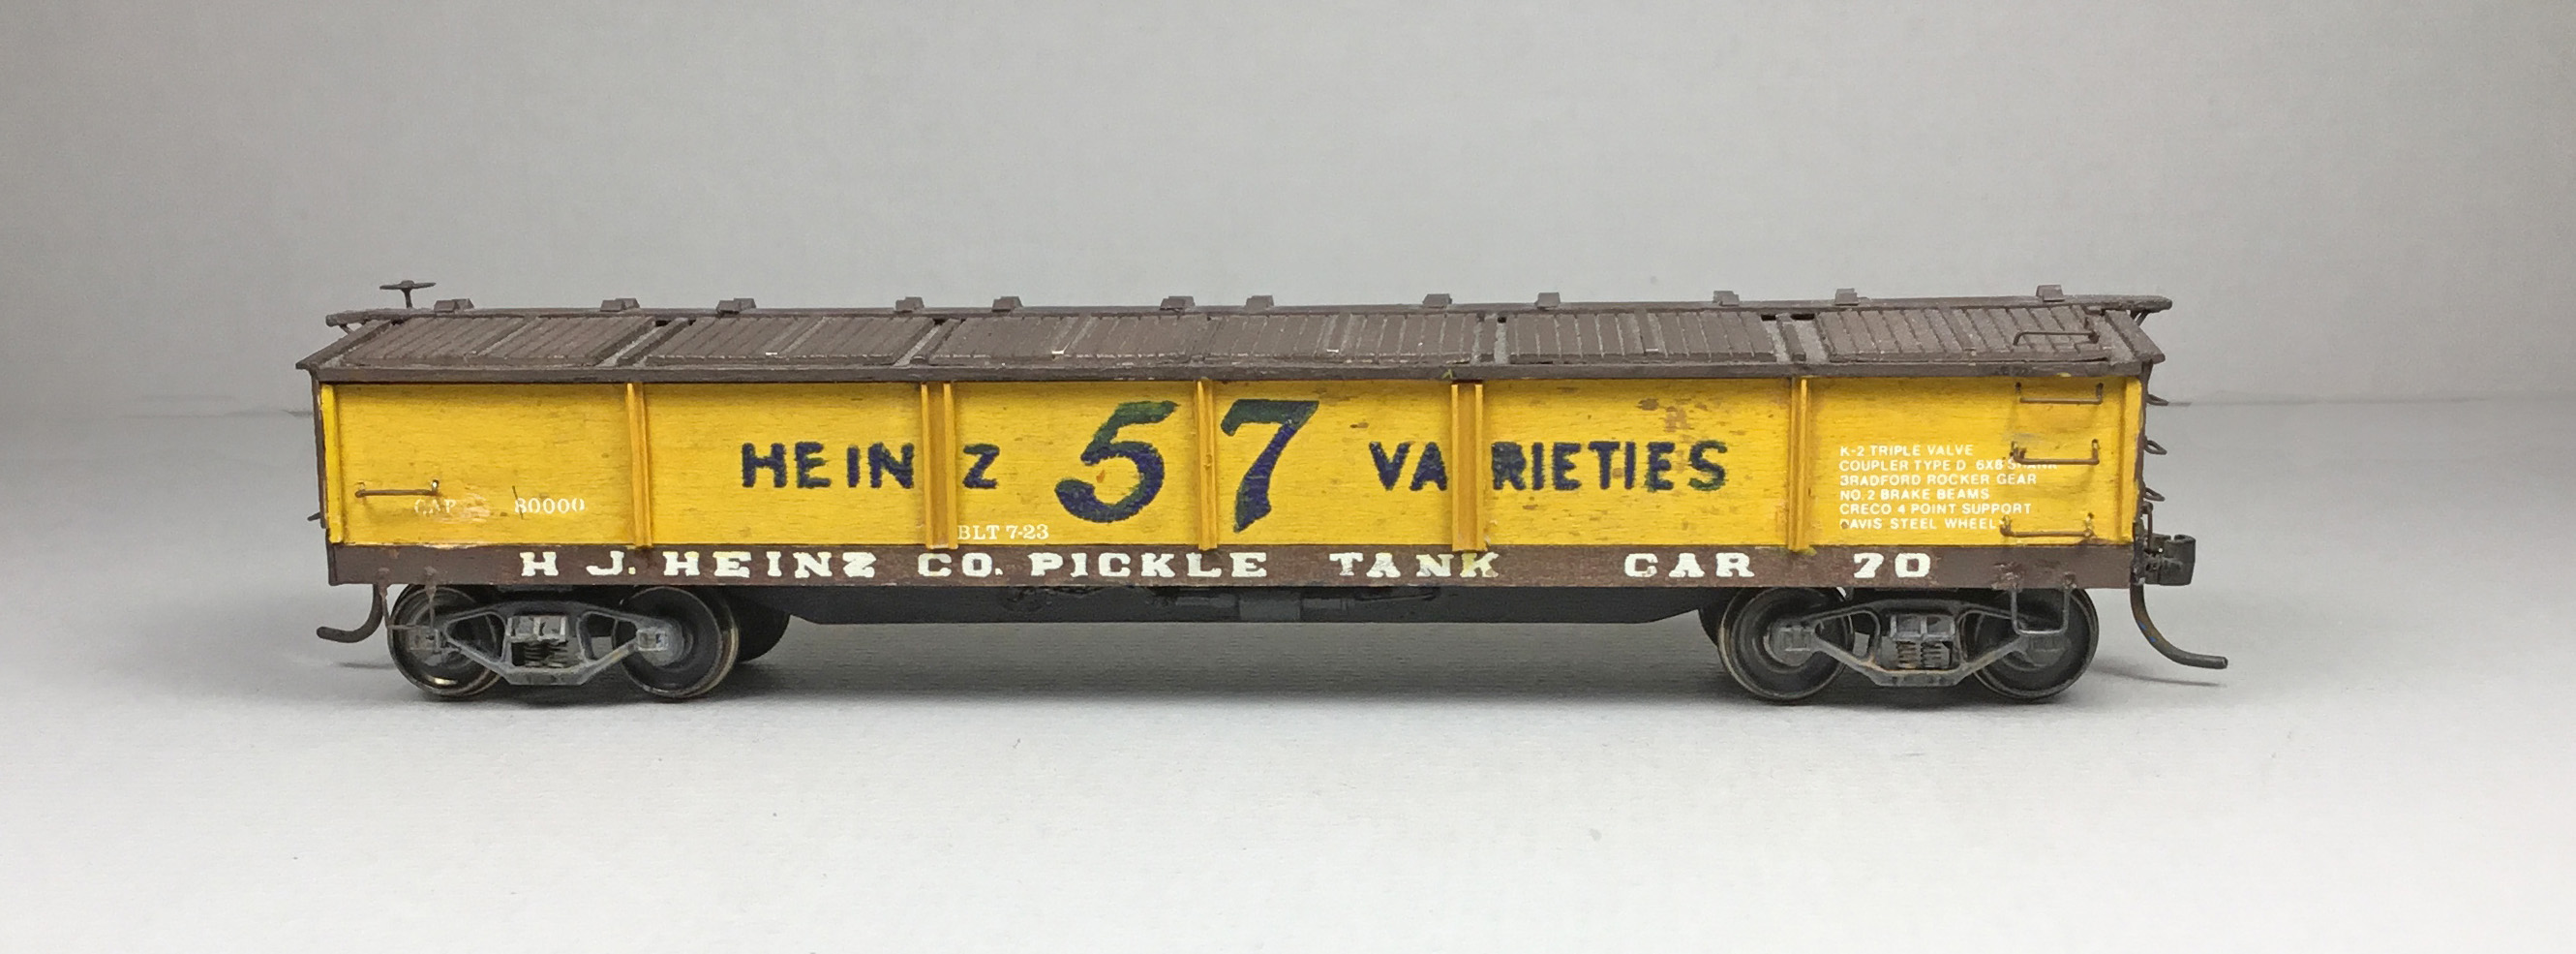
The pickle tank car with closed sides, nicknamed “coffin cars”, is a highly modified and upgraded Athearn plastic pickle car, kit 1476, lettered for HJ Heinz Company with (temporary marks HJHCo) reporting marks HJHX and number 73.  The kit was purchased and built in 1978 to service a salting station on my railroad. 


Athearn pickle tank as assembled from kit 1476.


Having visited several pickle salting stations and frequently driving by a Gedney Company pickle plant in Chaska, Minnesota, I developed an interest in pickle cars.  Therefore, I installed a salting station on the M&N railroad.   The salting station is a modified Wabash Valley Models kit based on on pickle works plans that appeared  in January 1955 and February 1961 Model Railroader (MR).  


A second Athearn pickle tank car, HJHX 78 was gifted to me by one of my then regular operators in 1993.  The number on this pickle tank was changed from 73 to 75 using scrap Champ decals.  Later the number was changed again to 78 with Woodland Scenics dry transfer white numbers when I found number 75 was not a coffin car.  Both of these kits were highly upgraded over the years as additional prototype photos and car data was found.


The prototype HJ Heinz Pickle Tank Cars assigned to series 70 to 80, A.A.R. Class TW, were built in 1925 by General American Company.   The cars had wood sides and ends.  The cars had six (6) panels on each side and six interior tanks, three on each side.   These cars did not have the typical roof hatches.  Instead the entire roof was divided into three sections on each side, one section over each of the interior tanks.  One of these roof sections (called hatches) was lifted to access the tank underneath it inside the car.  The January 1953 Official Railway Equipment Register (ORER) has eleven (11) cars listed.


A photo of pickle car 73 can be found in the 1931 Car Builders’ Cyclopedia Thirteenth Edition (Simmons-Boardman Publishing Company, 1931) and 1943 Car Builders’ Cyclopedia Sixteenth Edition (Simmons-Boardman Publishing Company, 1943).  There have also been photos and plans of pickle cars in the hobby press.   Photos of these “coffin” cars including  the B end, roof section hatches in open position and a color photo as well as a photo of the typical viewable four tank pickle car with number 75 are found in the excellent book Pickle and Vinegar Makers of the Midwest (David J. Leider, 2015).


1931 Car Builders' Cyclopedia


Heinz Pickle Tank 78
Author's Collection


In addition to photos, I have in my collection a car diagram of Heinz Pickle Tank Car number 70 for model construction produced by the H.J. Heinz Company in 1941.  When comparing the measurements on this diagram to the Athearn pickle closed side tank car you find the Athearn car does not have the exact measurements as it is 9 inches too tall and 12 inches too wide.   And, the boards on the ends are narrower than on the diagram.  I chose to live with these differences.


Car Diagram
Author's Collection


Both pickle tank cars 73 when built and 78 when acquired  had Kadee Number 5 couplers installed and were wighted to 4 ounces (above NMRA recommended weight) with kit weight and electrical outlet box punchouts.  Athearn truck sideframes on HJHX 73 received metal Proto 2000 33” ribbed black wheel sets, #21259 while HJHX 78  received Kadee 33" metal wheels.  Kadee fiber #205 .015” fiber washers were installed on kingpins to get proper coupler heights.  Cars were weathered with eye shadow makeup and airbrushed with Floquil Flat #11 thinned with used dirty thinner.   The pickle cars were put into service and remained that way until 2002 when the major upgrade was done.


The upgrade began with removal of roof running board, roof hatches,  brake wheel and housing, molded on grab irons and sill steps.  The upgrade continued on carbody and underbody as described below.


Sides

The ladders were removed by cutting out the area with the ladders.  The exposed areas left after ladder removal on HJHX 73 were filled with siding cut from Evergreen #3047 car siding and hand painted with Floquil #33 Rail Box Yellow.  On HJHX 78 the exposed areas were filled with siding cut from Evergreen .020” sheet I hand scribed.  The 22 side and end grab irons, Detail Associates #6426, were installed.  Sill steps, A-Line #29000, style A, were installed.


Heinz Pickle Tank 78


Heinz Pickle Tank 73


Roof

A new roof was cut from Evergreen #2037 car siding and installed on each car.   On the roof, running board saddles, cut from Evergreen #8202, 2” x 2”  strip styrene, were installed for attaching the new running board .   A new running board was fabricated from Evergreen #8106, 1” x 6” strip styrene and installed to create a 1 foot 6 inch wide running board specified in the car diagram.  On the car ends the running board extension brackets were cut from Evergreen #8102, 1” x 2” strip styrene.


Roof hatch ribs (two on each side divide roof into 3 sections) were made with an Evergreen #8204, 2” x 4”, installed on the 2” side and two Evergreen #8103, 1” x 3”, one installed on each side.  Other roof ribs are Evergreen #8204, 2” x 4” and Evergreen #8103, 1” x 3”  strip styrene.  Roof grab irons were bent using Detail Associates #2504, .012” diameter brass wire and installed with Detail Associates #SS 2206, eye bolts for corner legs.


New car roof with running board and ribs.


Roof hatch support brackets attached to the running board to support roof sections when opened were fabricated two ways.   On HJHX 73 the supports were bent from Detail Associates #2524, .010” x .030” flat brass.  On HJHX 78 hatch supports were made from Plastruct #570-90001, 3/64” angle and Evergreen #8106, 1” x 6” strip styrene.


The new roofs were airbrushed using Floquil Boxcar Red, F110074.


Roofs showing roof hatch brackets
attached to running board.


Ends

On the B end the molded on narrow brake step (platform) was widen with Evergreen #8204, 2” x 4” strip styrene.  Tichy Train Group (Tichy) brake step brackets, AB brake set #3013, were installed.  A plastic grab iron was installed for the brake shaft step at the sill.  A Tichy retainer valve, AB set #3013, and retainer line, Tichy #1100, .008” diameter phosphor bronze wire were installed.  Brake shaft, Detail Associates #2506, .019” brass wire with a Grandt Line #5607 15” brake wheel on HJHX 73 and HJHX 78, was installed.  At a later date, a broken wheel on HJHX 78 was replaced with an Accurail brake wheel.  A brake shaft bracket near the roof was bent from wire in the bits box and installed.  Uncoupling levers bent from Detail Associates #2504, .012” diameter brass wire with Details Associates, #SS 2206, eye blots for mounting brackets were installed.   Except for decals the B end work was finished so all added detail parts were hand painted Floquil Boxcar Red, F110074.


Decals for end reporting marks were made using Clover House #9600-11 Railroad Roman Condensed White Dry Transfers for letters and for numbers Woodland Scenics DT510, RR Roman White Numbers dry transfers applied to decal paper and coated with Microscale Liquid Decal Film.  While the decals were drying the area for the reporting marks and number was hand brushed with Future Floor Finish.  Once brushed area and decals were dry,  decals were soaked off in distilled water and applied to the car body where Microscale Micro Set had been applied with a brush.   After the decal was applied and positioned the edges had MicroScale Micro Sol applied.  Any excess solution was sucked away with the torn edge of a paper towel.  Again when dry, the decal area was hand brushed with Model Master Flat Clear Acryl, #4636, to protect decals and provide a flat finish for weathering when applied.


Pickle car B ends with upgrade details.


Underbody

On the underframe the four center cross members were removed and only three were reinstalled to match the car diagram.  The fish belly center sill was fabricated by adding Evergreen #155, .060” x .100” strip styrene with angles cut on ends to match prototype look.  I did not add the center sill plate cover as I thought it would be easier to add brake details before doing so; however, after adding the brake details I never did add it.  


Underbody with underframe changes made.


I considered adding the split-K system brake detail to match car diagram as I had done on an old Universal Model Products Company wood kit (kit review MR, Feb. 1955) I had upgraded.


Heinz Pickle Tank Car 70 with split-K brake.


Heinz Pickle Tank Car 70

Since I had moved my railroad time period from 1948 to 1954 (now spring 1955) prior to this upgrade and never found a photo of these cars without a dark underbody to see brake components or location, I thought I should install a typical AB brake system.   Therefore, I installed a Tichy AB brake system, AB set #3013, on HJHX 70 and 78.  After the  center sill holes were cut for brake levers, Tichy AB brake components were drilled for piping and installed.  Now the following brake system details were installed:


  • Train line, .019” flora wire
  • Brake cylinder lever, , Evergreen #8108, 1” x 8” strip styrene
  • Brake floating lever, Evergreen #8106, 1” x 6” strip styrene
  • Piping from air reservoir to control valve Tichy #1101 .010” diameter PBW
  • Piping from brake cylinder to control valve Tichy  #1106 .0125” diameter PBW
  • Dirt collector, Tichy set #3013
  • Brake rods, Tichy #1106, .0125” diameter PBW
  • Clevises are made with MEK Goop
  • Chain, A-Line #29219 black 40 links per inch


After brake system parts were installed the underbodies were airbrushed with Floquil Grimy Black, F110013.


Underbody brake details installed.


Before putting HJ Heinz Company cars HJHX 73  and HJHX 78 into service the cars were weathered with  eye shadow and Pan Pastels.  A dark brown eye shadow color was applied over entire car body.  Pan Pastels Red Iron Oxide Extra Dark 380.1 was applied over the end reporting marks and numbers to tone them down.  Paynes Grey Extra Dark 840.1  was used on the roof and lightly over safety appliances on car body.


Heinz Pickle Tank 73


Heinz Pickle Tank 78


HJ Heinz Company pickle cars HJHX 73 and HJHX 78 were ready for service on the Minneapolis & Northland Railroad Company, The Lakeland Route, “Serving today, Shaping tomorrow.”  A car card was made for HJHX 73 and HJHX 78 , the final step to put the a car in service on the Minneapolis & Northland Railroad Company Railroad.


Pickle cars HJHX 73 and HJHX 78 are not an a perfect match to the prototype; however, they will continue in service on my Minneapolis & Northland Railroad Company until a manufacturer produces a reasonable priced resin or plastic pickle car and decals  that match the prototype.  


Empty HJHX Pickle Tank 70 on CNW Interchange
Little Chicago, Minnesota to be moved to 
salting station in Sussex, Minnesota for loading.


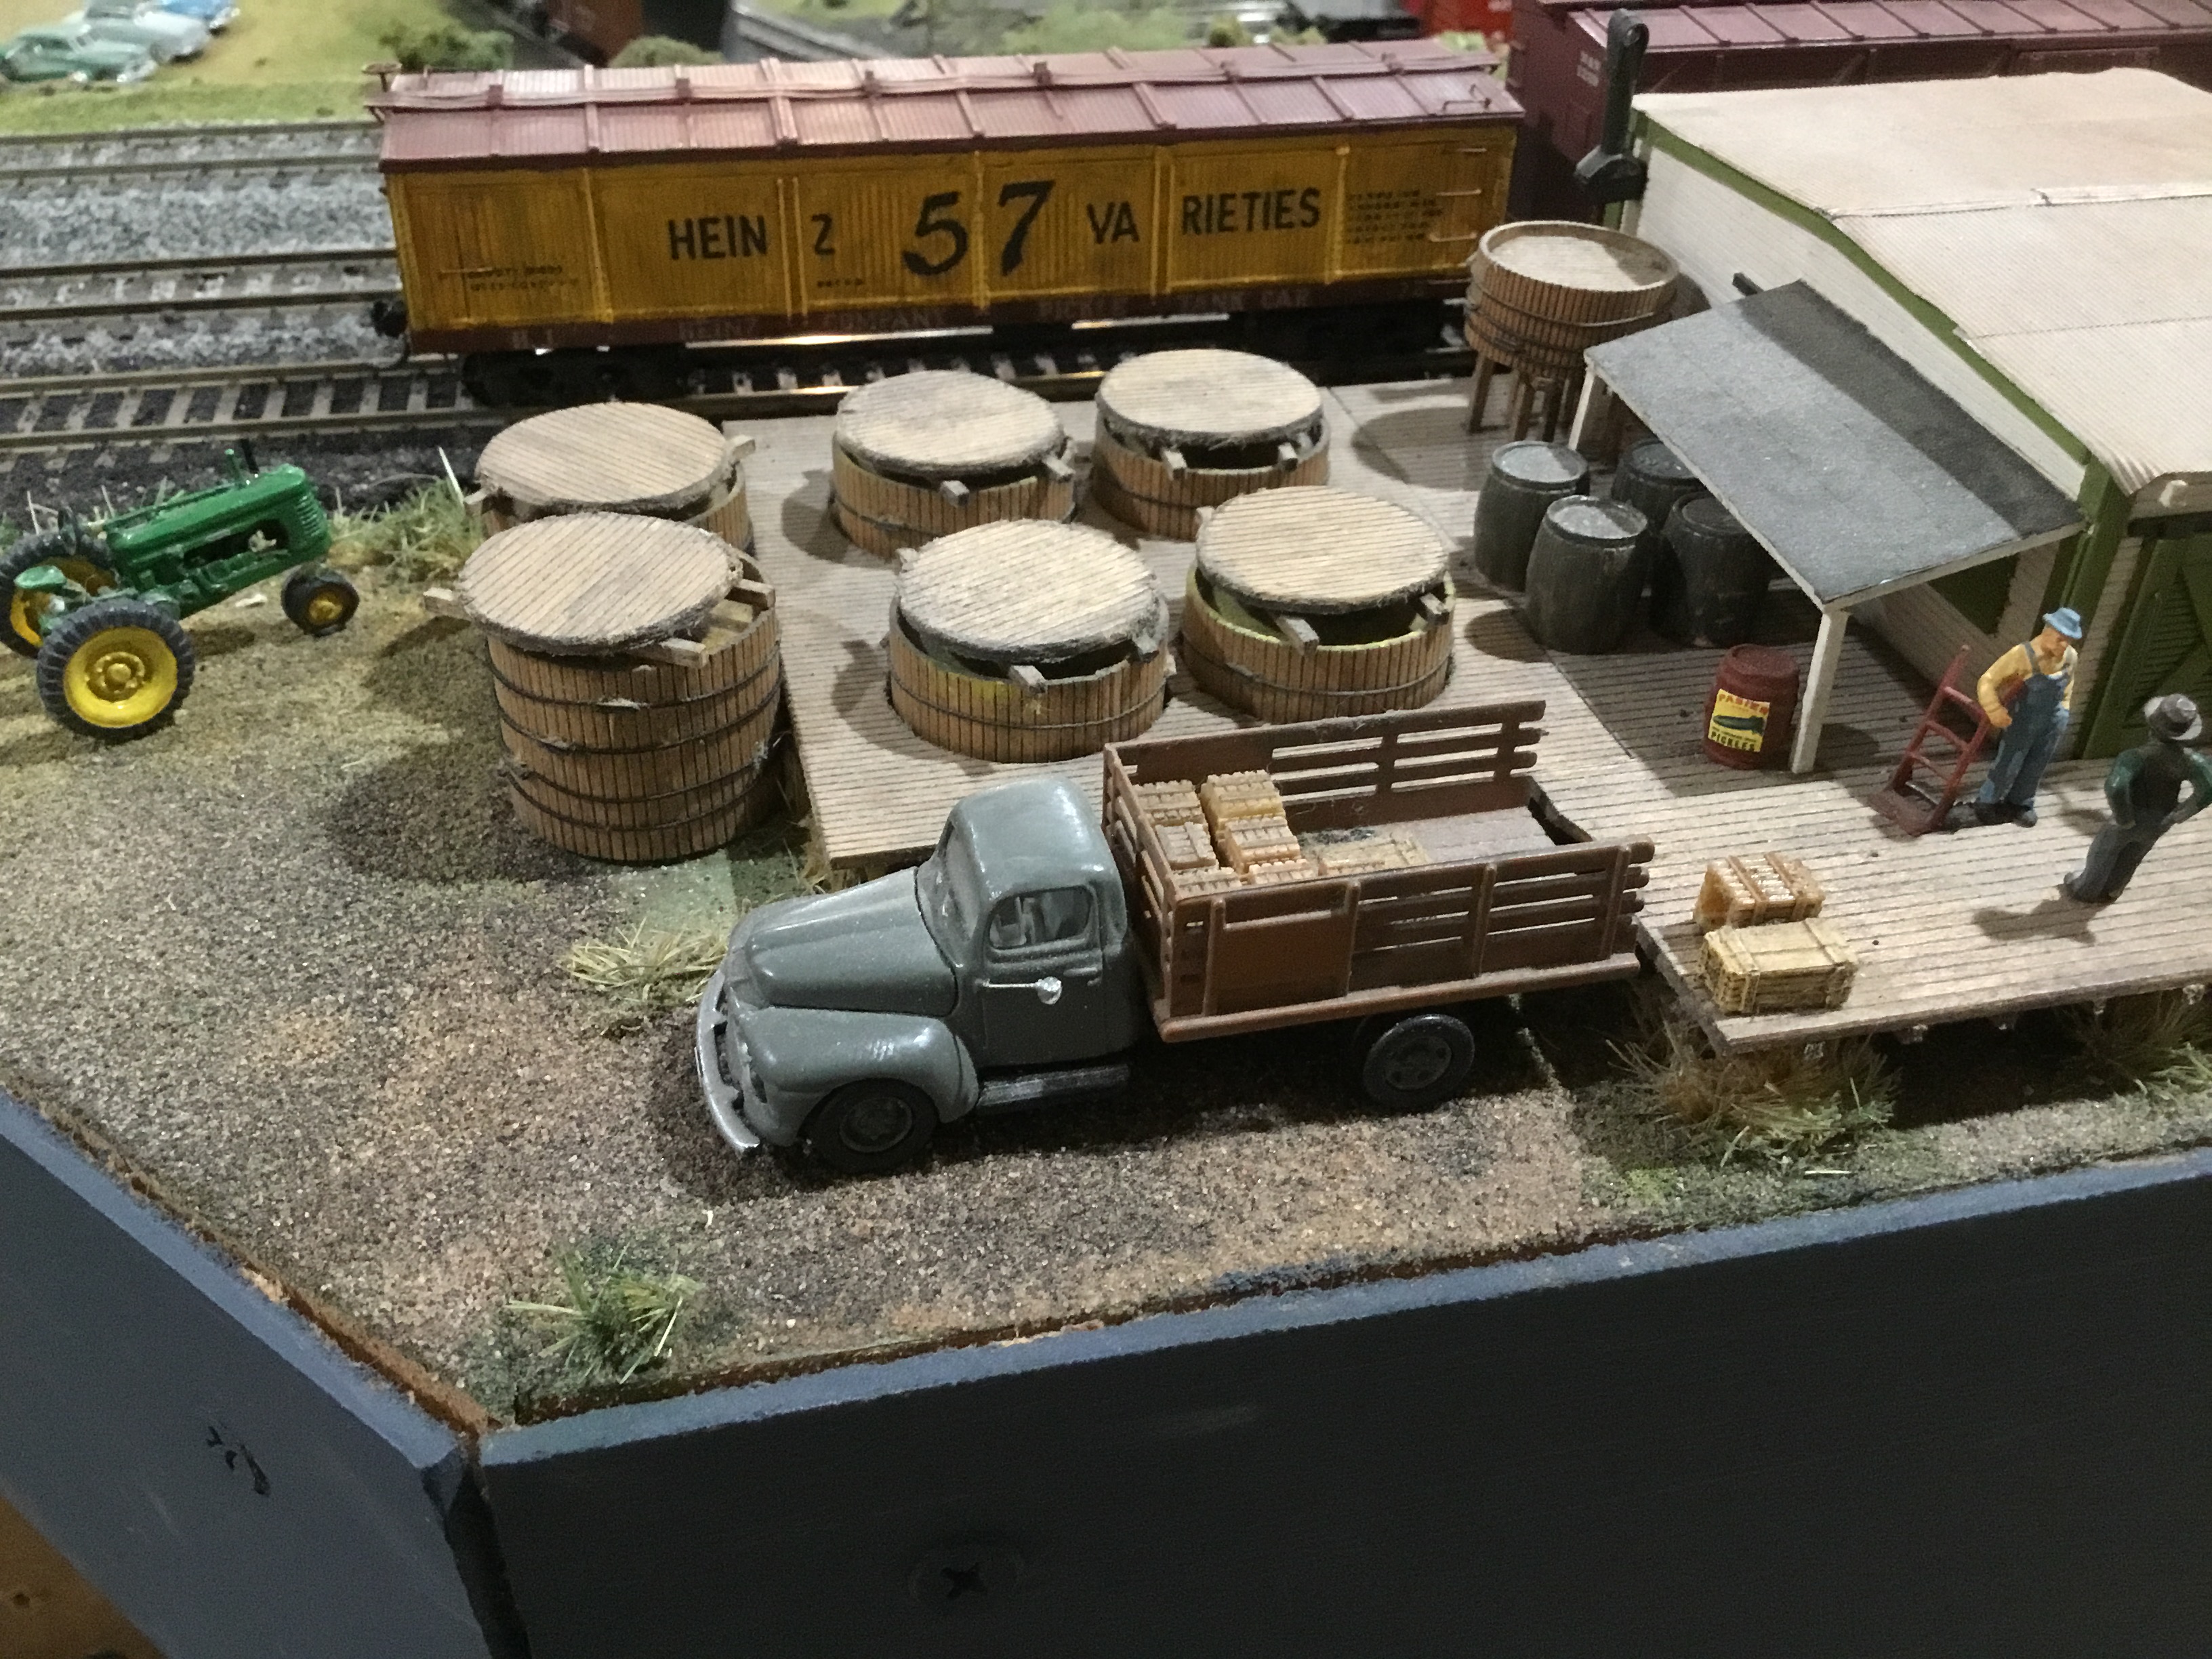
HJHX Pickle Tank 78 at salting station
 at Sussex, Minnesota on the 
Minnapolis & Northland Railroad Company. 


HJHX Pickle Tank78 at salting station
 at Sussex, Minnesota on the
Minnapolis & Northland Railroad Company. 


HJHX Pickle Tank78 at salting station
 at Sussex, Minnesota on the
Minnapolis & Northland Railroad Company. 


HJHX Pickle Tank78 at salting station
 at Sussex, Minnesota on the
Minnapolis & Northland Railroad Company. 


I want to say, “Thank You” to Gary Laasko for suggesting the pickle car was worth a blog.   And, a “Thank You” to Fred Holzapfel for gifting the Athearn pickle car that became HJHX 78.  Definitely appreciated.


Thank You for taking time to read my blog.  You can share a comment in the section below if you choose to do so.  Please sign your comment with your name if you choose to leave one.  Please share the blog link with other model railroaders.

Lester Breuer


.

Wednesday, June 7, 2023

Milwaukee Road SS Box Car 711794

While doing research on an Accurail Milwaukee Road single sheathed (SS) box car painted gray and lettered as a hide car I found the Hutchins roof was correct, the sides were missing the corner braces and other details as door stops and ladder length was not correct.  The ends did have two oversized vertical braces; however, not the two diagonal braces as the Milwaukee Road.  The lettering and car number were correct for a Milwaukee hide car; however, if the bracing on sides and ends and other incorrect detail was corrected the lettering would be ruined.  So I removed the Milwaukee name, reporting marks and replaced them with lettering for the Minneapolis & Northland Railroad Company to have a hide car M&N 1734 to serve the Swift plant on my railroad.  However, the rework and upgrade of an Accurail single sheathed box car into Milwaukee Road box car 711794, in MILW series 711000-71999, class XM, was my next project.

M&N hide car from MILW box car.
(Click on this or any image to enlarge)

As with any build or rework  of a freight car, data and photos of the prototype were found first.  I had built a Sunshine Models Milwaukee Box Car numbered 711470, kit 47.3, so I had Sunshine Models Prototype Data Sheet #47A with black and white photos and data for cars in this series.  A color photo of MILW 711040 showing the B end of the car is found in Milwaukee Road Color Guide to Freight and Passenger Equipment Vol. 2 (Morning Sun Books Inc., 2000).  A diagram for a car in this series is available in the Official Employees’ Shop Diagrams In-Service Freight Cars & Cabooses 1937 Chicago Milwaukee St. Paul & Pacific Railroad (Normandie House).


On the MILW car diagram you find MILW SS box car series 711000-71999 was built by the Bettendorf Company in 1925. The car was a 40 ton car that rode on Bettendorf Trucks.   The A end had a lumber door with a 8” x 14” opening.  The Sunshine Models data sheet tells us, “All cars used a steel “Z” bar framing and Hutchins all steel roof.  The doors were wood.  The steel framing allowed use of an underframe with straight center sills, avoiding the fish belly underframe of the World War I period.  The Milwaukee cars were equipped with cast side frame trucks.  The visual characteristics of these trucks were the close set springs in the package.  Non-powered hand brakes with vertical brake staff were applied to the cars and survived for years … by 1953 regulations required application of the AB brake system.”


Sunshine Models Data Sheet #47A


Sunshine Models Data Sheet #47A


Off to the to build inventory cabinet where I found an Accurail single sheathed box car , kit 7003, for the build of Milwaukee Road (MILW) Box Car 711794.   The original lettering the Chicago & Illinois Midland was removed with a nylon scratch brush.  The running board was removed, the pins on the back cut off and used as plugs to fill the holes in the roof.  Molded on grab irons and ladder rungs were carved off.  Door stops were cut off carefully and using MILW photo relocated to the proper MILW door stop location.   The ladders were shortened to six rungs as on the MILW prototype.  On the ends the vertical brace to the right of the other two was carved off.  And, sill steps were cut off.


Side with molded on details and
lettering removed.


End view with grab irons and ladder rungs removed.


With removal of unwanted detail done, the rework and upgrade could begin.  On the underbody I installed #148 couplers, kit trucks with InterMountain 33” metal wheel sets and glued on the fish belly center sill and temporally installed the underbody in car body.   As soon as I had done this I told myself this car, MILW 711794 needs a straight center sill.   Therefore, the under body was swapped with my M&N 1734 hide car on which the fish belly center sill was not installed.


Now the work on the sides began.  On the sides the corner braces were cut from Evergreen #101, .010” x .030” strip styrene and installed using MILW photos as a guide.  A piece of styrene from the bits box was installed on the previously moved door stops to create the MILW type door stop.


Corner braces and door stop installed.


Pleased with the look of the sides, the diagonal braces  were cut from Evergreen #131, .030” x .030” strip styrene and installed.  Again, I was pleased with the result so the rework and upgrade continued.


Diagonal braces installed on ends.


Back on the sides Tichy Train Group (Tichy) #3062 18” ladder rungs were installed.  The Tichy ladder rungs were also installed on the end ladders before returning to the sides.   Returning to the sides, A-Line #29000 sill steps were installed in # 76 drilled holes.  A Tichy #3015 18” drop grab iron was installed above the sill step under each ladder as in prototype photos.  On the left side grab irons were bent from .010” diameter NoName brass wire (brass wire gifted by a friend not knowing manufacturer so “NoName”).  Door handles were also bent from NoName .010” diameter NoName brass wire and installed.


Ladder rungs, grab irons and door handles installed.


Onto the roof work.   The removed running boards were milled and scraped with a single edge razor blade on the backside to a thickness of .025” and installed.  Roof grab irons were bent from NoName .010” diameter brass wire and installed with Yarmouth Model Works photo etched eye bolts without shoulder for corner legs.


Running board and roof grab irons installed.


To complete the longitudinal running board install the end extension brackets on the ends were installed.  The brackets were made by first gluing a Plastruct #90501, 3/64” angle to the underside of the running board to which legs cut from Evergreen #8102 1” x 2” strip were installed to complete the brackets.  The install of B end details continued with the following installed:


  • Retainer valve, a resin retainer valve cast in M&N Shops
  • Retainer line made with Tichy  #1100, .008” dia. phosphor bronze wire (PBW)
  • Brake shaft step bent from A-Line #29000 sill step
  • Brake shaft bracket on fascia, Tichy set #3013-35,36
  • Brake shaft, Tichy #1102 .015” diameter PBW
  • Brake wheel, Champion from Red Caboose X-29 


Above B end details installed.


Normally when doing the car body upgrade only the install of uncoupling levers remains; however,  not the case in the build of MILW 711794.   MILW 711794 requires a 8” x 14” lumber door on A end.  The lumber door was made by shaping scrap styrene pieces from the bits box and using MEK  Goop to make fasteners. 


Lumber door on A end installed.


Once the lumber door on the A end was finished the work on the underbody was done.   On the underbody from the hide car  Kadee # 148 couplers were installed with Fastenal 2-56 x 3/16” screws .  Kit trucks with InterMountain 33” metal wheel sets installed were installed with Fastenal 2-56 x 1/4” screws.  Car tire weights were used to weight car to 4 ounces ( over NMRA recommended weight) and the underbody was installed using MEK into the carbody.  Kit provided brake components, predrilled for piping with a #79 drill, were mounted per the Milwaukee prototype putting the AB valve on the same side with the air reservoir.  And, details were installed as follows:


  • Air reservoir mounting brackets are plastic car cut off sill steps
  • Center sill, made with Evergreen #136, .030” x .0125” strip styrene
  • Center sill flanges, cut from Evergreen #104, .010” x .080” strip styrene
  • Pipes from AB valve to air reservoir, Tichy #1101, .010” diameter PBW
  • Pipe from brake cylinder to AB valve, Tichy #1106, .0125” diameter PBW
  • Train line, .019” flora wire
  • Dirt collector, resin cast in M&N Shops
  • Brake cylinder lever, Evergreen #8101, 1” x 8” strip styrene
  • Brake floating lever, Evergreen #8106, 1” x 6” strip styrene
  • Brake lever hangers, plastic grab irons
  • Slack adjuster, Yarmouth Model Works photo etched, YMW #508
  • Brake rods, Tichy #1106, .0125” diameter PBW
  • Brake rod clevises, made with MEK Goop (plastic melted in MEK)
  • Chain, A-Line #29219, black 40 links per inch


Center sill and brake components installed.


Remaining underbody details installed.


After underbody work was done the MILW single sheathed box car was ready for paint and lettering.  After review of the numbers in the Circus City Decals and Graphics decal set for various MILW box cars, purchased from the Milwaukee Road Historical Association, I chose number 711794 for the car number.


First the car body had all detail added parts hand painted Vallejo/Micro-Mark Model Air Undercoat Light Grey #29013X2.   While I was painting the detail added parts I saw I had not installed the top mounted uncoupling levers.   Therefore, uncoupling levers and eye bolt mounting brackets were fabricated from Tichy #1106, .0125” PBW and installed.  Now the car body and underbody were airbrushed with Vallejo/Micro-Mark Model Air Undercoat Light Grey #29013X2. 


Uncoupling lever was installed.


Car body airbrushed Undercoat Light Grey.

When the Undercoat Light Grey was dry, the car body and underbody were airbrushed with Model Master Oxide Red  F404079 with paint 60% and custom thinner 40%.  The custom thinner mix: distilled water 50%, Vallejo air brush thinner 25% and Vallejo flow improver 25%.   Trucks were also hand painted with the Model Master Oxide Red F404079.


Underbody airbrushed Oxide Red/


Side view of airbrushed car body.


Car body airbrushed Oxide Red.


Once dry, car body was airbrushed with Vallejo Gloss Medium 70.470 for decal base.  After drying overnight, decals were applied.  Circus City Decals were used except for the build date from a Rib Side Cars decal set and car class XM from an old Champ Decal set.   I used color photo of MILW box car 711040 as a guide to apply decals.


Decals applied.


Decals were soaked off in distilled water and applied to the car body where MicroScale Micro Set had been applied with a brush.   After the decal was applied in the Micro Set and positioned the edges had MicroScale Micro Sol applied.  Any excess solution was sucked away with the torn edge of a paper towel.  Again when dry, car body sprayed with Vallejo Gloss Varnish #70.510 to better hide edges of decals and protect decals during handling.  Again when dry, the car body was sprayed with Model Master Acryl, #4636, flat to protect decals and provide a flat finish for weathering when applied.


Car body ready for weathering.


One more step before putting Milwaukee Road 711794 in service was to weather the car with Prismacolor pencils, eye shadow and Pan Pastels.  First Prismacolor Pencils Burnt Ochre PC943 and Tuscan Red PC937 were used to change color of boards in various areas.  Next an eye shadow color like a Dark Box Car Red was lightly applied over entire car body.  Finally, Pan Pastels Paynes Grey Extra Dark 840.1  was applied on the roof and lightly over entire car body with a makeup  brush.


Weathering applied.


Weathering applied.


Milwaukee Road single sheathed box car 711794  was ready for service on the Minneapolis & Northland Railroad Company, The Lakeland Route, “Serving today, Shaping tomorrow.”  A car card was made for MILW 711794 , the final step to put the a car in service on the Minneapolis & Northland Railroad Company Railroad.


MILW box cars sitting on Little Chicago
siding waiting delivery to elevator.


MILW box cars sitting on Little Chicago
siding waiting delivery to elevator.


MILW box cars sitting on Little Chicago 
siding waiting delivery to elevator.


MILW box cars sitting on Little Chicago 
siding waiting delivery to elevator.


If you spent time comparing the finished MILW 711794 to the prototype you may have noticed  a difference on the ends.  On the ends the sill channel, I realized later, could have been reworked to match the MILW prototype as the underbody sits low enough in the car body to do so.   I decided to live with this and other minor differences from the prototype rather than rework the reworked area already done.   The Sunshine Models 711470 in the photo below shows the sill channel difference; however, when viewed from the side both match the prototype.


Sunshine Models on right, Accurail on left.


Sunshine Models on right, Accurail on left.


I want to say, “Thank You” to Steve Steele for reminding me of the information regarding this series of MILW single sheathed  box cars in Sunshine Models Prototype Data Sheet #47A.


Thank You for taking time to read my blog.  You can share a comment in the section below if you choose to do so.  Please sign your comment with your name if you choose to leave one.  Please share the blog link with other model railroaders.


Lester Breuer


.