As our freight car fleet is growing we do an occasional review to see how we are doing adding freight cars of the various railroads we intended to have in the fleet. I model late spring 1955 so in my case I should have the New York Central (NYC) and Pennsylvania (PRR) that had the largest fleets in my chosen time period represented. In my last review I found I had done well with the PRR ; however, poorly with NYC. I resolved to fix the lack of NYC cars in my freight car fleet running on my Minneapolis & Northland Railroad Company.
I had no NYC cars in my freight car to build inventory so the hunt to purchase NYC cars began. One of my first finds was an Innovative Model Works (IMWX) steel 1937 design box car kit. The IMWX kit represents the prototype well and is a fine kit to build.
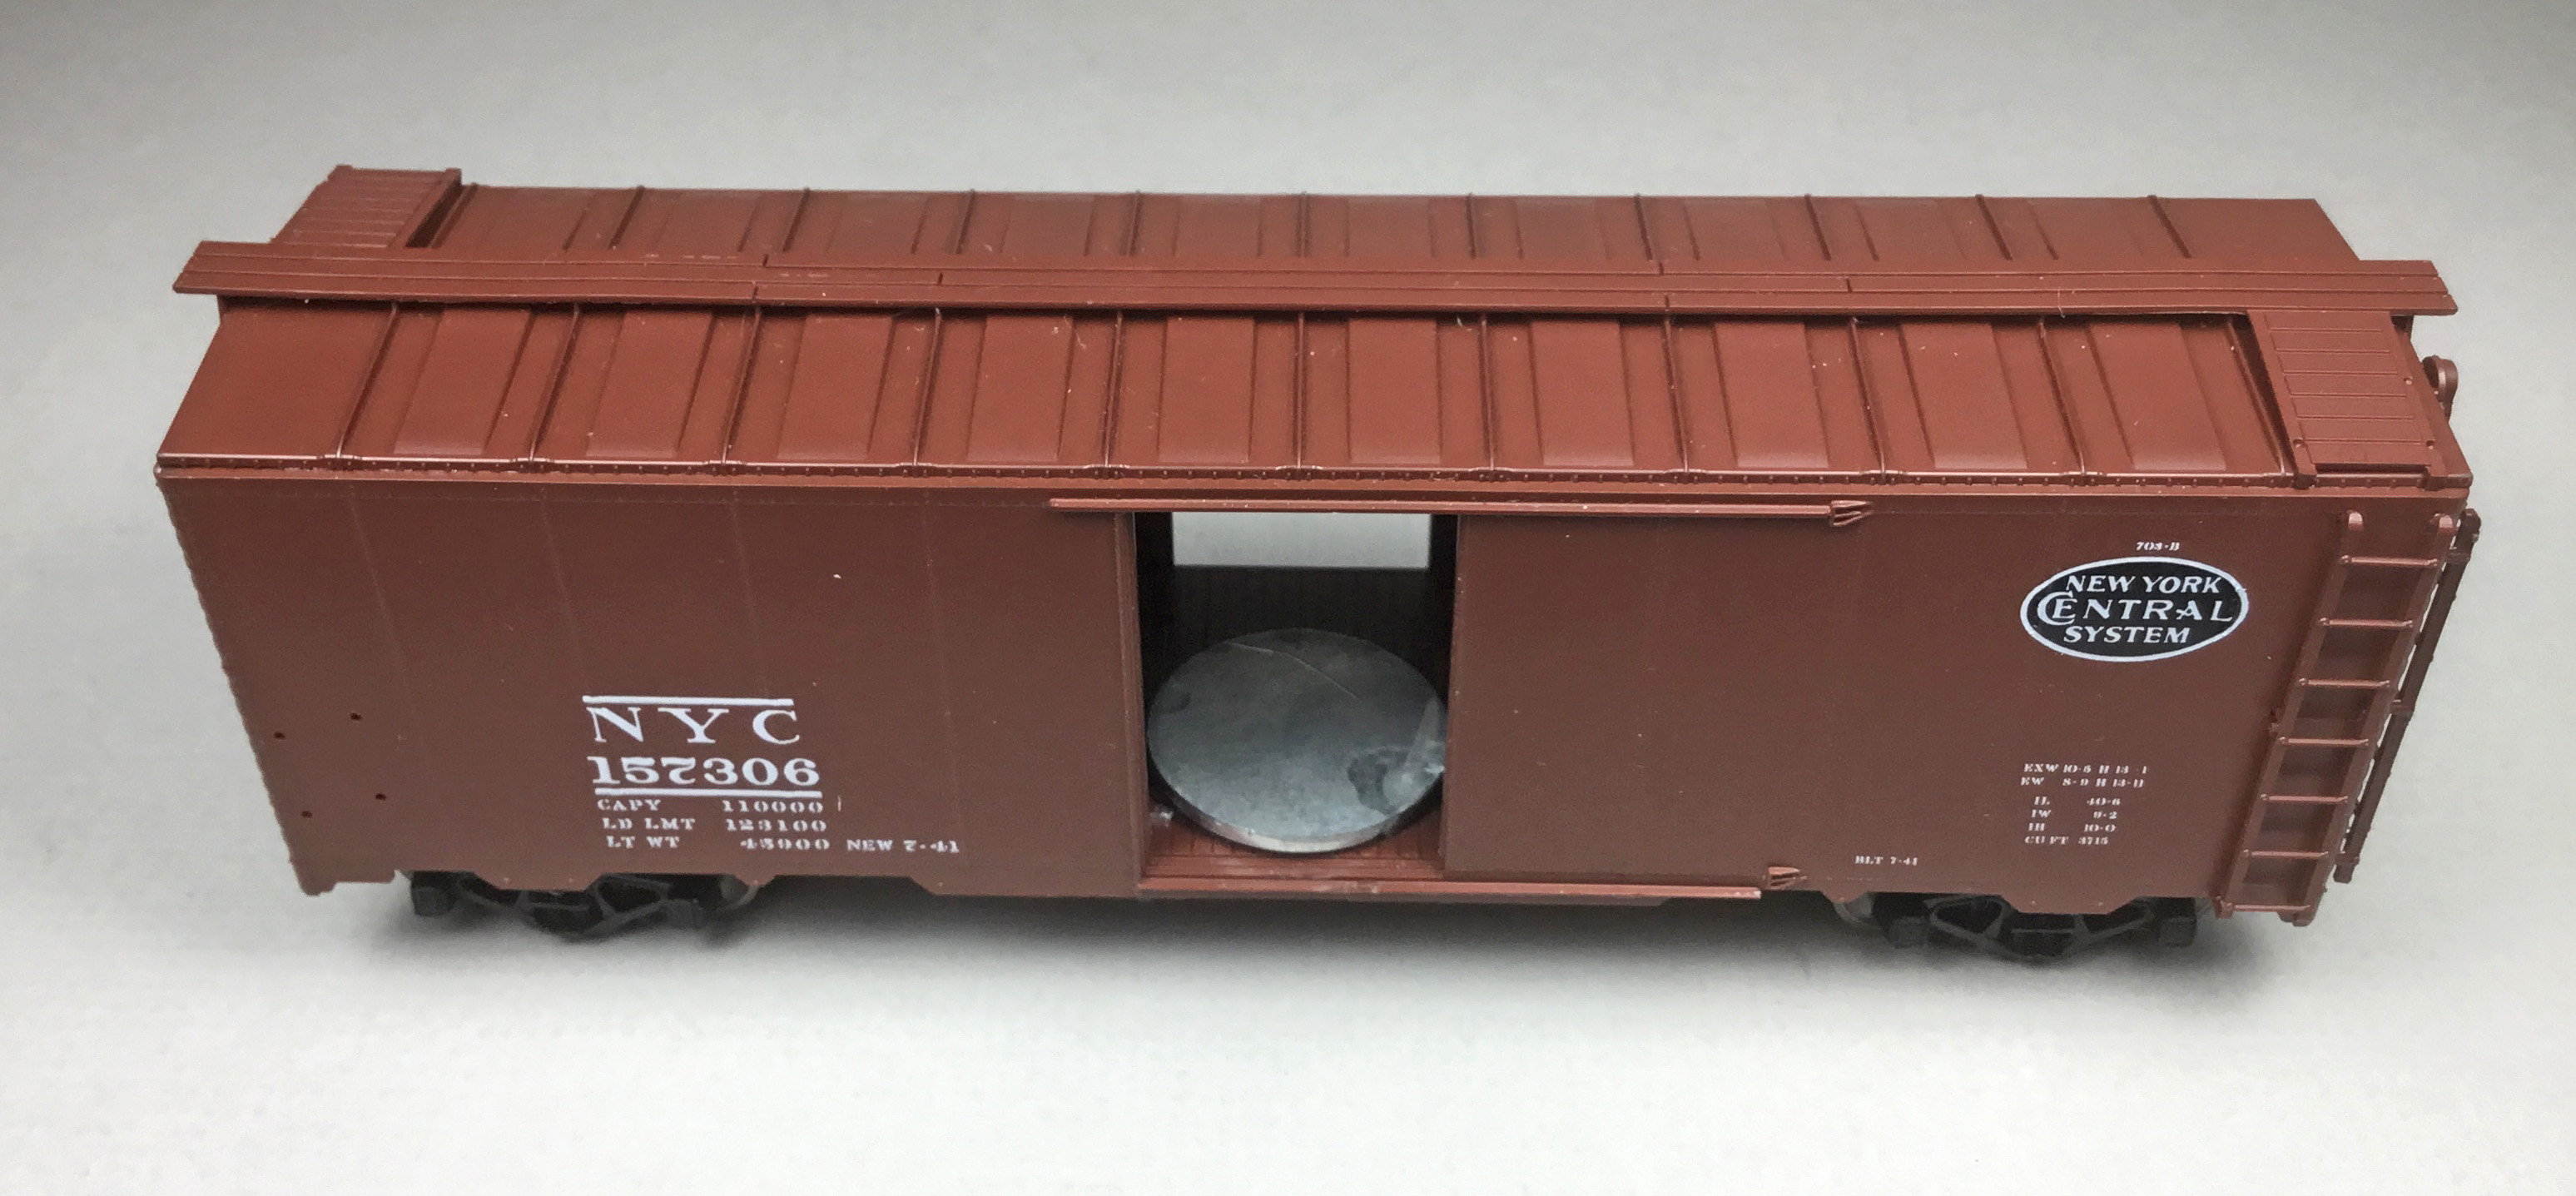
The prototype, a steel 1937 design, was built by the Despatch Car Shops (Lot 703-B) for the New York Central in 1942. The car diagram for this car shows 157306 was one of 1,703 cars built assigned to series 157000-158072.
 |
| NYC Freight Car Diagram Courtesy of Doug Harding (click or tap on this or any image to enlarge) |
The 1937 design NYC cars in this series had and inside height of 10’-0”, 4/5 dreadnaught ends, Youngstown doors, and Ajax brake gear. The cars rode on Barber trucks. One unique feature of the New York Central cars was a roping staple on the bolster ends that in photos shows on the sill tab covering the bolster ends on the sides. In my M&N time period the NYC cars paint color was a freight car red with white lettering and a black and white New York Central System oval herald. A photo, side view, of NYC 157302 can be found in Railway Prototype Cyclopedia RPC 35 (SilverLake Images, LLC., 2020). A side and “B” end view of NYC 157300 can be found for viewing on the New York Central System Historical Society (NYCSHS) website.
 |
| NYC Box Car 157302 Bob's Photo Lester Breuer Collection |
 |
| New York Central System Historical Society collection. Courtesy of NYCSHS website. |
I began my build of the kit with the underbody. On the underbody I removed the molding gate on the center sill and molded on brake cylinder mount. The molding gate was removed with a circular saw blade mounted in a Dremel tool. I make multiple cuts in the molding gate with the blade dividing it into many sections which can be easily removed with a number 17 blade mounted in an Xacto handle. If you use this method be careful with the saw blade as a slip can cause a severe injury. A cover for the saw blade that is mounted to the Dremel tool can be purchased from Micro-Mark for safer cutting.
 |
| Circular saw blade mounted in Dremel |
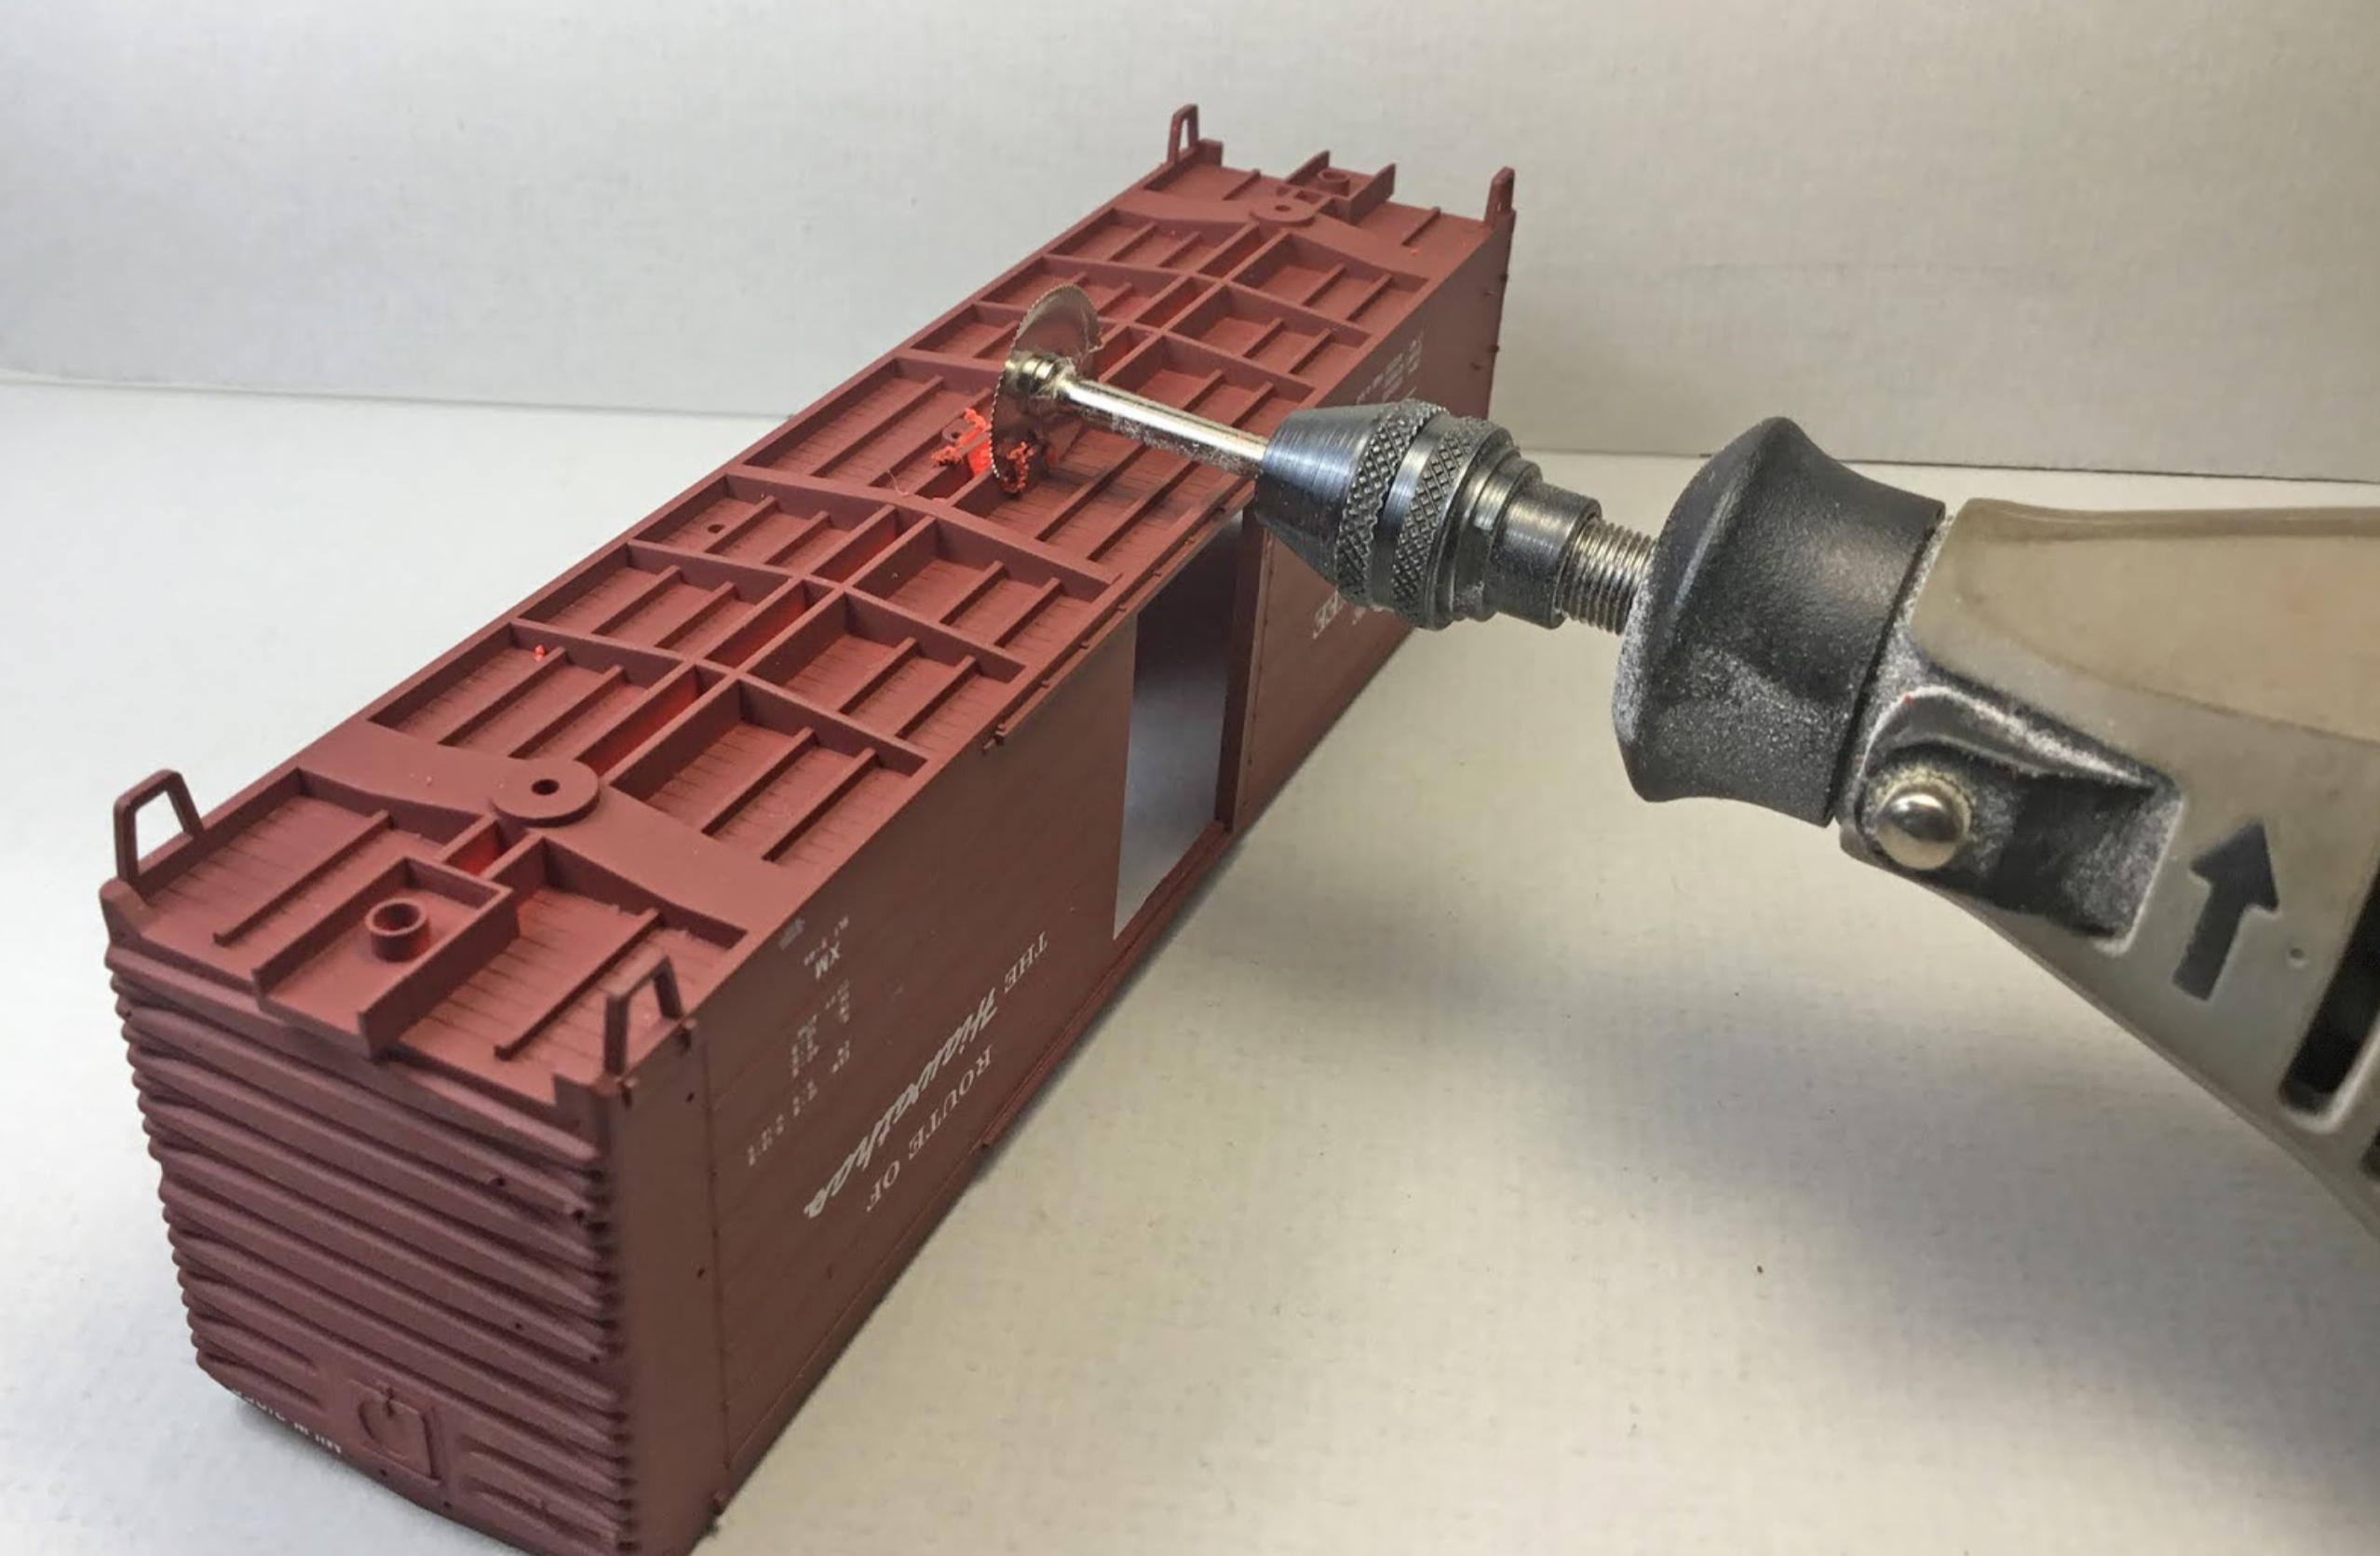 |
| Circular saw blade used to remove molding gate. |
With the molding gate removed various dental tools were used to cleanup the area. Once cleanup was done the underframe, coupler pockets, brake components and trucks were installed. Coupler pockets were drilled and tapped for 2-56 screws prior to install. The bolster kingpins received the same treatment. The kit brake cylinder and air reservoir were predrilled for piping with a number 79 drill. A Tichy Train Group (Tichy) AB valve, set #3013, was used to replace the kit AB valve. The brake components locations were based on the side views of prototype car photos. A train line, .019” wire, was installed.
 |
| Underbody with brake components. |
And, the car was weighted to 3.8 ounces with electrical outlet box punch outs prior to installing underbody into car body.
 |
| Car weighted to 3.8 ounces with electrical outlet box punch-outs. |
I moved to the roof running boards. The kit running boards are too thick so I scraped them on the back with a single edge razor blade to reduce the thickness to .025 inches and installed them.
 |
| Scraping underside of running boards. |
 |
| After thinning running boards installed. |
Now I installed the kit ladders on the sides and ends. On the sides I also installed the kit sill steps.
 |
| Ladders and sill steps installed. |
After ladder install on the ends, I installed the kit brake gear, bell crank for brake rod clevis to attach to and brake step brackets. A retainer valve, Precision Scale Co. #31796, was installed. And, a Plano Model Products #11322 Morton brake step was installed.
 |
| "B" end work of build underway. |
 |
| A better view of Morton brake step after painted. |
I continued working on adding the “B” end details. To complete the longitudinal running board install on the “B” end I installed the running board brackets made with Evergreen #8102 strip styrene and MEK fasteners. A retainer line and brackets, Tichy #1100 .008” diameter phosphor bronze wire (PBW), were installed. The plastic brake rod was cut off between chain and bell crank. A brake rod cut from Tichy #1102 PBW was installed to replace it.
 |
| "B" end work continuing. |
The kit Adjax brake wheel and a scratch built placard board with vertical boards cut from Evergreen #8106 1” x 6” strip styrene were installed as on the prototype. I continued working on the ends installing the kit bracket grab irons. On the kit bracket grab irons, the rung was cut off and a rung cut from Tichy #1101 .010” diameter rung installed. The sill grab irons were bent from Tichy #1101 .010” diameter PBW and installed.
 |
| Brake wheel and custom placard board installed. |
I continued installing grab irons on the sides. Kadee #2251, box car red bracket grab irons were installed using existing manufacturer drilled holes. Roof grab irons bent from Tichy #1101 .010” with Yarmouth Model Works eye bolts without shoulder for corner legs followed.
 |
| Grab irons installed on roof. |
 |
| Kadee bracket grab irons installed on sides. |
I moved back to the sides of install the unique feature these cars had - roping staples. The roping staples were bent from Tichy #1101 .010” diameter PBW and installed. To finish up the sides the molded on door handles were carved off and wire door handles as with roping staples were bent from Tichy #1101 .010” diameter PBW and installed.
 |
| Roping staple (tow loop) installed. |
 |
| Wire door handles installed. |
Now I went back to the underbody to complete work I wanted to do there. First I moved the brake cylinder and bracket to location based on prototype side photos. Now I finished adding the details as follows:
- Brake cylinder lever, cut from Evergreen #8101, 1” x 8” strip styrene
- Brake floating lever, cut from Evergreen #8101, 1” x 8” strip styrene
- Brake lever hangers, wire grab irons
- Brake piping air reservoir to control valve, #1101, .010” dia. phosphor bronze wire (PBW)
- Brake pipe from brake cylinder to control valve, #1106, .0125” dia. PBW
- Brake rods, #1106, .0125” diameter PBW
- Brake rod clevises, made with MEK Goop
- Chain, Precision Scale #48553, 34 links per inch (not in kit)
- Dirt collector, kit
- Bell crank, kit
- Train line, .019” wire (not in kit) had been installed earlier.
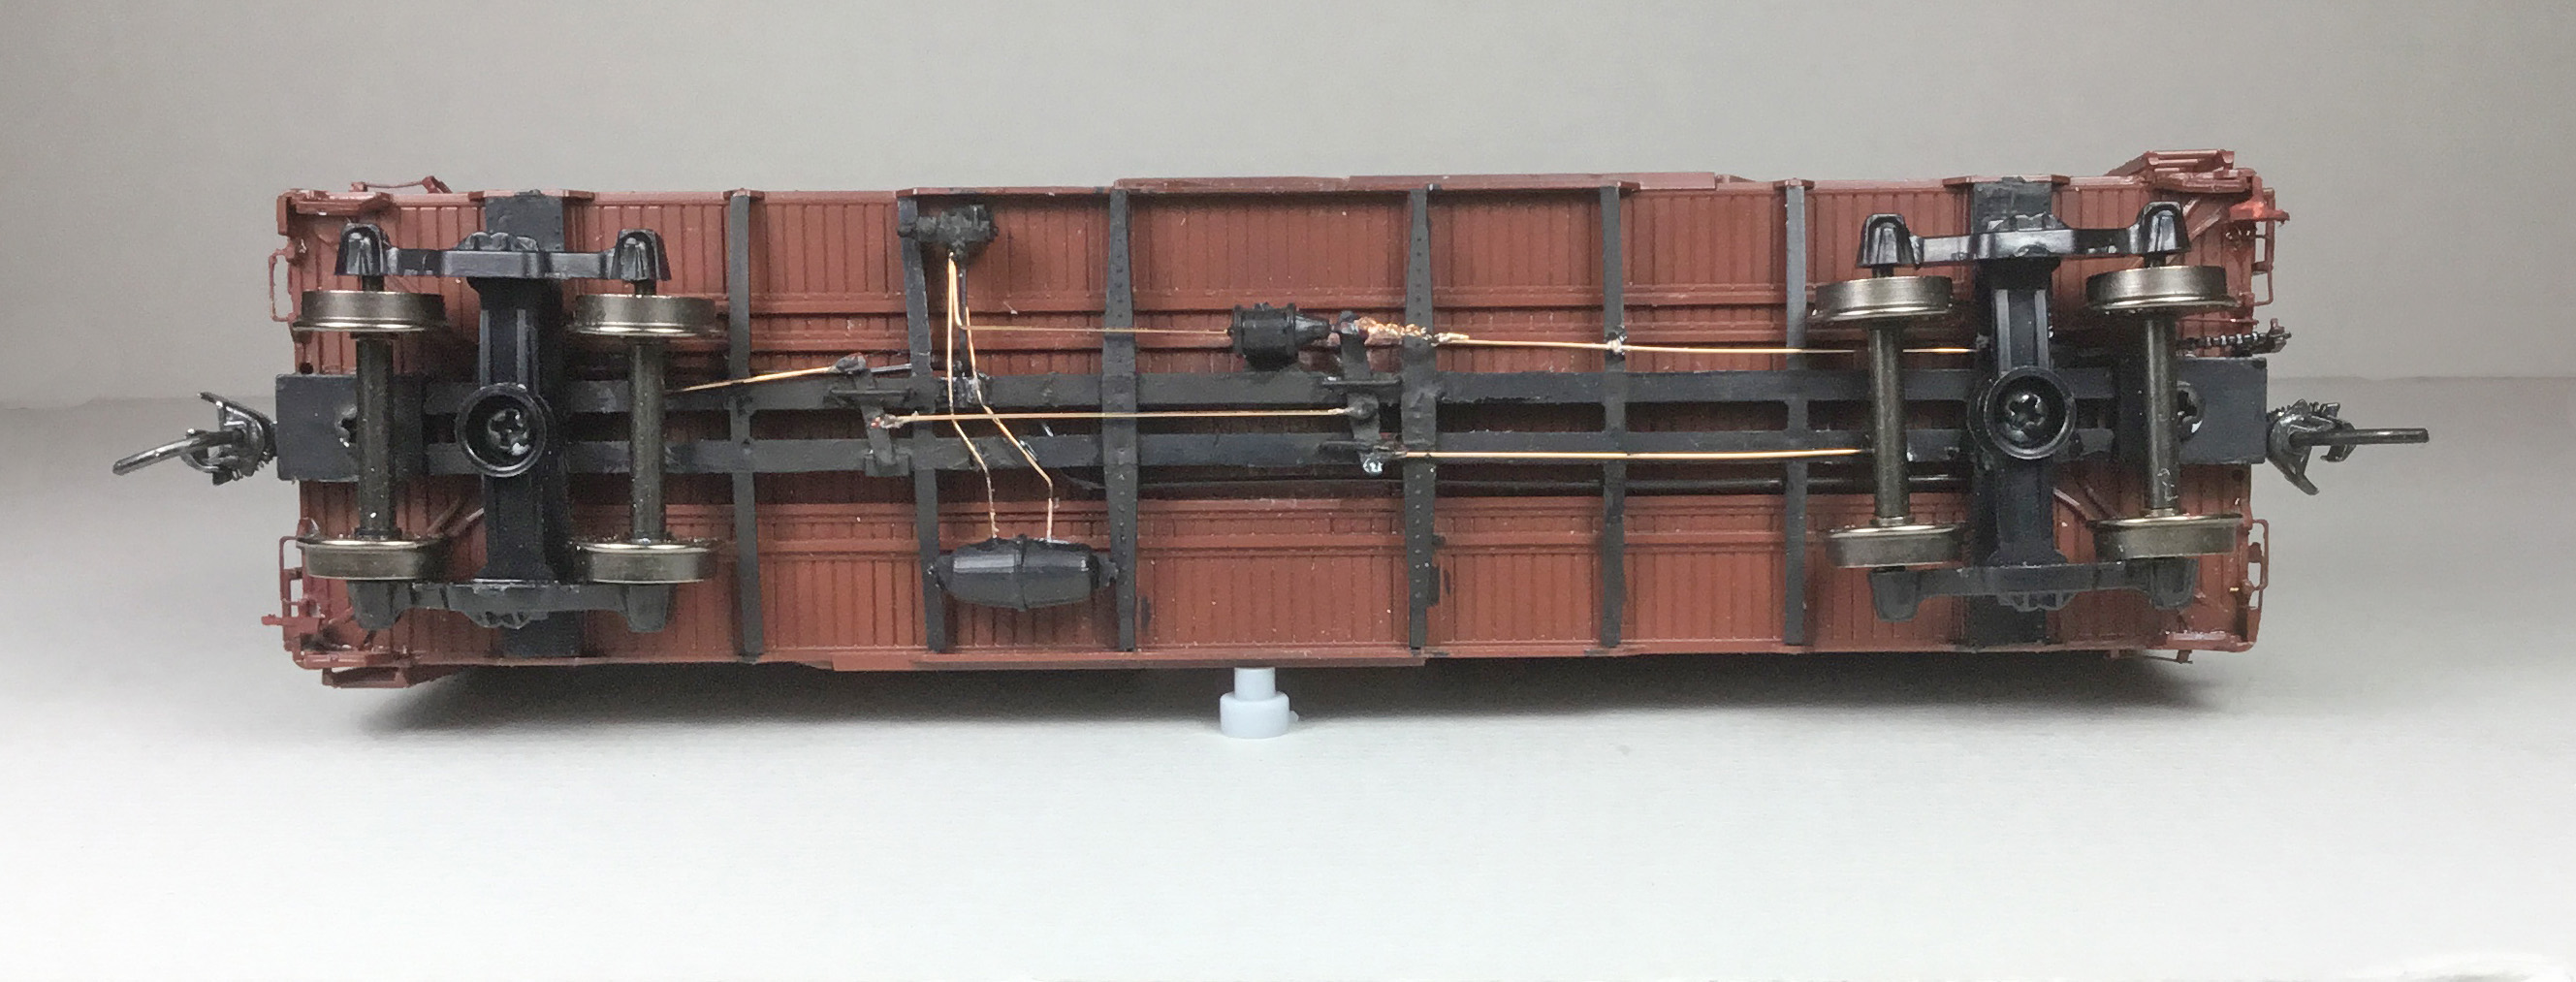 |
| Underbody details installed. |
With the underbody work done only the install of uncoupling levers remained. The bracket for the uncoupling levers was cut/shaped from an Evergreen .060” angle glued to poling pocket corner plate using a PBL nipper.
 |
| Uncoupling lever bracket shaped and installed. |
 |
| Uncoupling lever bracket shaped and installed. |
With the uncoupling lever bracket shaped, the uncoupling levers bent from from Tichy #1101 .010” diameter PBW were installed. On the underbody I attach the uncoupling lever to the coupler box cover with glue.
 |
| Uncoupling lever installed. |
 |
| Uncoupling lever attached to coupler box . |
 |
| Uncoupling lever installed. |
New York Central Box Car 157306 was ready for the paint shop. All added detail parts were hand painted Vallejo Black Red 70.814. Not many of the added parts on the car body needed painting now as most added parts were hand painted shortly after install during the build. However, the underbody and added parts did need painting. Therefore, the underbody was airbrushed Vallejo Model Air Black Grey RLM66 71.055.
 |
| NYC 157306 underbody painted. |
How about lettering? The manufacture, Innovative Model Works, did a good job of that. All that I needed to do was change the “new” built date stencil to a “reweigh” date stencil. A scratch brush was used to remove new built stencil date. The repack date was also removed. The removed reweigh date area was hand brushed with Vallejo Black Red with a touch of black added. When the painted area was dry the area was hand brushed with Future Floor Finish. Again when dry a new reweigh date that came from a B&O Fox Valley 2016 decal set was applied. No repack date was applied as I could not find a correct one for the car. Now the entire car body was airbrushed with Vallejo Gloss Varnish 70.510 and when dry airbrushed again with Model Master Acryl Flat Clear 4636.
 |
| Reweigh date changed. |
One more step before putting New York Central 157306 in service was to weather the car with Pan Pastels. Pan Pastels Paynes Grey Extra Dark 840.1 was applied with a makeup brush on the roof and lightly over safety appliances on car body. Artmatic eyeshadow, the color of box car red, was applied with a makeup brush on sides and ends. On the trucks Burnt Sienna Shade 740.3 was applied with a micobrush applicator.
 |
| NYC 157306 weathered with Pan Pastels. |
 |
| NYC 157306 weathered with Pan Pastels. |
 |
| NYC 157306 weathered with Pan Pastels. |
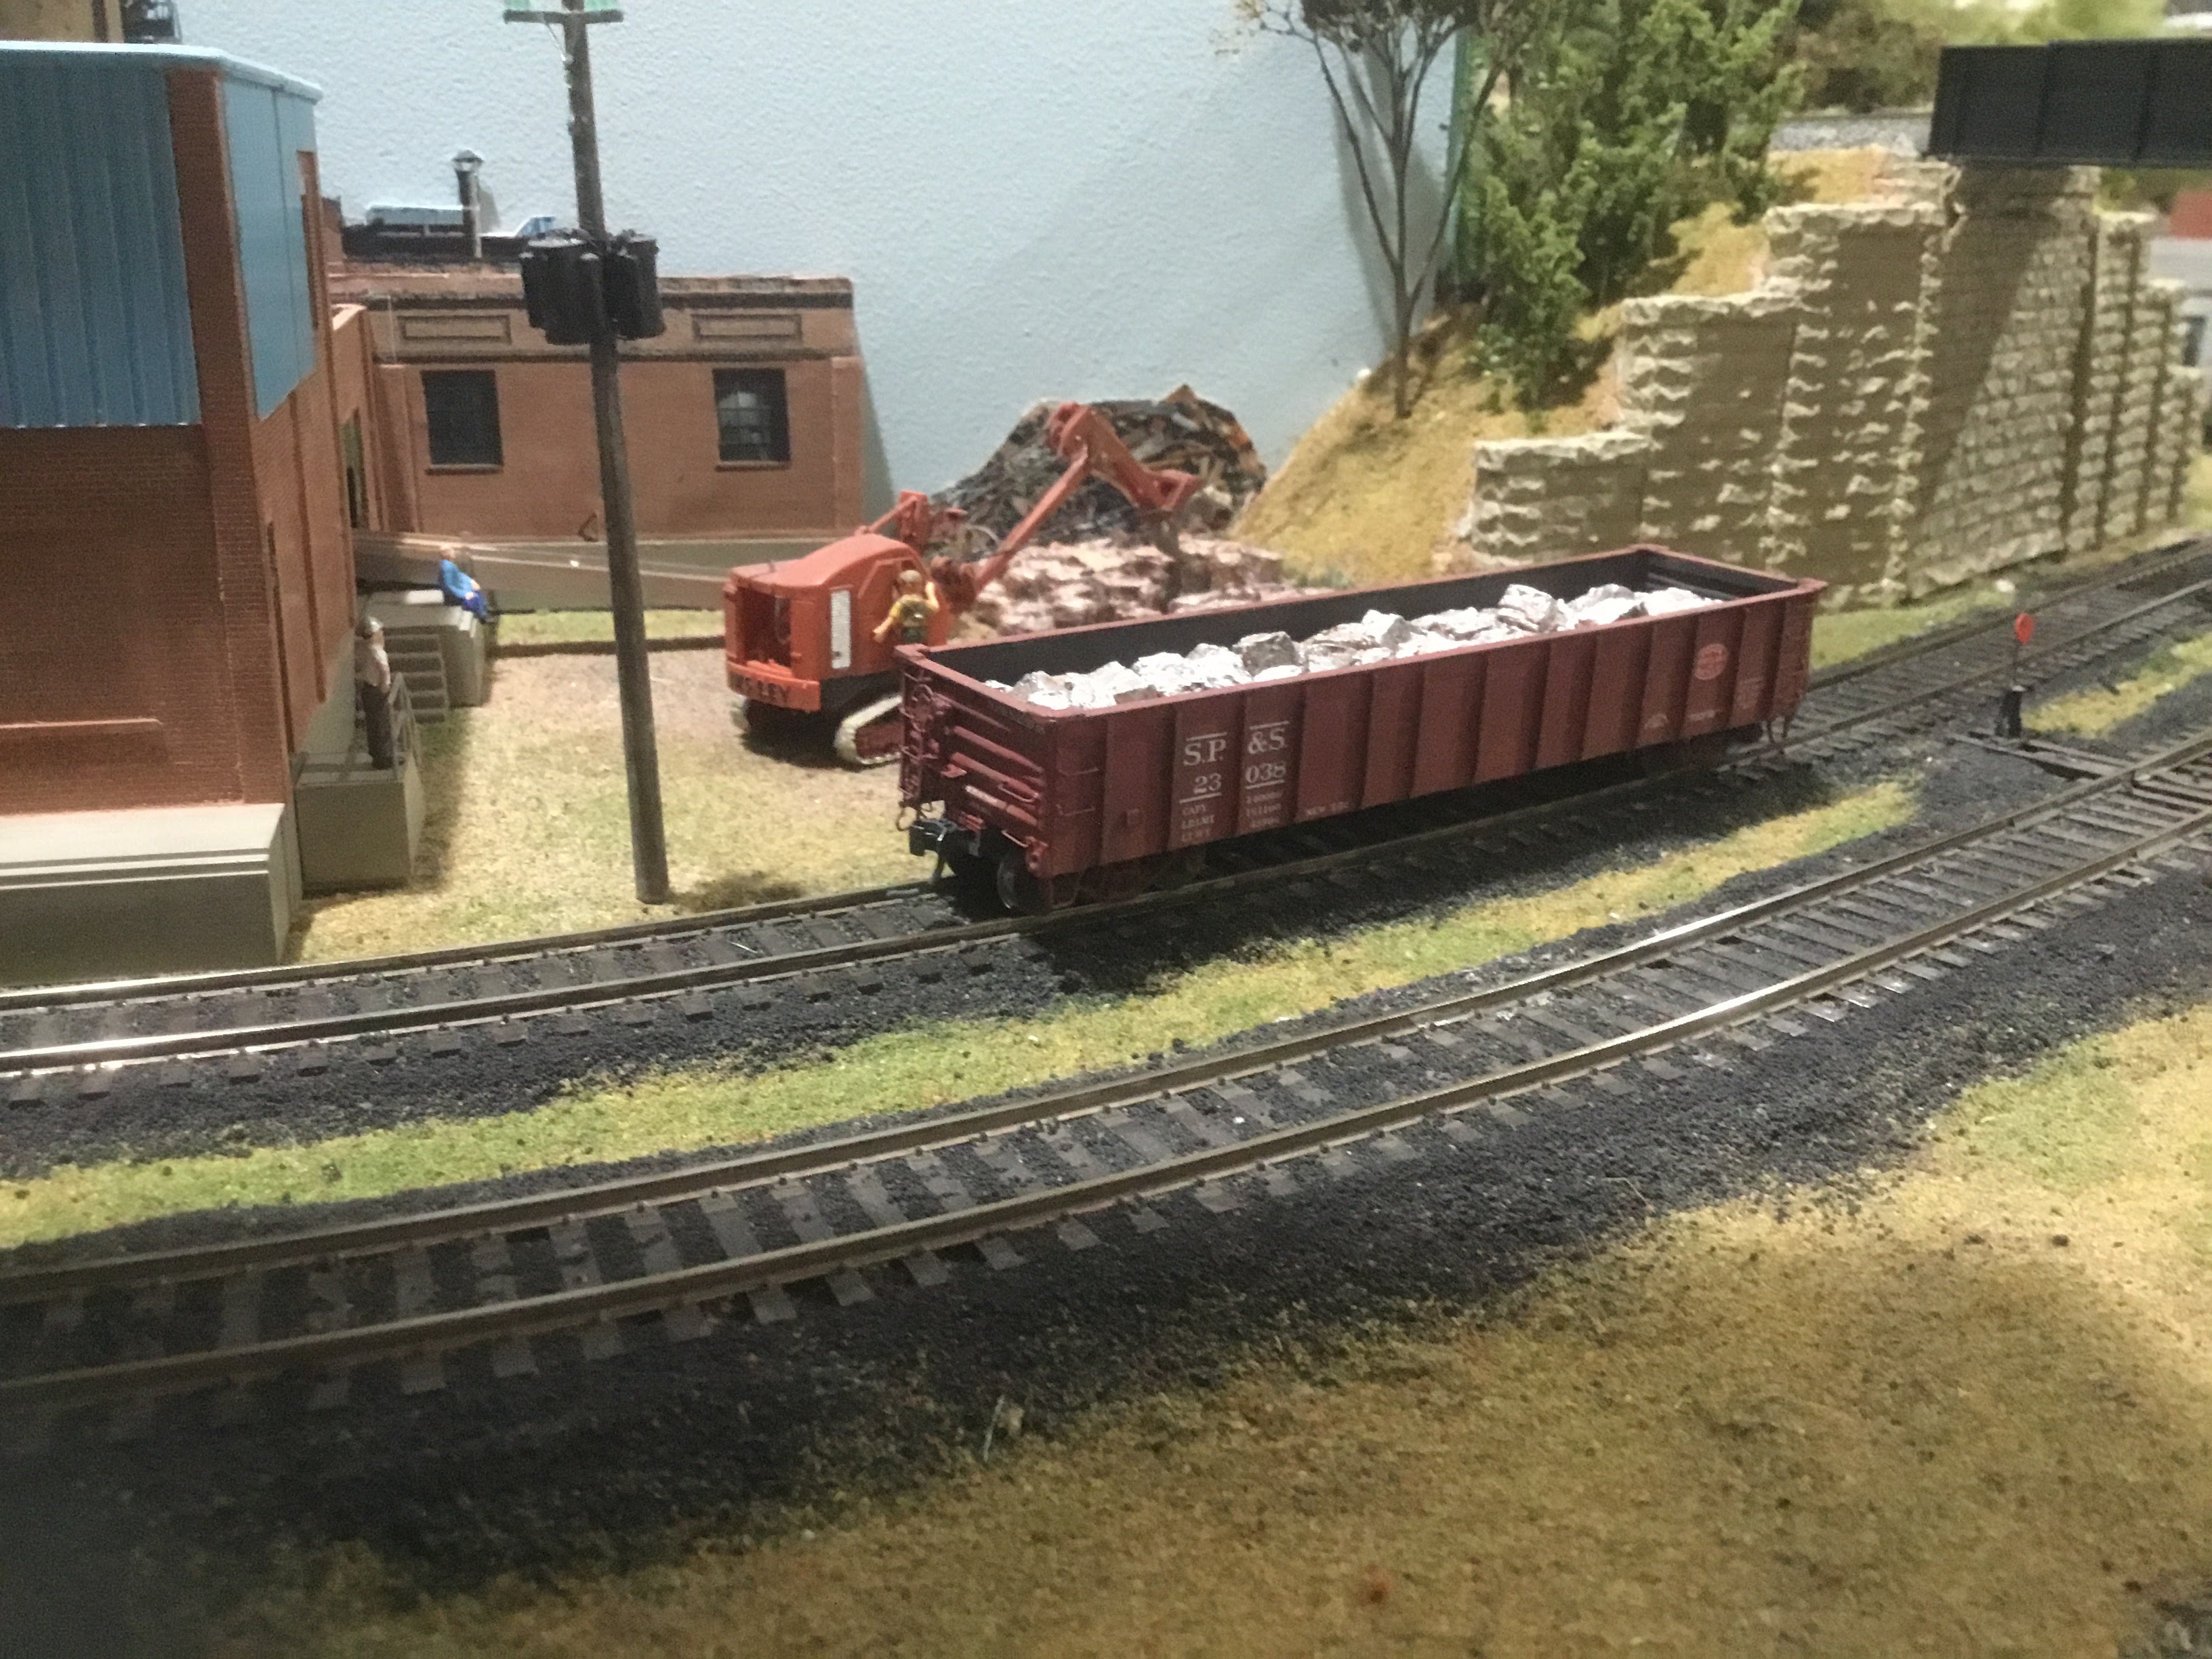
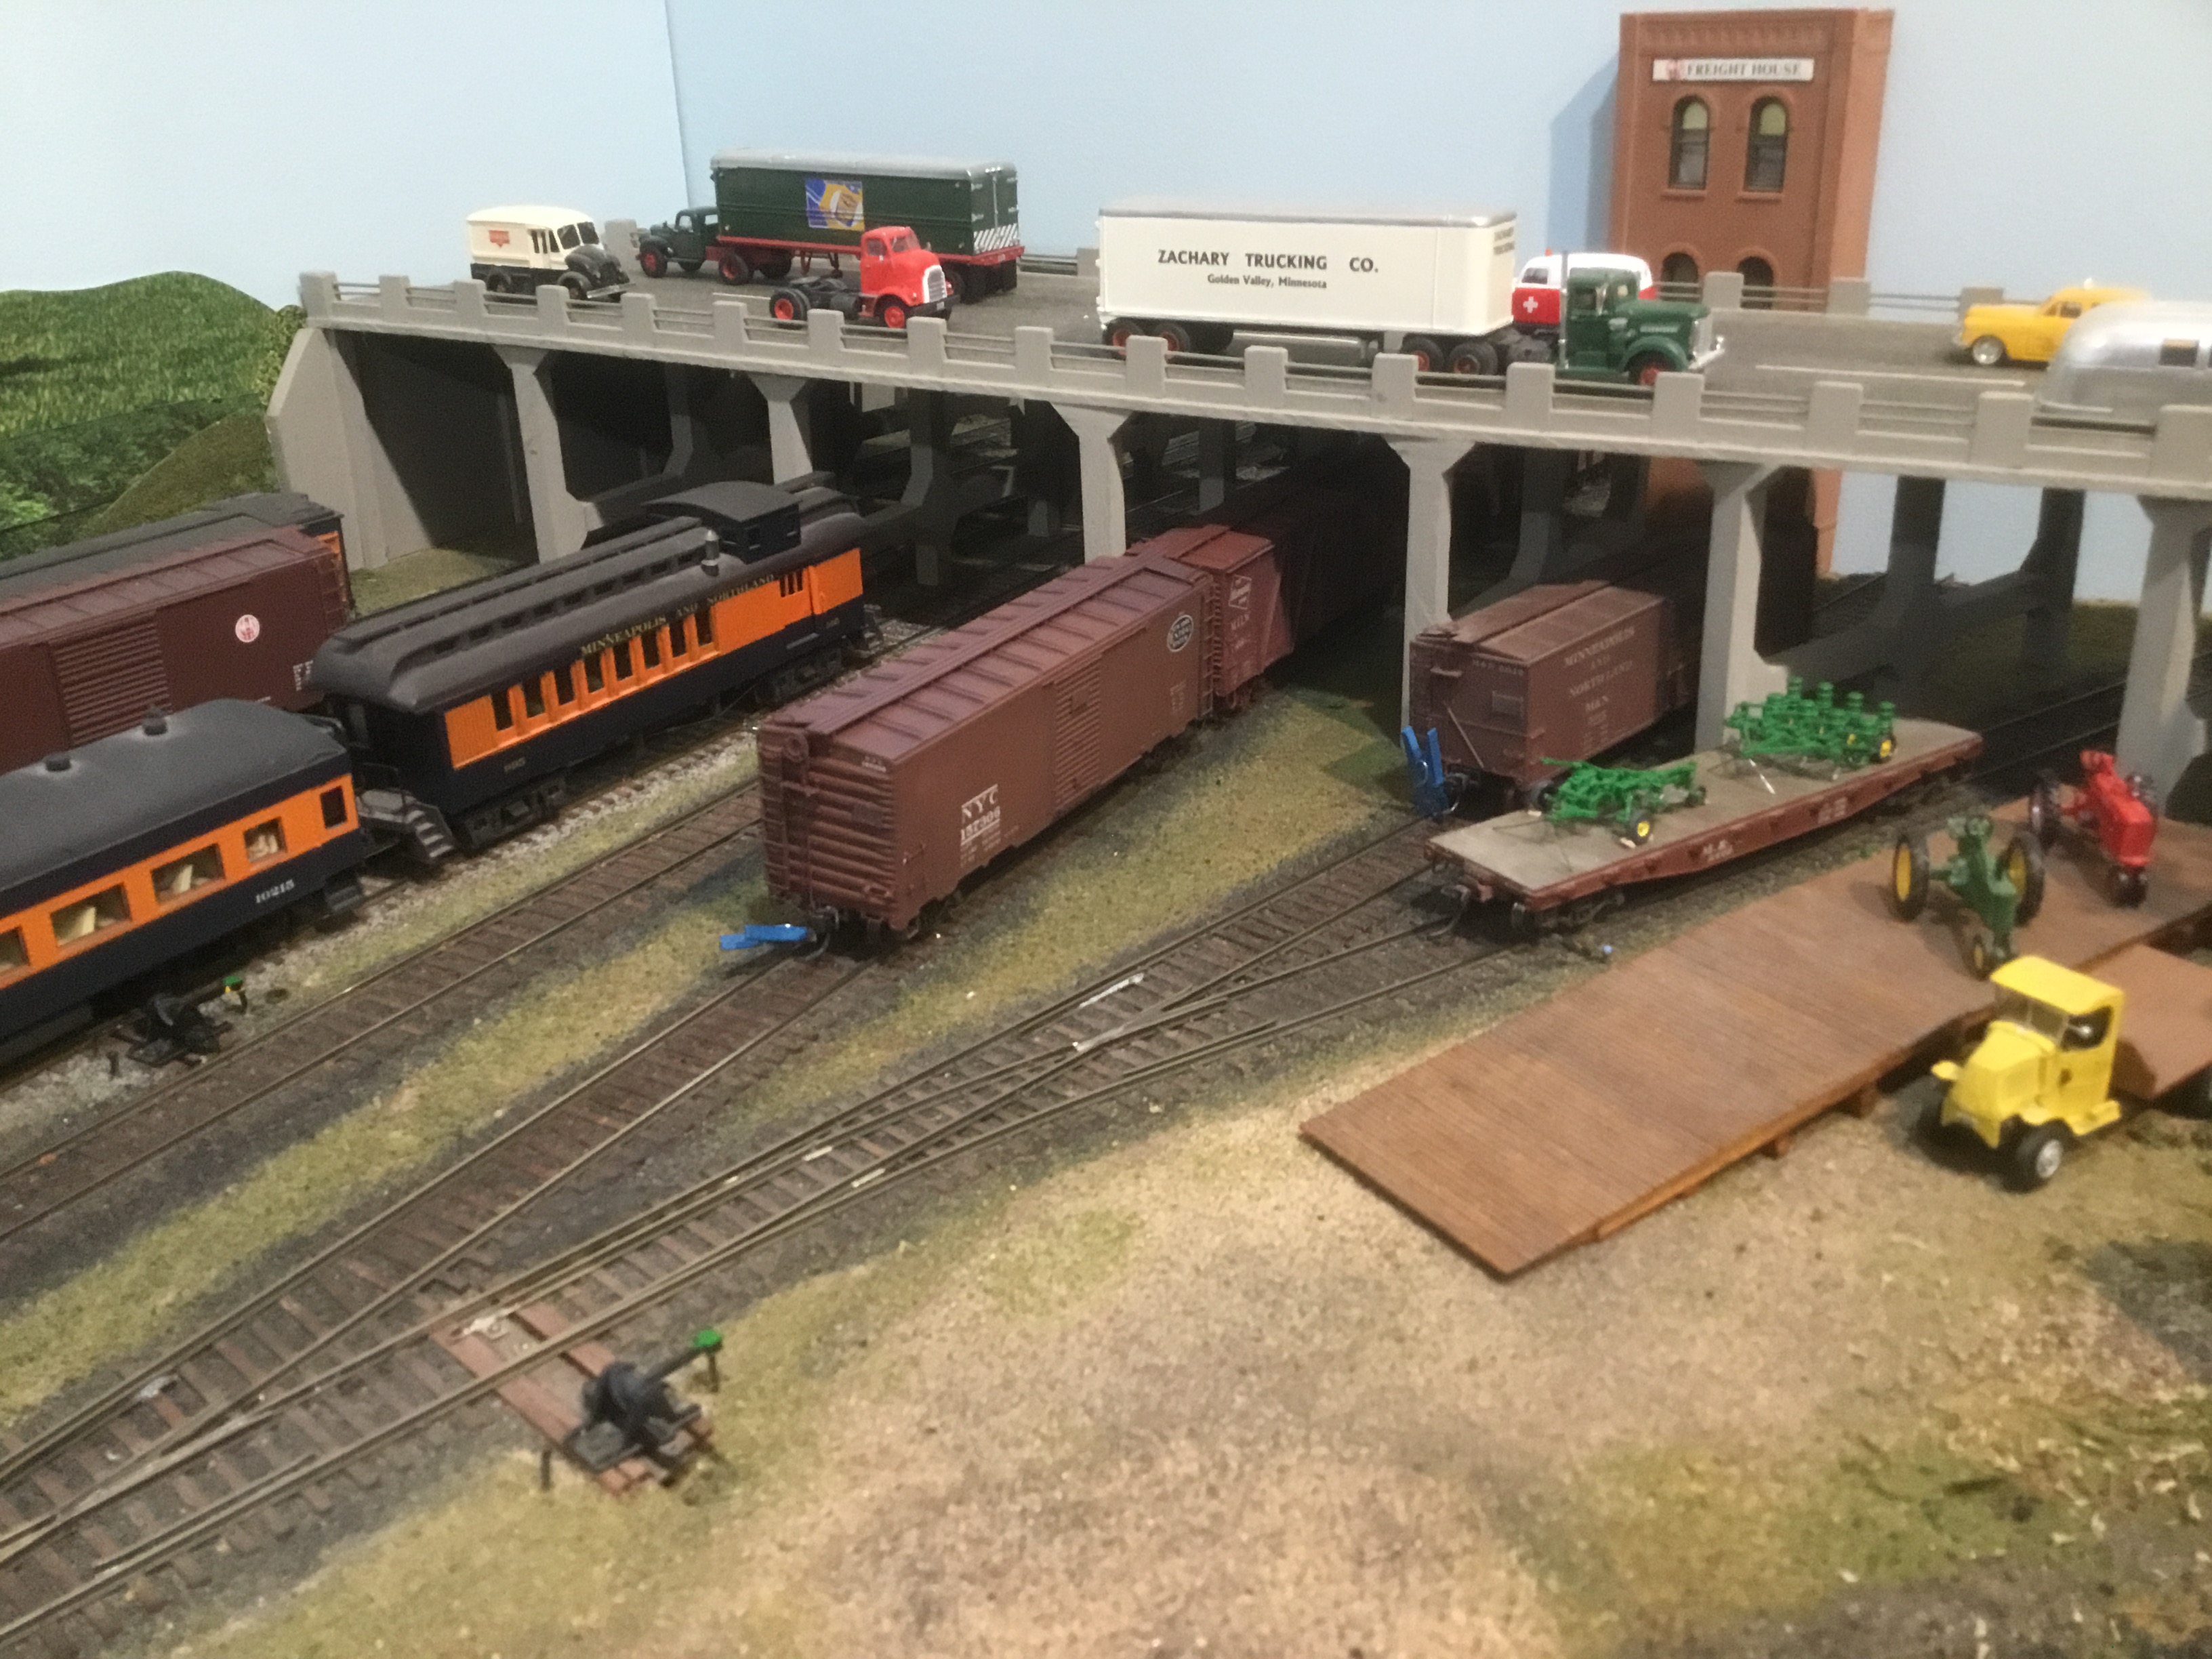 |
| NYC 157306 waiting for unloading at Minneapolis Freight House. |
 |
| NYC 157306 waiting for unloading at Minneapolis Freight House. |
 |
| NYC 157306 waiting for unloading at Minneapolis Freight House. |
I want to say, “Thank You” to several individuals that provided information, information sources, photo and diagram help with this build and upgrade. Definitely appreciated as without their help this build would have been more difficult.
A “Thank You,” to Doug Harding for photos and car diagram, Peter Aue, Jim Brewer, Rich Christie, Steve Hile , Seth Lakin, Terry Link and Mike Schleigh for photos, information and information sources regarding this car series.
Thank You for taking time to read my blog. You can share a comment in the section below if you choose to do so. Please sign your comment with your name if you choose to leave one. Please share the blog link with other model railroaders.
Lester Breuer
.