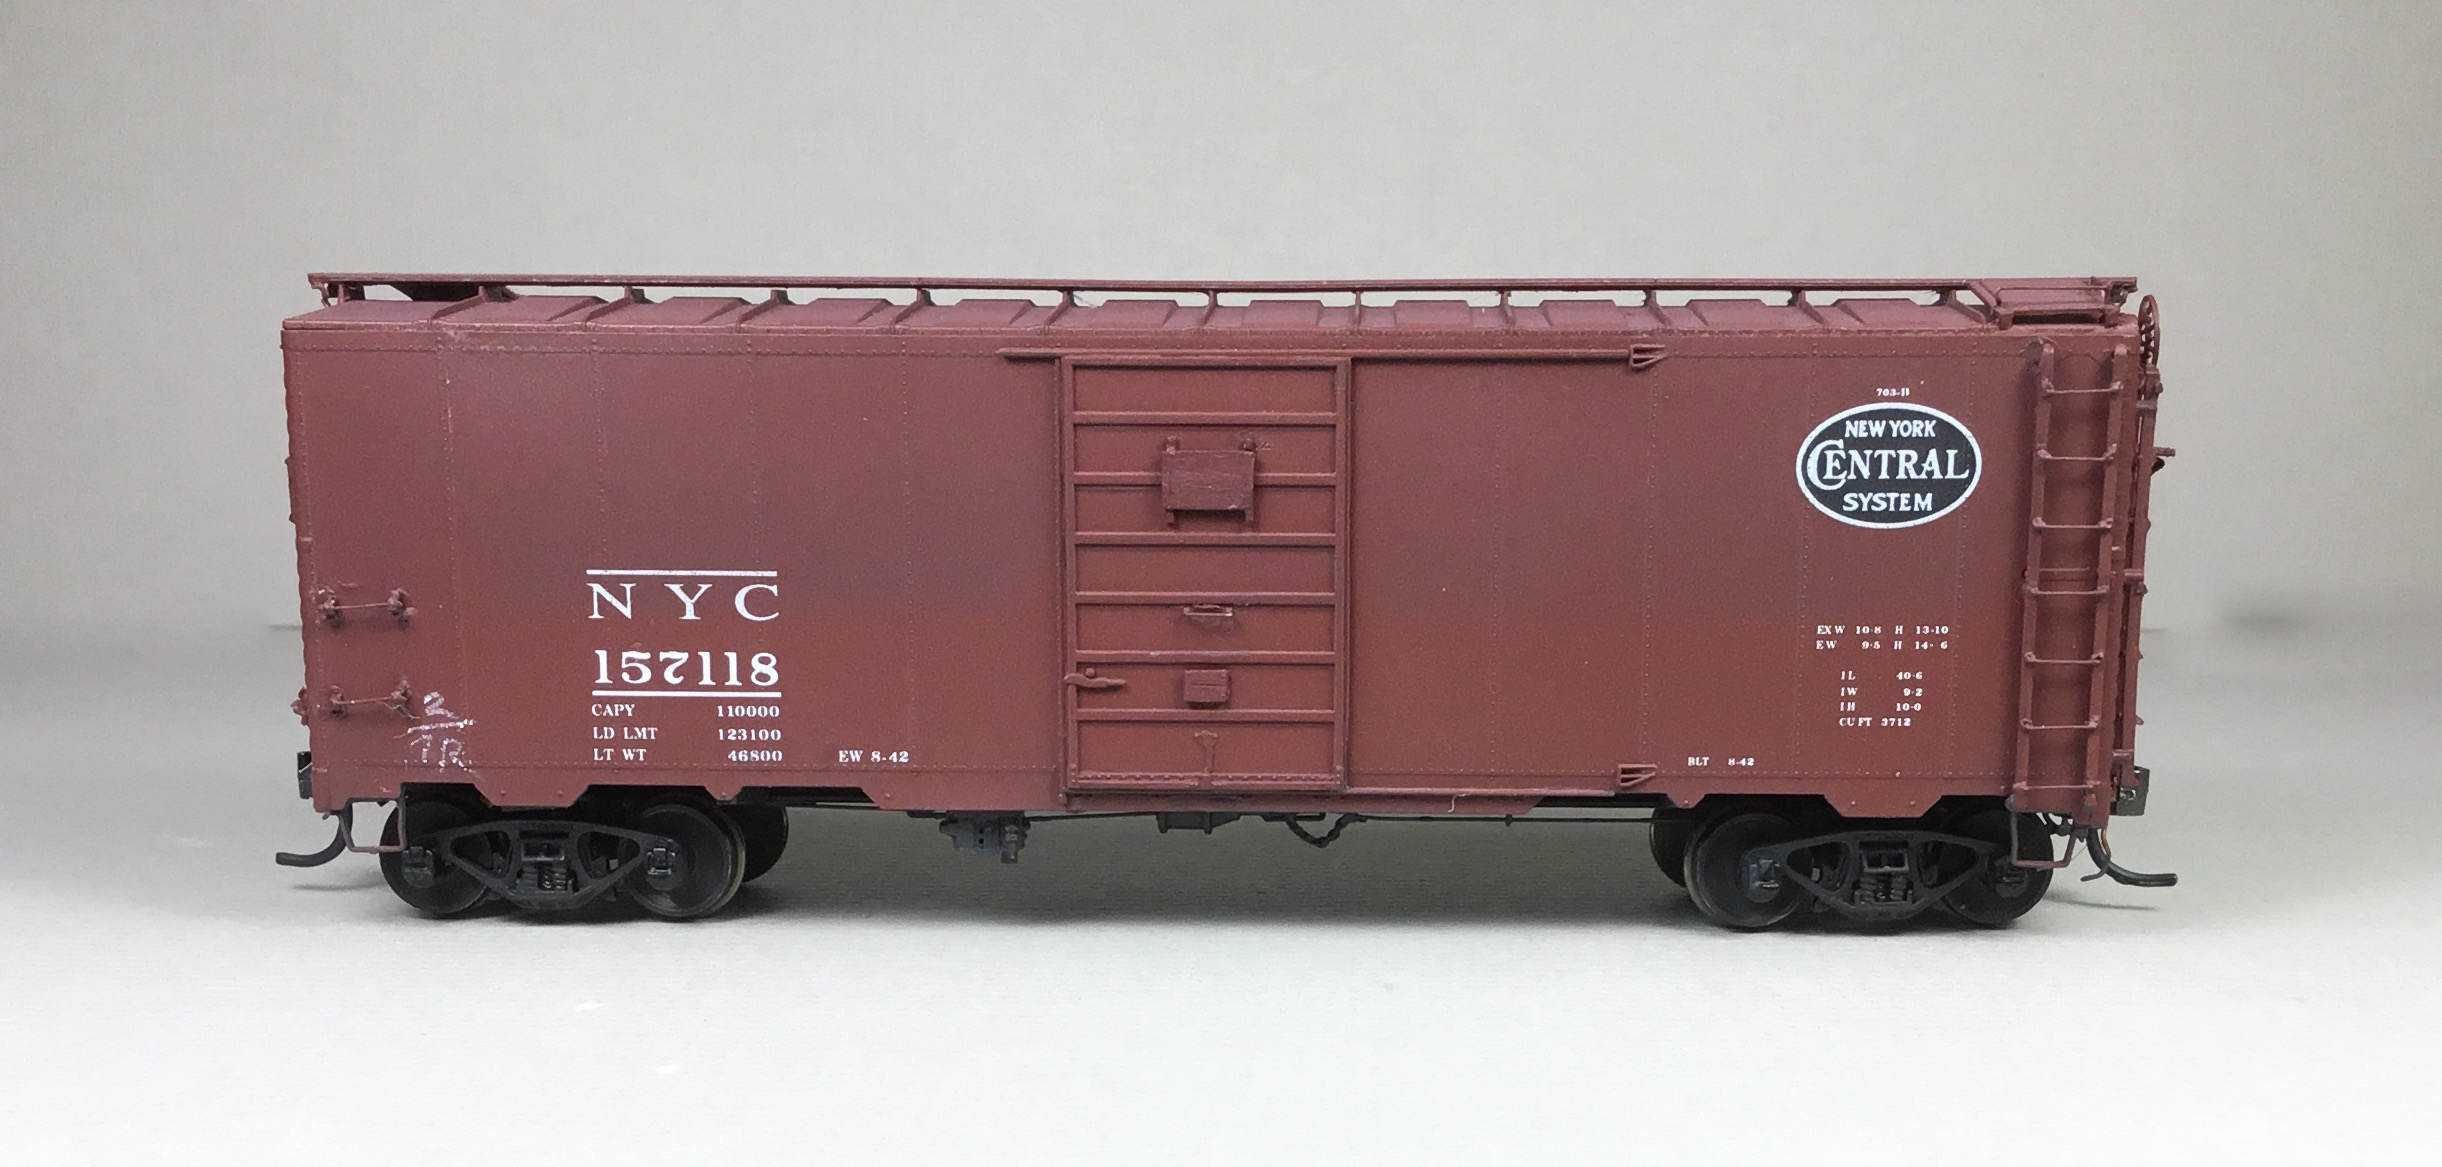
With New York Central (NYC) Box Car 157118, a box car of the 1937 design of 10” Inside Height (IH) added to the in-service fleet I decided to add another NYC Box Car; however, one with an IH of 10” 6”. The cars of the 10”6” IH height were referred to as the “Modified 1937 AAR 40-Foot Cars” by Ed Hawkins in his series of articles in the 1996 RailModel Journal. In the first article Ed states, “The prototype for the Modified 1937 AAR 40-foot car is shown on pages 110-111 of the 1946 Car Builder’s Cyclopedia, with line drawings and photos of sample cars. According to the drawing captions, the prototype design is termed the “Modified A.A.R. 1937 Design.” I have also found articles on these cars with the 10” 6” IH design termed the “1942 Design.
The prototype of the Modified AAR 1937 Box Car design built 1939 to 1946 had the following basic features: 10 feet 4 inches to 10 feet 6 inches Inside Height (IH), one additional rib creating 5/5 dreadnaught ends, 10 panel riveted steel sides (differences exist), standard 6 foot single door opening and a rectangular raised panel roof. Additional data for the New York Central cars from the table of Modified 1937 AAR Box Cars, complied by Ed Hawkins, for NYC cars in series 161000-161999 shows: 1000 cars built 6-44 to 1-45, with 10” 5” IH, builder Despatch Shops, Inc. (DSI), Lot 735-B, Youngstown doors, round end corners (termed W-section), push pole pockets, Murphy Raised Panel roof, side ladders had 7 rungs, Miner hand brake, wood running boards, Morton brake step, roping staples, and rode on Barber S-2 with spring planks trucks.
 |
| New York Central Box Car 161775 Courtesy of Ed Hawkins (Click or tap on this or any image to enlarge) |
 |
| New York Central Box Car 161430 New York Central Historical Society Archieves |
The kit I started with for the build of this car was InterMountain Railway Company (IM) kit 40807-10 lettered for a Southern car numbered 20742. The build began by removing the lettering with a Eurotool scratch brush with nylon bristles and Walthers Solvaset. The scratch brush with light pressure removes the lettering much faster than a toothpick if used can.
 |
| Scratch brush and Solvaset |
 |
| Lettering removed from car body |
After the lettering was removed some work on the underbody was done. After brake component molded on mounts were removed from the underbody the underframe was installed. Coupler pocket pads and truck kingpins were drilled and tapped for 2-56 screws. Kit air reservoir, brake cylinder and AB valve (control) were installed. All brake components had holes drilled with a #79 drill for piping prior to install. Holes in center sill were filled with styrene rod. If you are not using the plastic kit piping for your build, it can be used to fill the holes. Kadee #380-262 narrow #262 gear boxes with Kadee #148 couplers were installed with Fastenal 2-56 - 3/16” screws. Kit provided trucks with installed InterMountain 33” metal wheels were installed with 2-56 - 1/4” screws.
The car was weighted to 3.8 ounces with Harzole Adhesive Lead Free stick on tire weights. Now the roof was glued to car body.

With the basic car assembly work done, NYC 161430 was ready for upgrade details. I began with the ladders. Rather than use etched ladder stiles I chose to use the kit ladder stiles removing the molded ladder rungs and replacing them with “NoName” .010” diameter brass wire. The NoName brass wire came from a friend who did not know the name of the manufacture. To replace the ladder rungs, the ladders were left on the kit gates (sprues) for drilling the holes with a #80 drill and then enlarged with a #79 drill. After holes were drilled only every other molded on rung was cut off with a nipper and a wire rung bent from .010” diameter brass wire installed.
 |
| Every other ladder rung installed. |
After every other ladder was installed the remaining rungs were installed to complete the ladder.
 |
| Remaining ladder rungs installed to complete ladder. |
Once ladders had all wire rungs installed the ladders were cut from the gate (sprue) and installed on the car sides and ends.
 |
| Roof and ladders installed. |
Following ladders install, kit running boards were installed using Testors Tube Cement.
 |
| Running board installed. |
Next, I began B end work. To complete the longitudinal running board install the end extension brackets, Yarmouth Model Works #220, were installed. The brake housing brake wheel hole was enlarged with a #56 drill for Kadee brake wheel. The install of B end details continued with the following items:
- Brake step brackets, kit
- Brake step, Morton, Plano Model Products from #11322 set
- Brake wheel housing & chain, kit
- Bell crank, kit
- Retainer valve, kit
- Retainer line,Tichy #1100, .008” diameter phosphor bronze wire (PBW)
- Retainer line brackets, #1100 .008” diameter PBW
- Brake shaft, Tichy Train Group (Tichy) #1102 .015” diameter PBW
- Brake shaft clevis to bell crank, kit
- Brake wheel, Miner, Kadee #2022
 |
| B end with details installed. |
 |
| Closer view of installed B end details. |
With above details installed, I continued working on the B end installing the right side and sill grab irons. A kit bracket grab iron was installed on the right, hand hold cut off with nipper and a hand hold bent from brass NoName .010” wire installed. Sill grab irons were also bent from brass NoName .010” diameter wire.
 |
| Grab irons installed. |
Before leaving the B end an uncoupling lever bracket (plate) cut from Evergreen .010 styrene was glued behind the poling pocket tab. An eye bolt bent from Tichy #1101 .010” diameter PBW was installed in the plate. Now, uncoupling levers were bent from Tichy #1106, .0125” diameter PBW and installed.
 |
| Uncoupling lever installed. |
 |
| Note uncoupling lever plate (white styrene) installed behind poling pocket. |
 |
| An angle view of uncoupling lever install. |
All other grab irons were now added. On the roof NoName .010” diameter brass wire was bent to form the grab irons and installed with Yarmouth Model Works etched eye bolts without shoulder for corner legs. Kadee bracket irons #2251 were installed on the left end of the sides.
 |
| Grab irons installed on roof and sides. |
 |
| Grab irons installed on roof and sides. |
In addition to grab irons, the molded on door handles were carved off and brass wire handles again bent from NoName .010” diameter brass wire were installed. Roping staples were bent with Xuron needle wire bending plier and installed on sill tabs. And, A-Line #29000, sill steps were installed.
 |
| Roping staples and sill steps installed. |
 |
| Note sill step and roping staple. |
With the car body added details complete the work on the underbody was done. The B end work included the install of the following parts:
- Brake cylinder, kit, mounting bracket, Tichy #3013
- AB (Control) valve, kit, mounting bracket, Tichy #3013
- Dirt collector, was molded on AB (control) valve
- Air reservoir, kit, mounting brackets molded on kit reservoir
- Above brake components were predrilled for piping
- Slack adjuster, universal style from parts box
- Brake cylinder lever, cut from Evergreen #8108, 1” x 8” strip styrene
- Brake floating lever, cut from Evergreen #8106, 1” x 6” strip styrene
- Brake levers hangers, plastic grab irons
- Brake piping from air reservoir to AB valve, Tichy #1101, .010” dia. Brass wire
- Brake pipe from brake cylinder to AB valve, Tichy #1106, .0125” dia. PBW
- Brake rods, Tichy #1106, .0125” diameter PBW
- Brake rod clevises, MEK Goop
- Chain, Precision Scale # 48553, 34 links per inch
- Train line, kit
- Frame extended between bolster and coupler box, Evergreen I beam
 |
| Underbody details installed. |
Off to the paint shop for paint and lettering. Before moving the car to the paint shop I reviewed the the K-4 Decal set I was using to see if I could use car number 161430 on the car in photo above. After review of the numbers in the K-4 Decals decal set, I new number 161430 could be made up from the numbers in the decal set for the car number.
In the paint shop, the car underbody was airbrushed Vallejo Model Air Nato Black #71.251.
 |
| Underbody painted. |
Next the car body was airbrushed with a Vallejo Box Car Red mix. The Vallejo Box Car Red mix served as a primer coat as it was not the NYC box car red color I wanted based on the color photo above.
 |
| Car body painted with Box Car Red mix. |
 |
| Car body painted with Box Car Red mix. |
Therefore, the car body was airbrushed again with Vallejo Model Color Burnt Red #70.814 to get a color similar to the photo above. Once dry, car body was sprayed with Vallejo Gloss Varnish #70.510 for decal base.
Decal sources were as follows: K4 Decals (K4 decals.com), New York Central 40Ft. Box Car (Roman Lettering), K4-NYC4OR-87. The East Buffalo (EB) reweigh date was made by using letters and date from the “BEN 2-55”reweigh date from Scale Rail (no longer in business) Milwaukee Road 40” Horizontal Rib Box Car set #31054-HO. I used prototype photo (above) as a guide to apply decals.
After Vallejo Gloss Varnish had dried overnight, decals were applied. Decals were soaked off in distilled water and applied to the car body where MicroScale Micro Set had been applied with a brush. After the decal was applied in the Micro Set and positioned the edges had MicroScale Micro Sol applied. Any excess solution was sucked away with the torn edge of a paper towel. Again when dry, car body sprayed with Vallejo Gloss Varnish 70.510 to better hide edges of decals and protect decals during handling. Since the Minneapolis & Northland Railroad Company is set in late spring 1955, NYC 161430 is a box car with fresh paint just out of the paint shop. Therefore, I did not apply any weathering.
 |
| Decals applied. Note new car body color after Burnt Red applied. |
 |
| Decals applied. Note new car body color after Burnt Red applied. |
 |
| Decals applied. Note new car body color after Burnt Red applied. |
New York Central Box Car 161430 was ready for service on the Minneapolis & Northland Railroad Company, The Lakeland Route, “Serving today, Shaping tomorrow.” A car card was made for NYC 161430, the final step to put the a car in service on the Minneapolis & Northland Railroad Company Railroad.
 |
| NYC 161430 in Minneapolis Chestnut Street Yard. |
 |
| NYC 161430 in Minneapolis Chestnut Street Yard. |
 |
| NYC 161430 in Minneapolis Chestnut Street Yard. |
 |
| NYC 161430 in Minneapolis Chestnut Street Yard. |
I want to say, “Thank You” to Ed Hawkins for his permission to use here on my blog the New York Central color photo of box car 161775 (above) from his article Modified 1937 AAR 40-Foot Cars, Part III in RailModel Journal - December 1996.
Thank You for taking time to read my blog. You can share a comment in the section below if you choose to do so. Please sign your comment with your name if you choose to leave one. All comments are reviewed and approved before they appear. Please share the blog link with other model railroaders.
Lester Breuer
.