In recent months I have received several emails asking if I would write a blog entry on the pliers I use when building a freight car for my Minneapolis & Northland Railroad Company. I thought I can do that. And, here it is.
I opened the tool drawer at my work bench to show you the pliers it contains. Of the pliers in the drawer I use three or four every modeling session. Other pliers in the drawer are used when needed.
 |
| Tool drawer with pliers (Click on this or any image to enlarge) |
The three pliers that are on the bench during every build are a BeadSmith fine nose (no serrations), a Xuron 450S (with serrations) fine needle nose with “tweezer” like tips and a Xuron 450 ( no serrations) fine needle nose with “tweezer” like tips. Both Xuron pliers have soft rubber handle grips for comfort and control. All three pliers will handle the most delicate parts but are strong enough for forming and bending operations.
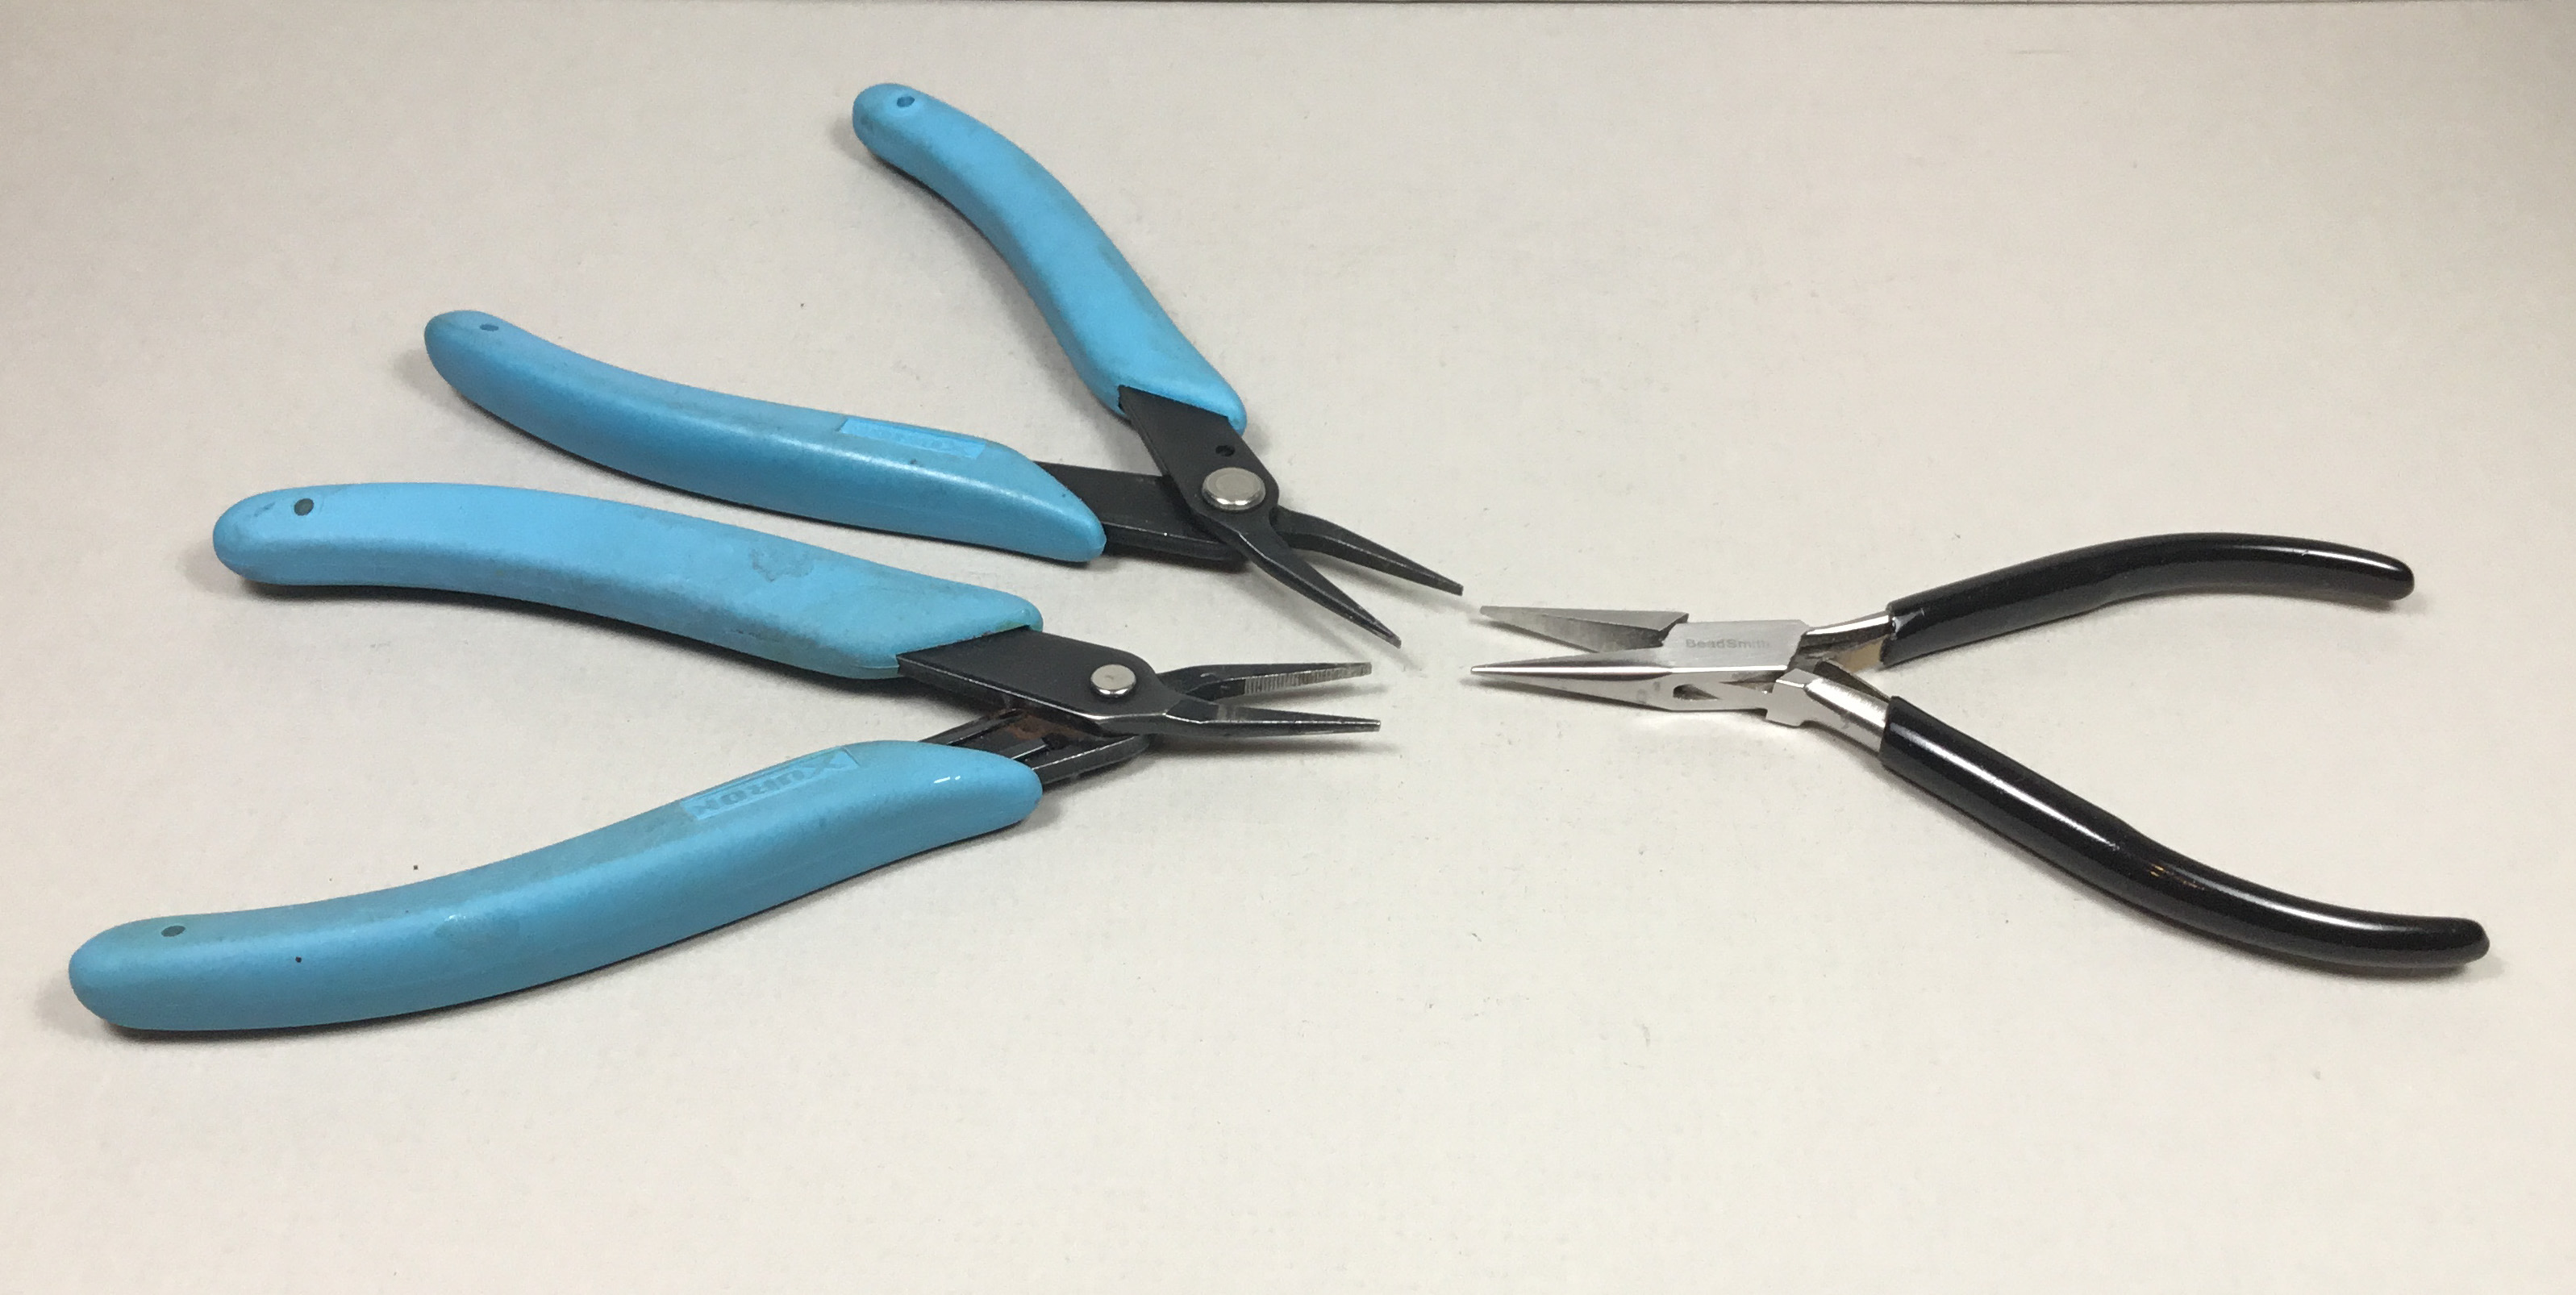 |
| My three most used pliers |
 |
| A closer look at the plier tips |
My BeadSmith plier was purchased at a Hobby Lobby in the craft, specifically bead, section of the store. The Xuron pliers as other Xuron tools were purchased directly from Xuron at a show booth or mail order. The BeadSmith, my first choice due it having the smallest needle nose jaw, is used for bending wire grab irons, wire ladder rungs, and bending uncoupling levers; however, not for installing the bent parts. The Xuron 450S with the serrated jaw is used for that. Why? The part before install if held with non serrated jaw may be sent into one of the “black holes” under or near my workbench for lost parts. For install of small plastic and resin parts the BeadSmith or Xuron 450 ( no serrations jaw) is used to prevent serration marks. And, yes the sending of the plastic or resin parts into one of the “black holes” before install also exists.
 |
| Pliers and jig used for bending grab irons. Normally .010" phosphor bronze wire is used for grab irons and ladders rungs rather than .0125" in photo. |
If the freight car I am working on needs to have drop type grab irons, the flat nose pliers comes out of the plier drawer to help with the bending task. After bending a wire grab iron with the BeadSmith plier, it is inserted into a flat nose pliers on side or nose to the depth of the drop grab iron portion and jaw is closed to hold the grab iron while the legs on the exterior of the jaw are bent down. Now when the bent jaw is opened you have a formed drop grab iron. The depth of the grab iron into the flat plier jaw can be determined by a mark or a piece of tape on the inside of the flat plier jaw.
 |
| Bottom two flat jaw pliers used most. |
 |
| Closer look at plier jaw tips |
In addition to grab irons, ladder rungs and uncoupling levers there are other parts that require bending as bends in under body piping. I make these bends with a Xuron 488 Round Nose bending pliers used for looping and forming wire. Plier blades are round at the tip and transition to an elliptical shape for multiple forming possibilities. Although delicate in appearance, the pliers blades will stay aligned (not cross) when in use, unlike less expensive alternatives. I also have a BeadSmith round nose bending plier that I may use for underbody piping bends.
 |
| Loop bending pliers. |
 |
| Closer view of jaw tips. |
I also use the Xuron 488 Round Nose bending plier to bend two other parts that require bending a round eye as on an eye bolt or the eye on the underbody brake rod that holds the chain that attaches to the brake cylinder lever. The eye on the brake rod that holds the chain is always bent with the smaller tip of the Xuron 488. If I decide to bend rather than use a commercial eye bolt for the mounting bracket of the an uncoupling lever (cut lever), the Xuron 488 round nose bending plier using the smaller tip is used.
 |
| Eye bolts and loop on brake rod to hold chain bent with Xuron 488 in lower right corner. |
 |
| Commerical eye bolts if not bent with loop bending pliers. |
During the build of a freight car there are times the part to be installed on the freight car is so small that the jaws on the already mentioned pliers are too large to hold it. If this is the case, I reach for an ultra fine tweezer like point needle nosed polished stainless steel pliers with serrated jaws. In the past I used this plier to bend tiny eye bolts; however, I broke a tip off in an attempt to bend an eye bolt from too heavy wire so I purchased a second one. I purchased these pliers from the Tool Man (no longer in business); however, MicroMark has this plier available.
 |
| Ulta fine tweezer like serrated jaw. |
On all freight cars I build Kadee couplers are installed in the coupler pockets. I add an additional slight upward bend to the trip pin with a stainless steel wire loop bending plier for better operation. I purchased my plier from the Tool Man (no longer in business). Kadee has their version of this plier available as does MicroMark.
 |
| Pliers to adjust coupler trip pins if used. |
On many freight cars I build I install A-Line metal sill steps to replace molded plastic sill steps that have been cut off. The A-Line metal sill steps have a slightly round bend rather than a true right angle bend at the corners as a prototype may have. If I want the sill steps installed to have a true right angle bend I use a Xuron 575 Micro Forming plier to make the corner bends a true right angle. I do not heat the sill step in a flame prior to bending as other modelers have suggested. The Xuron 575 micro forming plier has unique forming blades to shape wire and light gauge strips of brass and aluminum. It can also be used for adjusting trip pins on Kadee coupler trip pins.
 |
| Xuron plier I use to square A-Line sill step corners. |
Of course, there are many pliers on the market that could perform some of the tasks mentioned above and I have purchased a few.
 |
| Needle nose plier in lower left corner I have used for many tasks before finding a better tool to preform the task. |
There is one more plier that I use; however, it is not for bending. Rather the plier was and is still used for breaking loose bottles caps on PollyScale and Floquil paint bottles for cap removal. My way of getting to the paint to hand paint details added to a freight car or to use with an airbrush to spray a freight car. The channel lock plier I call “the persuader.”
 |
| Channel lock "persuader" plier. |
You now know pliers I use to build a freight car for service on the Minneapolis & Northland Railroad Company. I have attempted to purchase the highest quality pliers my budget could afford. I encourage you to do the same. I believe quality tools help one build a better freight car.
 |
| Freight cars in McGregor Yard in Northfield, Minn. on the Minneapolis & Northland Railroad Company were built using pliers described above. |
 |
| Freight cars on the Great Northern Interchange in Minneapolis, Minn. on the Minneapolis & Northland Railroad Company were built using pliers described above. |
Thank You for taking time to read my blog. You can share a comment in the section below if you choose to do so. Please sign your comment with your name if you choose to leave one. Please share the blog link with other model railroaders.
Lester Breuer
.
No comments:
Post a Comment