 |
| Sunshine Models Prototype Data Sheet #77A |

The underbody was fitted next. Some sanding on the sides and ends was required to obtain a proper fit. After fitting, I attached Kadee #262 narrow "whisker" coupler boxes with Kadee #148 "whisker" couplers installed with super glue to hold them for drilling. I drilled the bolsters and coupler pockets for 2-56 screws and added the Athearn, # 99002, 2-56x1/4" screws to the coupler boxes. Next I added weights, electrical outlet box punch-outs, to bring the car weight to 3.8 ounces. Finally, Accurail trucks were installed with Atheran, #99002, 2-56 screws to represent the five spring package cast side frame style. A Kadee, #208, thickness .015" fiber washer was added on each bolster to obtain correct coupler height.

The underbody was now glued to the car body to complete the basic car for final detailing. Brake components were installed. I replaced the control valve and brake cylinder mounting bracket in the kit with spares from another Sunshine Models kit. A slack adjuster, cut form 2x2x14" scrap styrene was attached to the center sill for attaching the floating brake lever. Brake levers cut from Evergreen, #8108, 1x8" and #8106, 1x6" strip styrene were added. Brake lever hangers were bent from Detail Associates, #2503, .010" diameter brass wire. Brake rodding was made using Tichy, #1106, .0125" phosphor bronze wire (PBW) to which clevises, half of a Tichy turnbuckle, #8021, were added to attach to the rodding to the brake levers. Chain, attached to the brake rod via an eye bent into the brake rod, is A-Line #29219,40 links per inch.

Detailing of the car body began with the roof to which I installed the longitudinal running board with Formula '560' canopy glue and super glue. I left the install of the longitudinal running board extension brackets as the first step on the end detailing. I made latitudinal running board support brackets from .005"x.040" brass shim stock to which I glued the latitudinal running boards. Prior to gluing the latitudinal running boards to the supports I had attached the kit provided corner grab irons using Yarmouth Model Works, YMW 256, etched eyebolts for corner brackets.
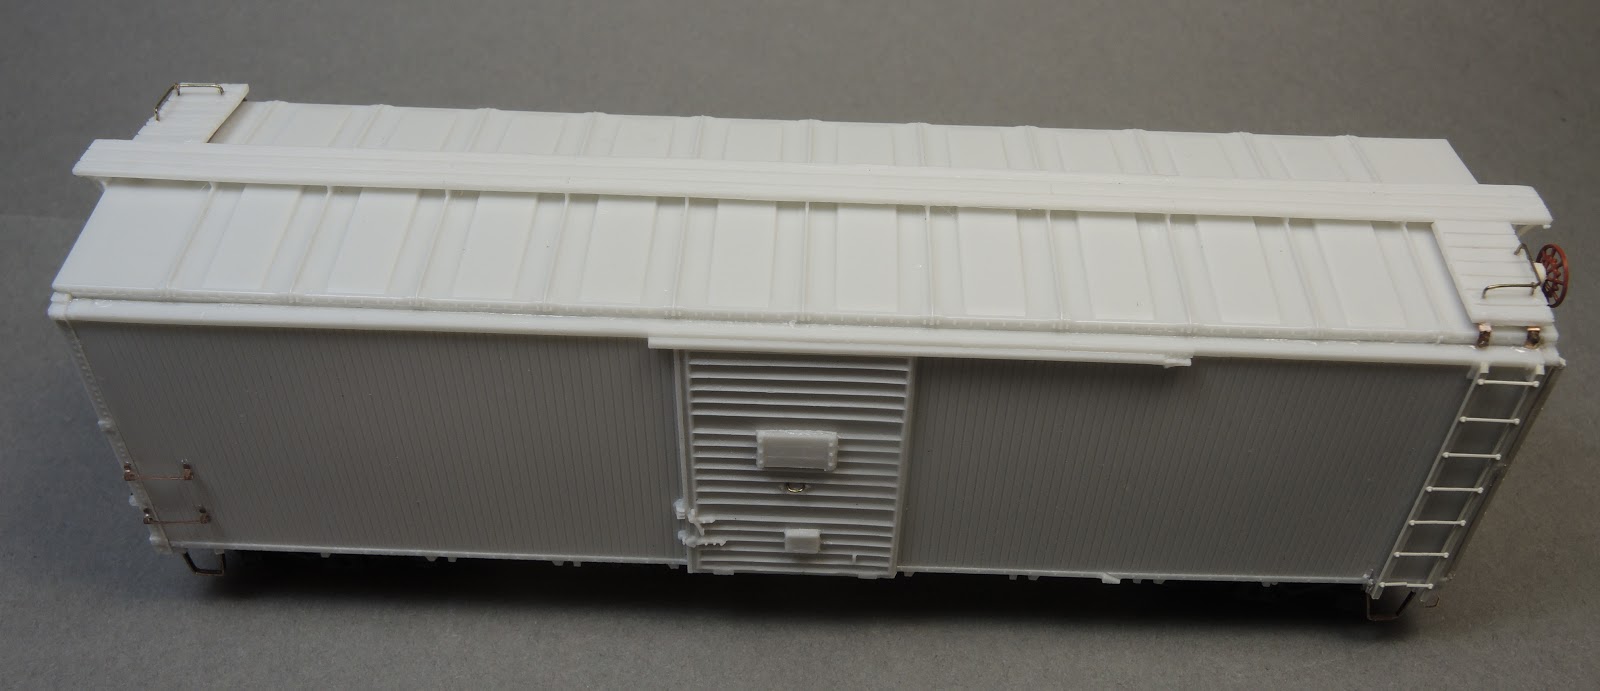
Next I began adding the "B" end detail by installing the longitudinal extension running brackets made using Evergreen, #8102, 1x2" strip styrene. To easily find the length of the brackets, I use a 4 inch caliper to obtain the length. The ladders were installed next. Prior to installing the end ladders I always install the side ladders first to allow rung ladder alignment on the end ladders with the side ladders. I installed a Plano Model Products, #131-12, metal etched brake step next. The kit provided brake housing, chain, and bell crank followed. The molded brake rod was cut off at the end of the chain and replaced with a Detail Associates, #2505, .015" diameter brass wire one. A Sunshine Models resin retainer valve and retainer line, Tichy Train Group (Tichy), #1100, .008" diameter PBW with brackets, a "U" bolt shape bent from .010" diameter wire using a Xuron wire bending plier were installed. A Kadee #2030 Ajax brake wheel followed. Sill grab irons, Tichy, #1106, .0125" diameter PBW were installed. The special bracket grab iron on the right was made using a plastic bracket kit grab iron cut in half, gluing a half grab iron with bracket to the right side of the grab iron location, cutting off the molded grab iron portion with a sprue nipper leaving only the bracket, and finally installing a grab iron, bent from Tichy, #1106, .0125" with only one leg and rung installed in the right side location. Yes, a bit of work to create this special end grab iron. A Evergreen, #291 .060" angle, about a 1/4" in length, was glued next to the push pole pocket plate in the lower left corner and shaped with a sprue nipper to form the uncoupling lever bracket. The uncoupling lever was bent from Tichy, #1106, .0125" PBW, and installed. With the "B" end complete, the same extension running board brackets, grab irons, special bracket grab iron, uncoupling lever bracket and uncoupling lever were installed on the "A" end.

The side details were added next. The ladders, as I said above, were already installed so I began with the left side grab irons. I used Detail Associates, #6209, 22" wide bracket grab irons rather than the kit grab irons. Sill steps provided in the kit; however, bent into the shape of the prototype per photos, were installed. The molded on door handle was carved off and replaced with one bent from Detail Associates, #2503, brass .010" diameter wire. Placard boards included in the kit were installed on the doors and on the ends.

Detailing complete, I moved the car to the paint shop. The car body was first washed with a makeup cotton swab dipped in 91% isopropyl alcohol. Once dry, the underbody was sprayed with Vallejo Model Air, #71.054, Dark Grey Black ( tarnished black). The car body was sprayed with Polly Scale, #414350, mineral red. I used the last of my Polly Scale mineral red so in the future I will use a Vallejo Model Color mix of 2 parts Black Red, #70.859 and 1 part Flat Yellow, #70.953. No matter what water base paint I use, it is thinned with a custom thinner mix of distilled water, Vallejo air brush thinner and flow improver. After a couple of hours the car body is sprayed with Model Master,4638, Gloss Clear Acryl for a decal application surface. Decals in the kit, except for the Slogan "Main Street of the Northwest" from Microscale set 87-184,were applied using Microscale Set and Sol decal setting solution. You may experience some frustration as I did when applying the three layer Mondad decal. And, you can see I also had trouble with the old Microscale slogan on this car. I plan to remove the slogan and attempt again as I have extras. Once the decals were dry, a single-edge razor blade was used to cut through the decals on the board lines and again coated with Microscale Sol and Walther's Solvaset decal setting solution. And, when dry the car body was sprayed with Model Master, 4636, Flat Clear Acryl to protect the decals.
 |
| Car sitting on GN Interchange |

 |
| NP 9978 built in 2014 on GN Interchange |
 |
| NP cars on GN Interchange waiting delivery |
I wish thank Frank Hodina of Resin Car Works for the creating the masters for these kits.
Thank You for taking time to read my blog. You can share a comment in the section below if you choose to do so. Please share the blog link with other model railroaders.
Lester Breuer
Nice work, Lester! You are building quite the fleet! - Eric H.
ReplyDeleteThank You for the kind words. Yes, it is continues to grow.
ReplyDeleteLester
Nice work Lester. I am interested in your paint thinner. What are the proportions of water, air brush thinner and flow improver? Also what is your usual proportion of thinner to paint?
ReplyDelete