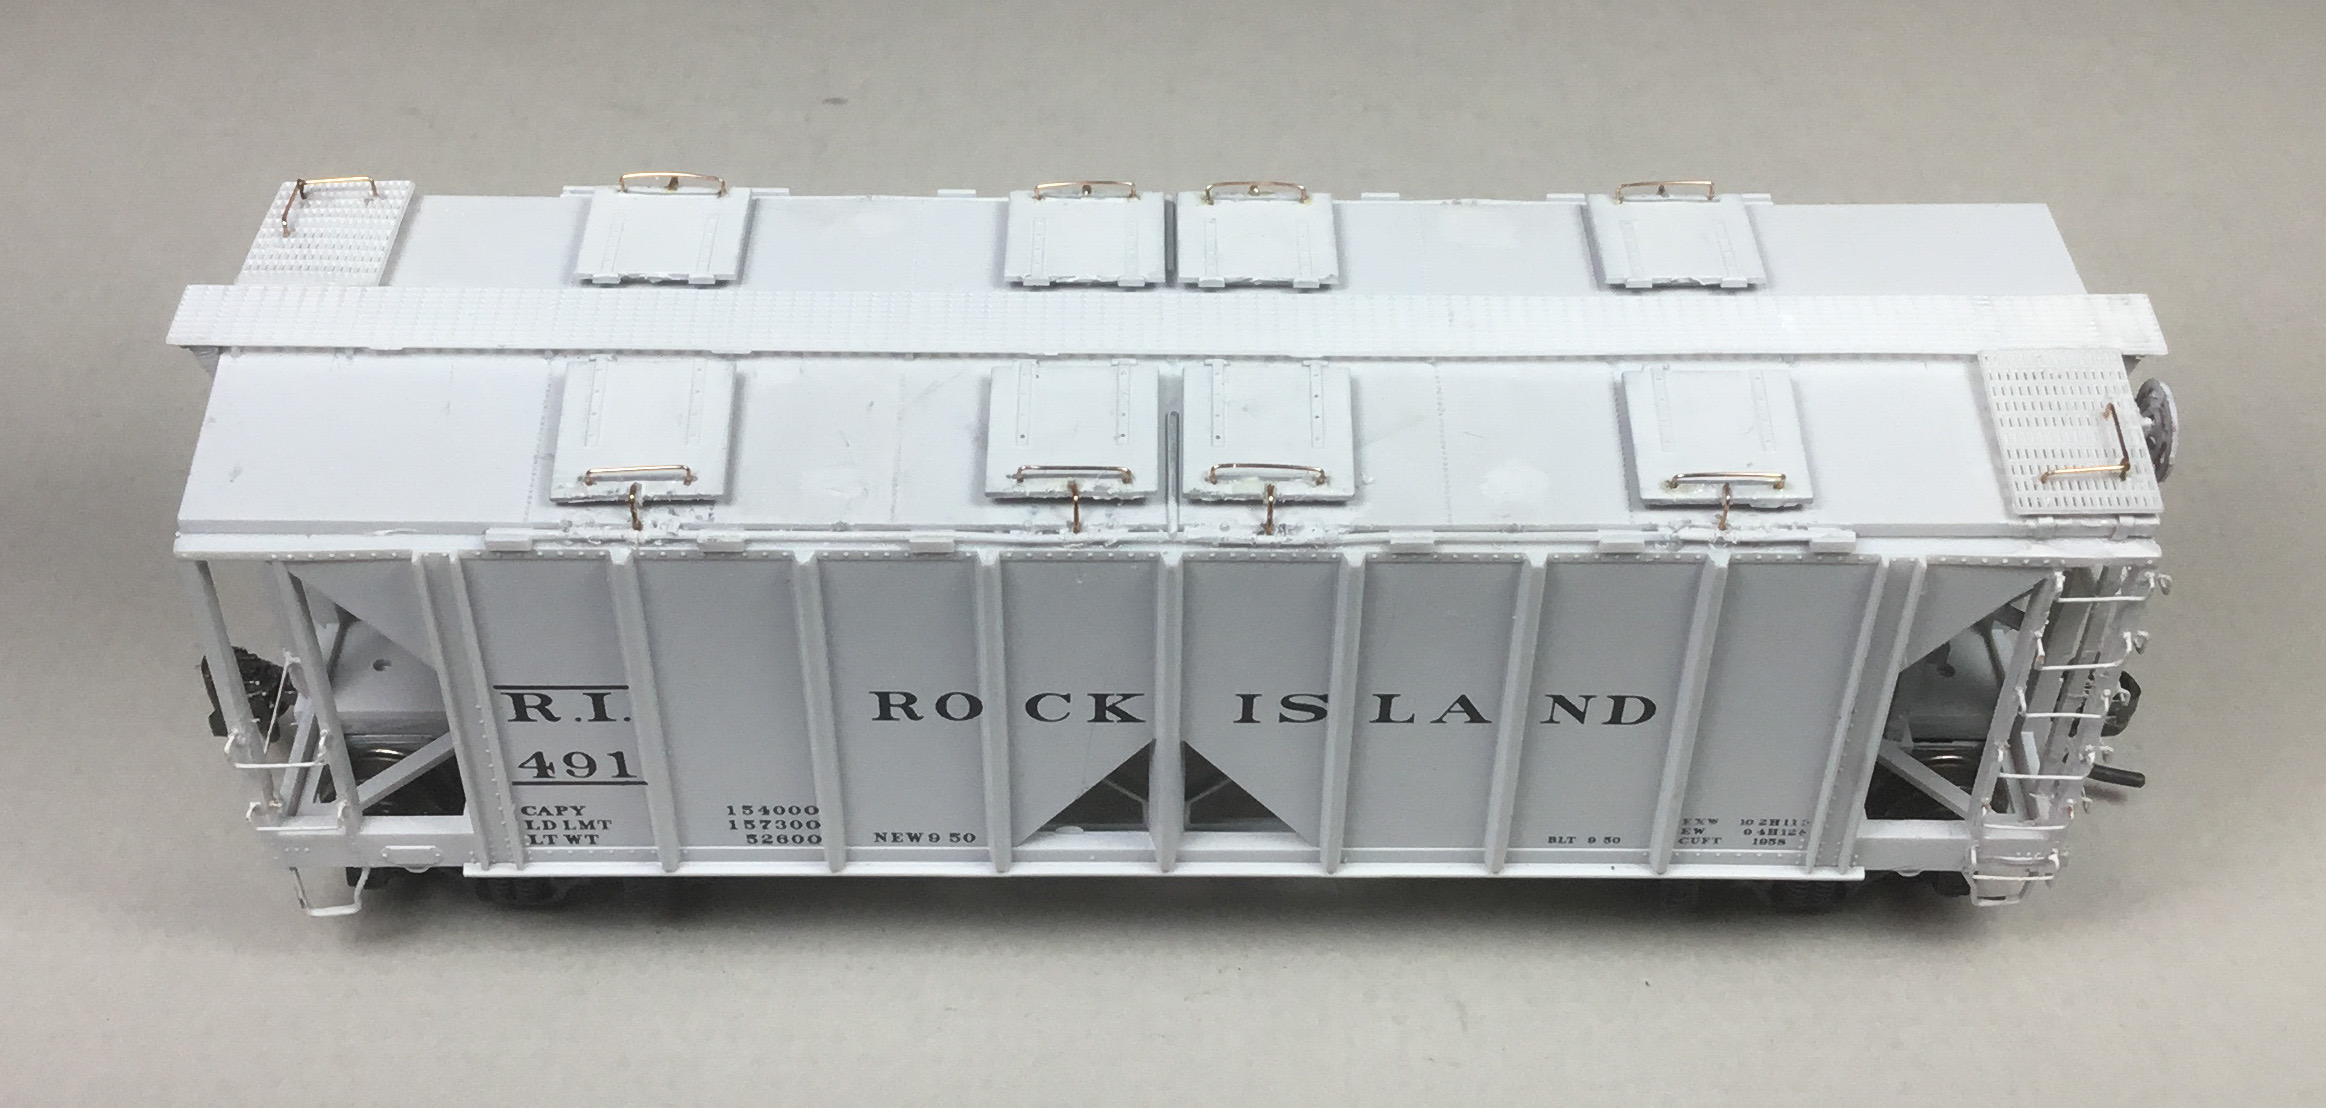
Wanting a build and upgrade that did not require painting and decal application, I felt Bowser Rock Island 70 Ton 2 bay covered hopper, numbered 491, kit 55653, was a good choice. When I compared the Bowser hopper to prototype photos the car body, hatches and lettering were an excellent match to the prototype.
Rock Island 491, built by American Car & Foundry in 1950 , class LO, was one of 170 cars assigned to series 331-449. The cars had an outside length of 37 feet 9 inches. Features included triangular side openings, metal Ajax running boards and brake step. Eight Type 1 hatches for loading and two bays with with four discharge gates for unloading. Ureco power hand brakes.
 |
| RI hopper 436 Steve Hile Collection (Click on this or any image to enlarge) |
A color photo of Rock Island hopper 491 appears in the Rock Island Color Guide to Freight and Passenger Equipment (Morning Sun Books Inc., 1996).
I built the RI hopper using the instructions; however, making some changes. The first step in the instructions is to “install brake gear to underframe.” Since I wanted to add brake component piping I drilled all brake components with a #79 drill to accept piping. I modified the brake gear mounting areas to better match prototype mounting and installed the kit provided brake components. Next I installed the piping as follows:
- piping from air reservoir to AB valve, Tichy Train Group (Tichy) .010” diameter PBW
- Piping from brake cylinder to AB vale, Tichy .0125” diameter phosphor bronze wire (PBW)
With piping complete back to the instructions to install the brake lever (kit) and end braces (kit). Now the underframe was installed into the car body. I installed Kadee #148 couplers and kit trucks with Intermountain 33 inch metal wheels installed.
 |
| Piping installed. |
The kit weights were installed with Permatex Silicone clear adhesive sealant and roof was installed; however, not glued as the car I felt needed more weight. The car was put on a postal scale and as I suspected the car was light. So I added weight using metal electrical box punch outs to bring the car weight to 3.8 ounces. Now, the roof was glued on.
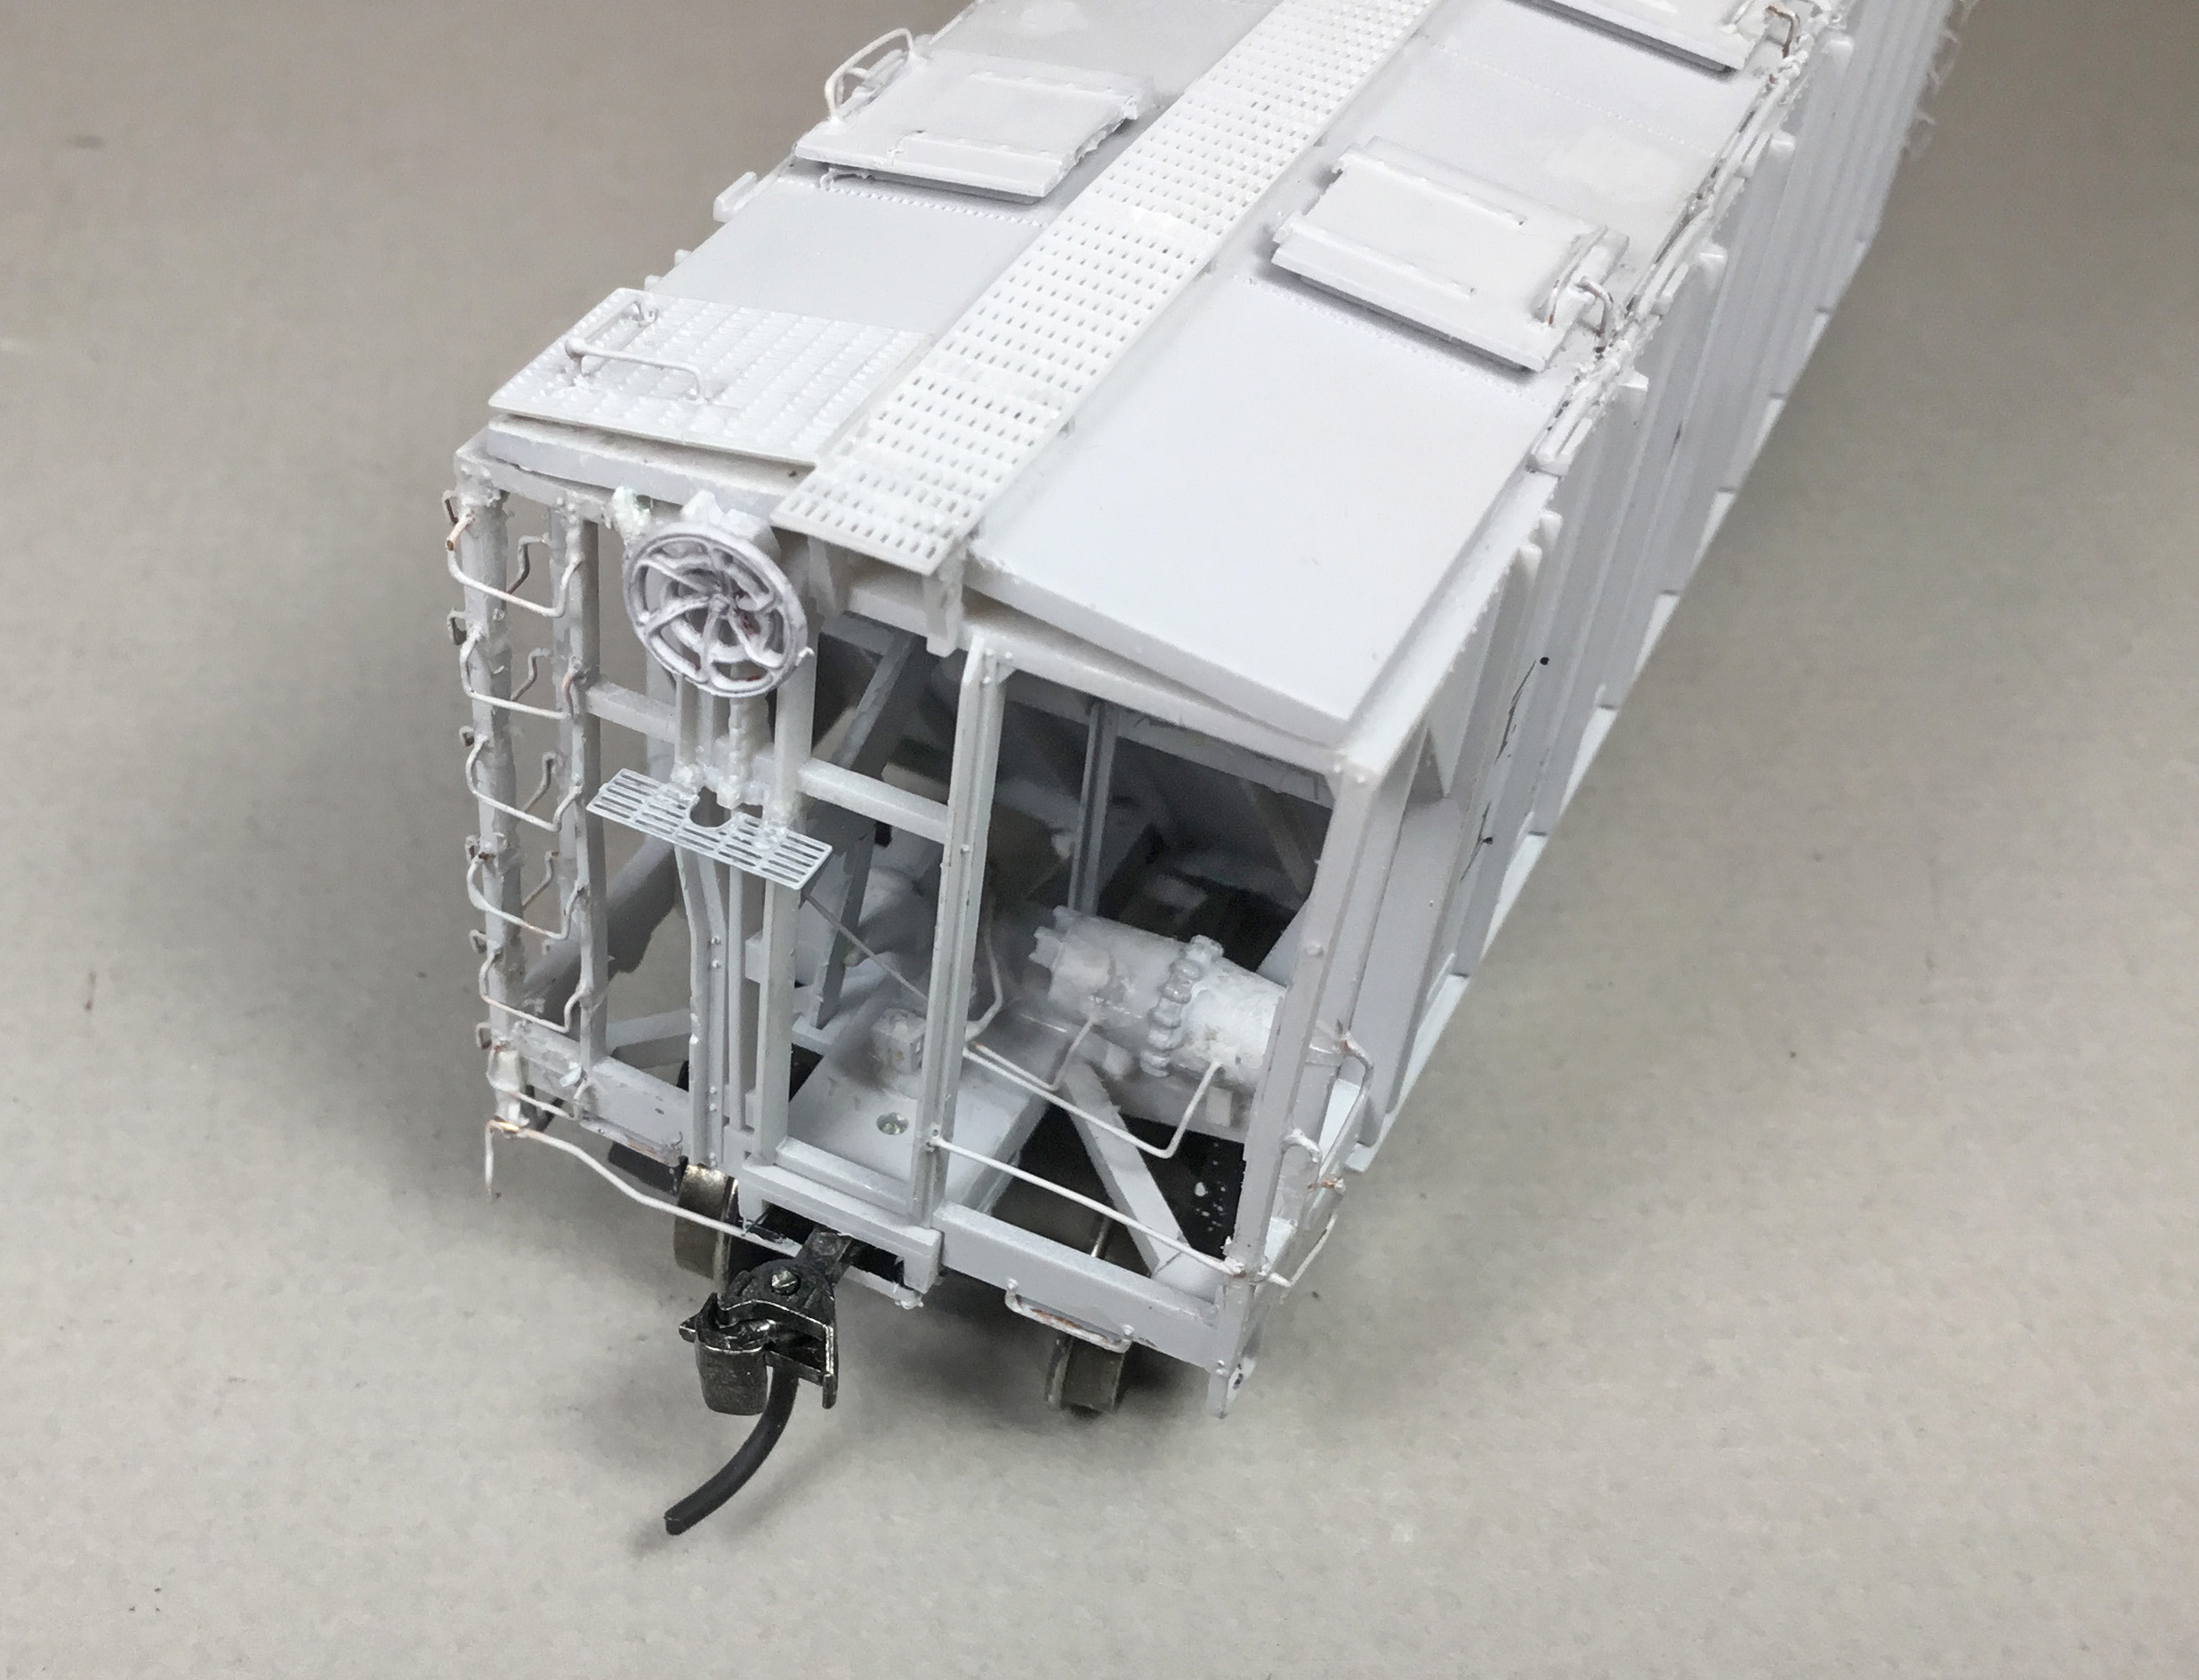
I went back to the “B” end and installed a resin retainer valve from parts drawer and retainer line, Tichy #1100, .008” diameter PBW. I also installed the kit brake wheel which was later removed and the correct Ureco brake wheel installed.
 |
| Roof, retainer valve and line, and brake wheel installed. |
I moved on to roof work. On the roof I installed the roof hatches and an Athearn wood running boards in error. At the time I thought this series had a wood running board as RI hopper series 500-559 built in 1940. Wrong! Later the wood running boards were removed and the kit provided Apex running boards were installed.
 |
| Hatches and incorrect wood running board installed. |
On the underbody the hopper trim rings (kit) and hopper gates (kit) were installed.
 |
| Trim rings and hopper gates installed on bottom of hoppers. |
Next the most difficult part of RI hopper 491 upgrade; the grab irons and ladder rungs install. All the molded on grab irons and ladder rungs were removed with micro shear flush cutter and single edge razor blade (SERB). I do not remove the all the ladder rungs at once. Rather I remove one on the side and replace it with a wire one and then on the hopper end I remove the next one down and add the wire one. A #80 drill chucked in a #4486 chuck on a 8050 Micro Dremel is used to drill the holes for the new grab irons. When drilling the stiles on ends you have to be very, very careful as they will break easily. Therefore, you are removing and replacing every other ladder rung to help maintain ladder stile strength. New grab irons and ladder rungs were bent from Tichy #1101, .010” diameter PBW.
 |
| Grab irons and wire ladder rungs installed. |
 |
| Grab irons and ladder rungs installed on ends. |
Back to the “B” end to install uncoupling lever brackets. The brackets were cut from scrap Plastruct angle and installed. And, the molded on sill steps were cut off and replaced with A-Line #29002, style C sill steps.
 |
| Note uncoupling lever bracket on left side of sill. |
 |
| Note uncoupling lever brackets next to sill step. |
 |
| Wire sill steps have replaced molded on ones. |
With grab irons and ladder rungs installed I hand painted detail parts installed with Vallejo/Micro-Mark Undercoat Light Gray #29013X2.
 |
| Added detail items to upgrade hopper painted. |
At this time in the build I sent a photo of my progress to Steve Hile asking for his comments. He sent back a photo of prototype (see above) hopper RI 436. A great photo that made me aware I needed to make some changes to match the prototype. Changes I needed to make were: Apex running boards, Apex brake step, and Ureco brake wheel. The rework to complete the build was started.
First the roof. The wood running boards were removed and the Apex running boards (kit) were installed. The molded on running board grab irons (handholds) were cut off with a SERB and #79 holes drilled to receive new wire grab irons bent from Tichy # 1101, .010” diameter PBW. The molded on handholds and locks were cut off and replaced. Like other grab irons these were also cut off with a SERB and replaced with ones bent from Tichy #1101, .010” diameter PBW.
 |
| Note new hatch handholds and latches. |
 |
| Note new Apex running boards with wire grab irons added on laterals. |
Brake wheel replacement was next. I removed the installed kit brake wheel. A Detail Associates Ureco Brake Wheel, # BW 6403, was installed.
 |
| Ureco brake wheel installed. |
Now brake step was replaced. The molded on brake step was cut off with a SERB. The molded on brackets are left in place. A Plano Model Products #11322 Apex brake step was installed on the molded on brackets.
 |
| Apex brake step replaced molded on brake step. |
Finally I completed the “B” work installing the uncoupling levers bent from Tichy #1106, .0125” diameter PBW.
 |
| Uncoupling levers are installed. |
With the car body changes done it was onto the underbody changes. Brakes levers cut from Evergreen strip styrene were installed. The brake cylinder lever was cut from Evergreen #8108 1” x 8” and the floating lever was cut from #8106 1” x 6”. Brake lever hangers, plastic grab irons, were installed. And, the brake rods cut from Tichy #1106 .0125” diameter PBW installed. MEK Goop (plastic melted in MEK) was used to make the brake rod connecting clevises.
 |
| Underbody brake levers and brake rods installed. |
Rock Island covered hopper 491 was ready for service on the Minneapolis & Northland Railroad Company, “Serving today, Shaping tomorrow.” A car card was made for RI 491 , the final step to put the cars in service on the Minneapolis & Northland Railroad Company Railroad.
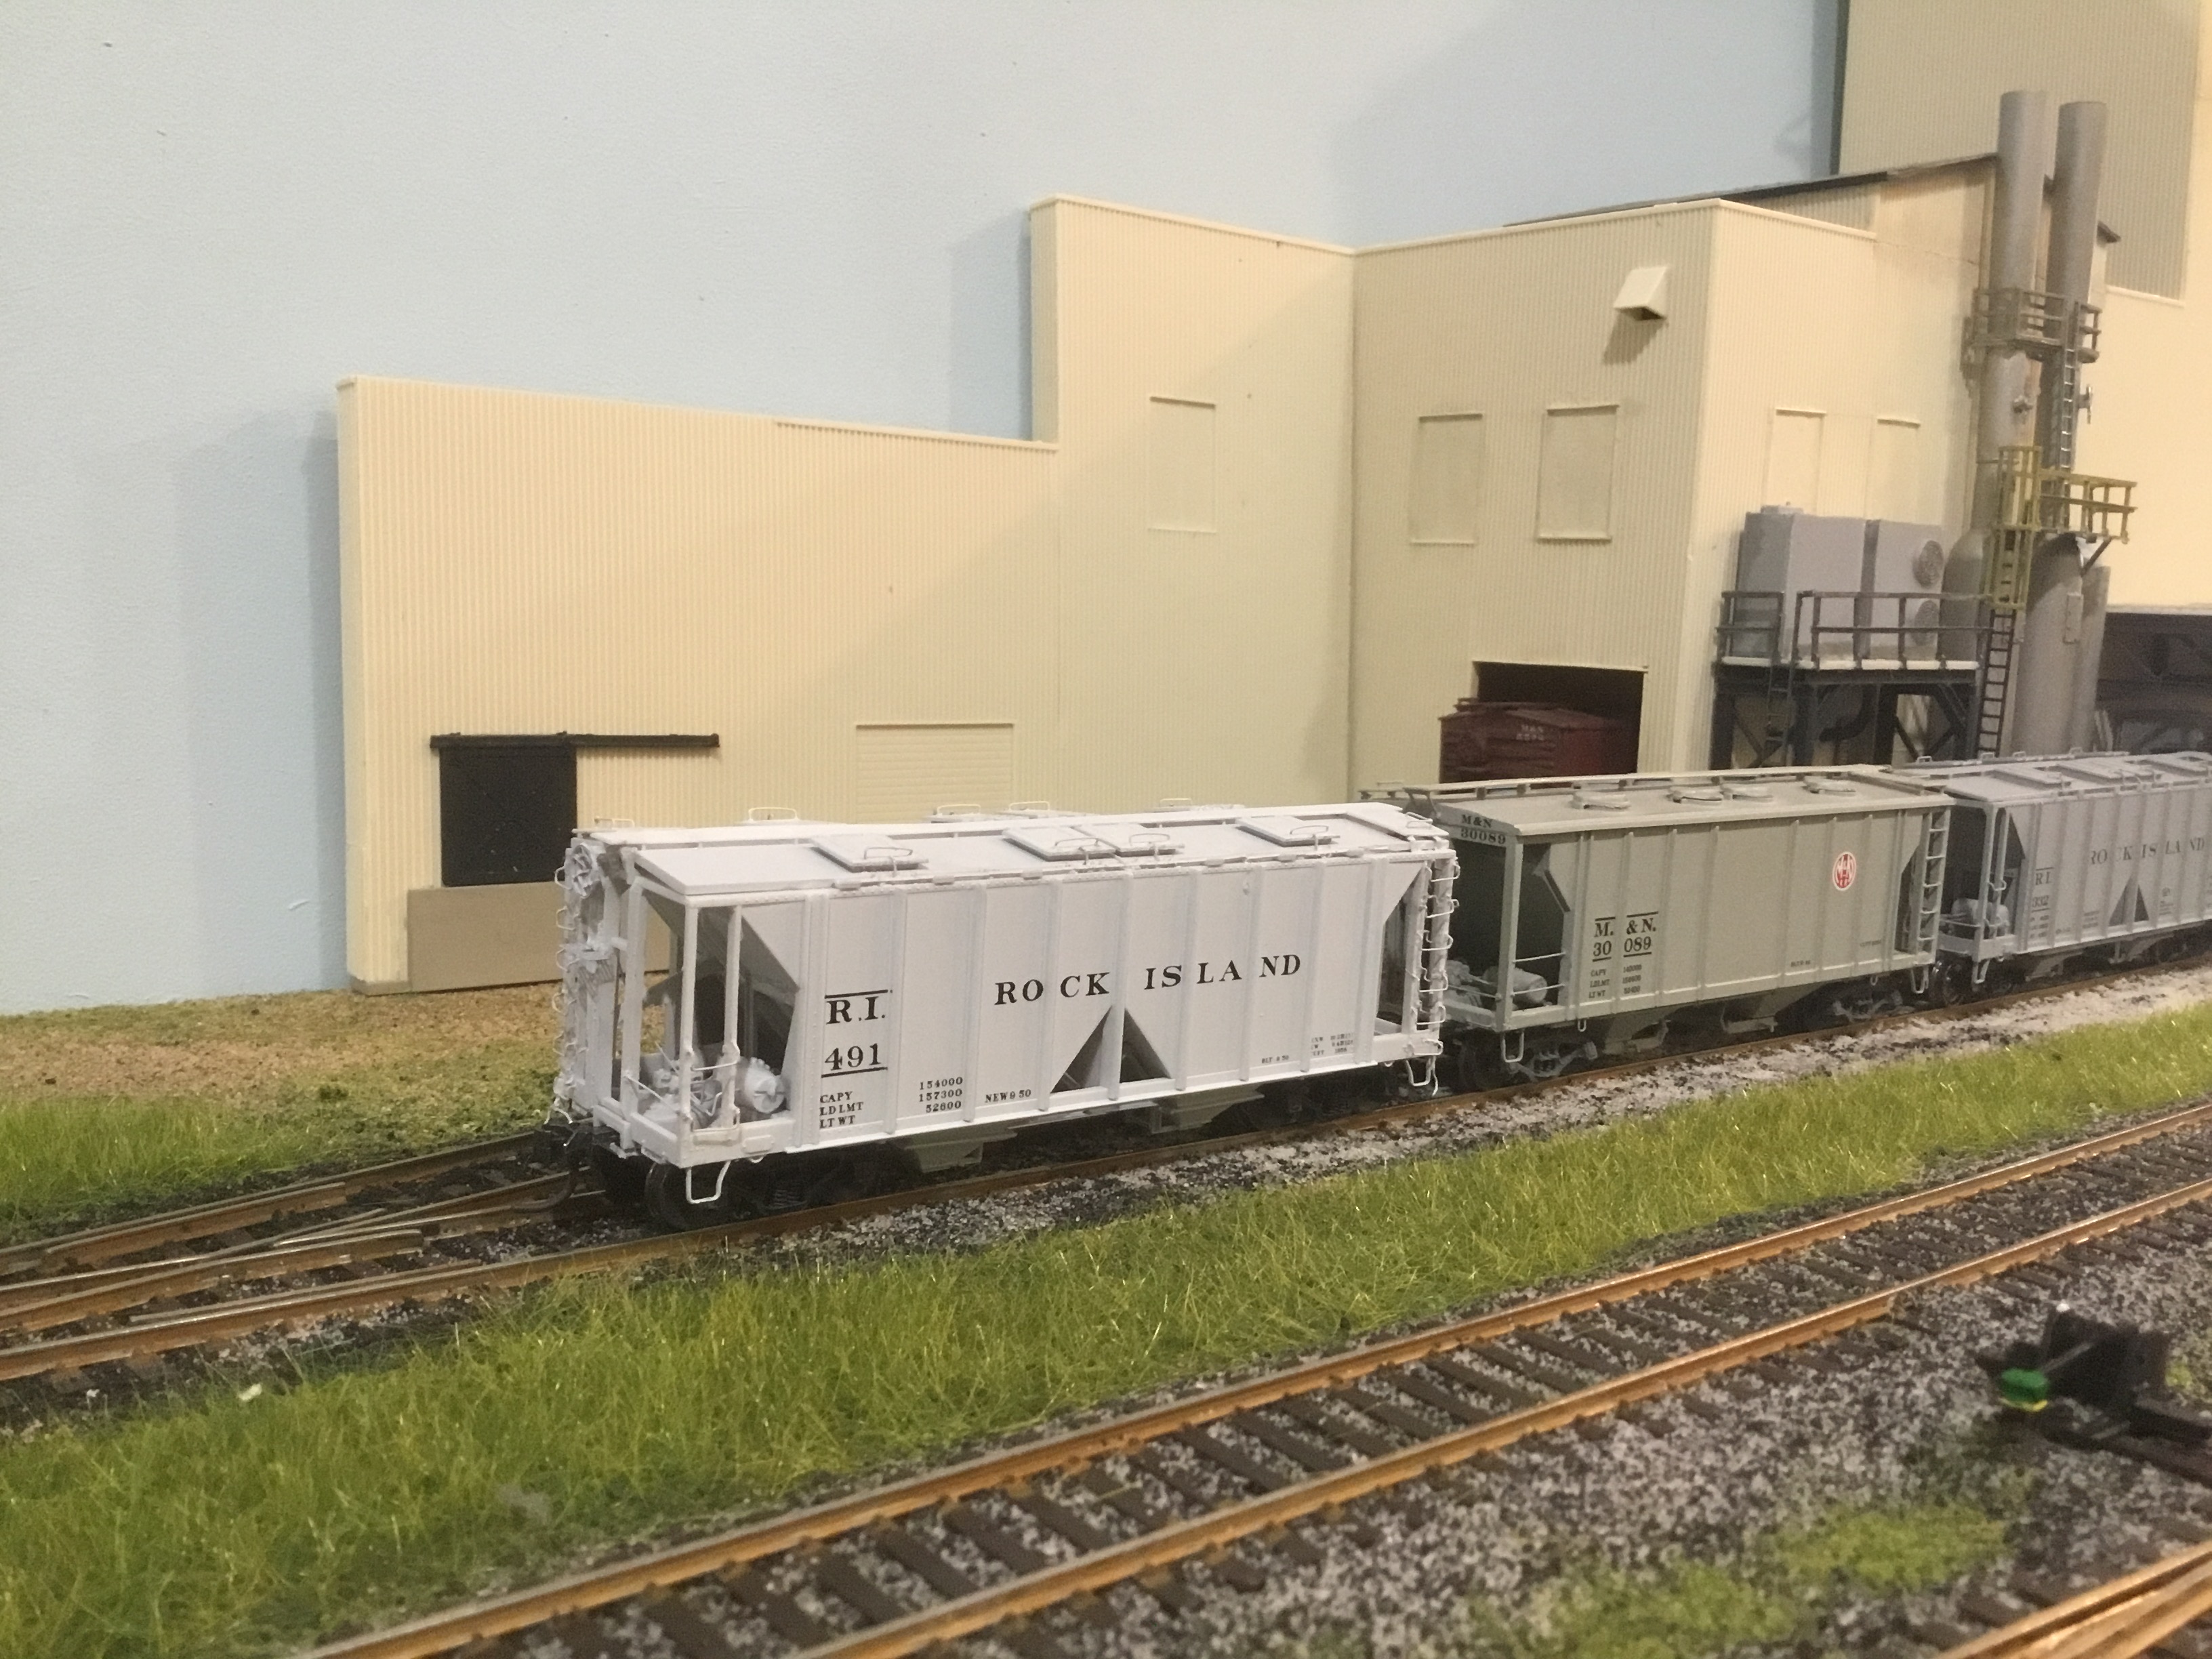 |
| RI hopper 491 being used to deliver sand to Anchor Glass Plant in Randolph, MN |
 |
| RI hopper 491 being used to deliver sand to Anchor Glass Plant in Randolph, MN |
 |
| RI hopper 491 being used to deliver sand to Anchor Glass Plant in Randolph, MN |
 |
| RI hopper 491 being used to deliver sand to Anchor Glass Plant in Randolph, MN |
I want to say, “Thank You” to Steve Hile for providing information and photo help with this build and upgrade. Definitely appreciated as without his help this build would have produced an inaccurate hopper. Another Thank You to Steve for permission to use RI hopper 436 photo in this blog post.
Thank You for taking time to read my blog. You can share a comment in the section below if you choose to do so. Please sign your comment with your name if you choose to leave one. Please share the blog link with other model railroaders.
Lester Breuer
.
Thanks Les, I enjoy the information highlighting details I can use in S Scale.
ReplyDelete