Sunshine Models resin Southern Pacific (SP), kit 38.29, was obtained from Bill Pardie, a friend reducing his inventory of to build kits. The flat kit was for a single-sheathed SP boxcar, SP class B-50-15, rebuilt between 1936 and 1942 for merchandise service, later called Overnight Service. I decided to build it immediately as I have only a few Southern Pacific Freight Cars in my freight car fleet; however, not as a car in the Overnight Service paint scheme or number series. After review of the prototype data sheet (PDA) #38A in the kit and another information sheet in the kit supplied by Tony Thompson with major features of cars in selected years for the SP class B-50-15/16 boxcars, I decided I would build a rebuilt boxcar numbered 32620 in SP series 31560-32659. The rebuilt cars had the original wood sheathing replaced with steel panels. Photos of cars with wood and steel panels are in the prototype data sheet. Additional photos are found in Steam Era Freight Cars Reference Manual, Volume One: Box & Automobile Cars (Speedwitch Media, 2006, 2007) and Southern Pacific Freight Car Painting and Lettering Guide includes PFE (Southern Pacific Historical & Technical Society, 2016). In addition, I received a 3/4 photo from Bill Pardie and “B” end photo from Ted Culotta I used for the build.
The prototype for my single-sheathed (SS) wood box car was built in 1926 by Pullman for the SP with “Pratt” truss framing of “hat” section posts and diagonals like the A.R.A. design. The SP class B-50-15 cars had an inside height (IH) of 9’ 1” instead of the A.R.A. 1924 design 8’7” IH. The car had Murphy 7/9 ends, no end door, a Hutchins Dry Lading roof, Carmer uncoupling levers, single-sheathed “Pratt” truss framing with wood sides replaced with steel panels when rebuilt and steel doors added. Over time modifications included Equipco power hand brakes replacing horizontal brake wheel, AB brakes replacing KC brakes and original T section trucks replaced. Since I did not have a specific photo of the car with number I chose and aware that tracking of specific changes to specific cars is difficult, I added these modifications to my SP box car build. In addition, the paint scheme for SP box car 32620 would be SP paint and lettering adopted in 1946 with the full name used.
 |
Photo of Southern Pacific Box Car 15748 on Sunshine Models Prototype Data Sheet #38A |
As with every flat kit I began the with the resin car body assembly consisting of sides, ends, and in this kit the roof. The kit roof, a radial Murphy roof not correct for car number 32620, was replaced with a correct resin Hutchins Dry Lading roof cast in the M&N Shops. Of course, a plastic Hutchins Dry Lading roof could be used. The cast resin roof being a little short was extended to proper length with layers of styrene added to each end and sanded to shape.
 |
| Car Body assembled with Hutchins roof. (Click or tap on this or any image to enlarge) |
With the car body assembled, the basic underbody work was done after underbody fitted to car body. Cross ties, cross bearer rivet plates, and bolster cover plates were installed. Coupler pads and bolster center plates were drilled and tapped for 2-56 screws. Kadee #262 narrow draft gearboxes with Kadee #148 whisker couplers installed were installed with Fastenal 2-56 x 3/16” screws.
 |
| Cross ties, cross bearer rivet plates, bolster cover plates and couplers installed. |
Baffles cut from Evergreen .060” sheet styrene were added inside car body to prevent inward bowing of car sides in the future and to support the underbody upon install. Trucks with InterMountain 33” metal wheels were installed with Fastenal 2-56 x 1/4” screws. Car was weighted to 3.8 ounces with electrical metal box punch outs attached with Permatex clear silicone adhesive sealant and the floor was installed and glued into car body. Tichy Train Group (Tichy) brake components and brackets were installed.
 |
| Floor ready to install in car body. |
Now I began the work on the car body. First ladders provided in the kit were cut to length and installed on the sides and ends. Ladders rungs on the end ladders should line up with the side ladder rungs.
 |
| Ladders installed. |
Next, I cut board gaps in the kit provided wood longitudinal running board and installed it with Formula 560 Canopy glue and added weight to keep it flat while glue dried. The longitudinal running board end braces, cut from Evergreen, #8102, 1” x 2”, were installed and fasteners were made with MEK Goop. I made mounting brackets for the latitudinal running boards (corner platforms, corner walks, laterals). I cut two strips from photo etched scrap brass for each corner platform longer than the corner platforms to allow a portion to extend beyond the back and front. The brass strips were installed on the underside of each corner platform near the sides. The corner platforms were installed with the back strip extensions glued under the longitudinal running board and the front extensions bend over the roof edge. Corner grab irons in kit were installed with Yarmouth Model Works photo etched eye blots without shoulder for corner legs.
 |
| Running boards installed. |
Car body details on the sides were installed next. Straight grab irons bent from Tichy #1101, .010” diameter phosphor bronze wire (PBW) were installed on the left side of the door. Based on prototype photos sill steps, A-Line #29002, style C, were installed rather than the incorrect sill steps, style A, in the kit. I do not install the doors at this time as the door area provides an area to hold the car when necessary during build without worry of a dirty finger leaving residue since area will be covered by door before going to paint shop.
 |
| Grab irons and sill steps installed. |
I continued the build adding details on the ends. On the ends grab irons, Tichy #1101, .010” diameter PBW, Carmer uncoupling levers, metal etched in kit, Carmer mounting bracket, cast resin part in kit and placard boards, in kit were installed on the ends. The “B” end remaining details were installed next. “B” end details installed are as follows:
- brake step, Tichy #3013 in kit
- brake step supports, Evergreen #8102, 1” x 2” and MEK fasteners
- brake housing and chain, Tichy set #3013 in kit
- brake rod step was bent from scrap photo etched brass
- brake rod, Tichy #1102, .015” diameter PBW
- retainer valve, resin cast in M&N Shops
- retainer line and brackets, Tichy #1100, .008” diameter PBW
- fasteners, MEK Goop (MEK with scrap plastic melted in it)
- brake wheel, Kadee Equipco #2041
 |
| "B" end details installed. Adjax brake wheel to be changed to Equipco. |
Only underbody details and doors needed to be installed to finish the build. On the underbody the following details were now added:
- brake cylinder lever made from Evergreen #8108, 1” x 8” strip styrene
- floating brake lever made from Evergreen #8106, 1” x 6” strip styrene
- brake lever hangers, wire grab irons in kit
- Universal slack adjuster cut from resin strip in parts box
- slack adjuster brackets, made from resin flash
- piping from air reservoir to control valve, Tichy #1101, .010” diameter PBW
- pipe from brake cylinder to control valve, Tichy #1106, .0125” diameter PBW
- brake rods, Tichy #1106, .0125” diameter PBW
- brake rod clevises, Tichy turnbuckles #8021
- chain, A-Line #29219, Black 40 links per inch (not in kit)
- train line, .018” diameter floral wire
- dirt collector, Tichy, set #3013
- train line couplings, dirt collector tee, and fasteners made with MEK Goop
 |
| Finished underbody ready for paint. |
With the “B” end and underbody finished I went back to finish the sides to add the doors before painting. Before installing the doors I carved off the cast on door handles and installed wire door handles bent from Tichy #1101, .010” diameter PBW followed by install of placard boards provided in kit.
 |
| Doors added. Car ready for paint. |
SP box car 32620 was ready for paint. The trucks and wheels were hand painted with Vallejo Model Color Black Grey, #70.862. The car underbody was sprayed Model Air Vallejo Dark Grey Blue, 71.054.
 |
| Underbody spray painted. |
The car body was sprayed Vallejo Grey Surface Primer 70.601. When dry, the car body was sprayed Vallejo/MicroMark Box Car Red, #2915X2, thinned 50% with a custom mix of distilled water, Vallejo air brush thinner #71.161 and Vallejo Airbrush Flow Improver 71.562. After paint was dry the car body was sprayed Vallejo Gloss Medium 70.470 to have a Gloss base for decal application.
 |
| Car body spray painted. Ready for decals. |
 |
| Car body spray painted. Ready for decal. |
After drying overnight, decals in kit, except for the herald from Microscale decal set 87-414, were applied. I used a photo of SP box car 32178 car as a guide to apply decals. Decals provided in the kit were soaked off in distilled water and applied to the car body where MicroScale Micro Set had been applied with a brush. After the decal was applied in the Micro Set and positioned the edges had MicroScale Micro Sol applied. Any excess solution was sucked away with the torn edge of a paper towel.
 |
| Decals ready to be applied. |
Again when dry, car body sprayed with Vallejo Gloss Varnish 70.520 to better hide edges of decals. Again when dry, the car body was sprayed with Vallejo Matt finish 70.520. And, again when dry, the car body was sprayed again with Vallejo Matt finish 70.520 to get the flat finish look I wanted.
 |
| Decals applied. |
 |
| Decals applied and brake wheel changed to Equipco. |
And, after Matt Varnish was dry, a light weathering with Artmatic eye shadow and Pan Pastels Paynes Grey Extra Dark 840.1 and Burnt Sienna 740.5 on trucks.
 |
| SP box car 32620 lightly weathered. |
 |
| SP box car 32620 lightly weathered. |
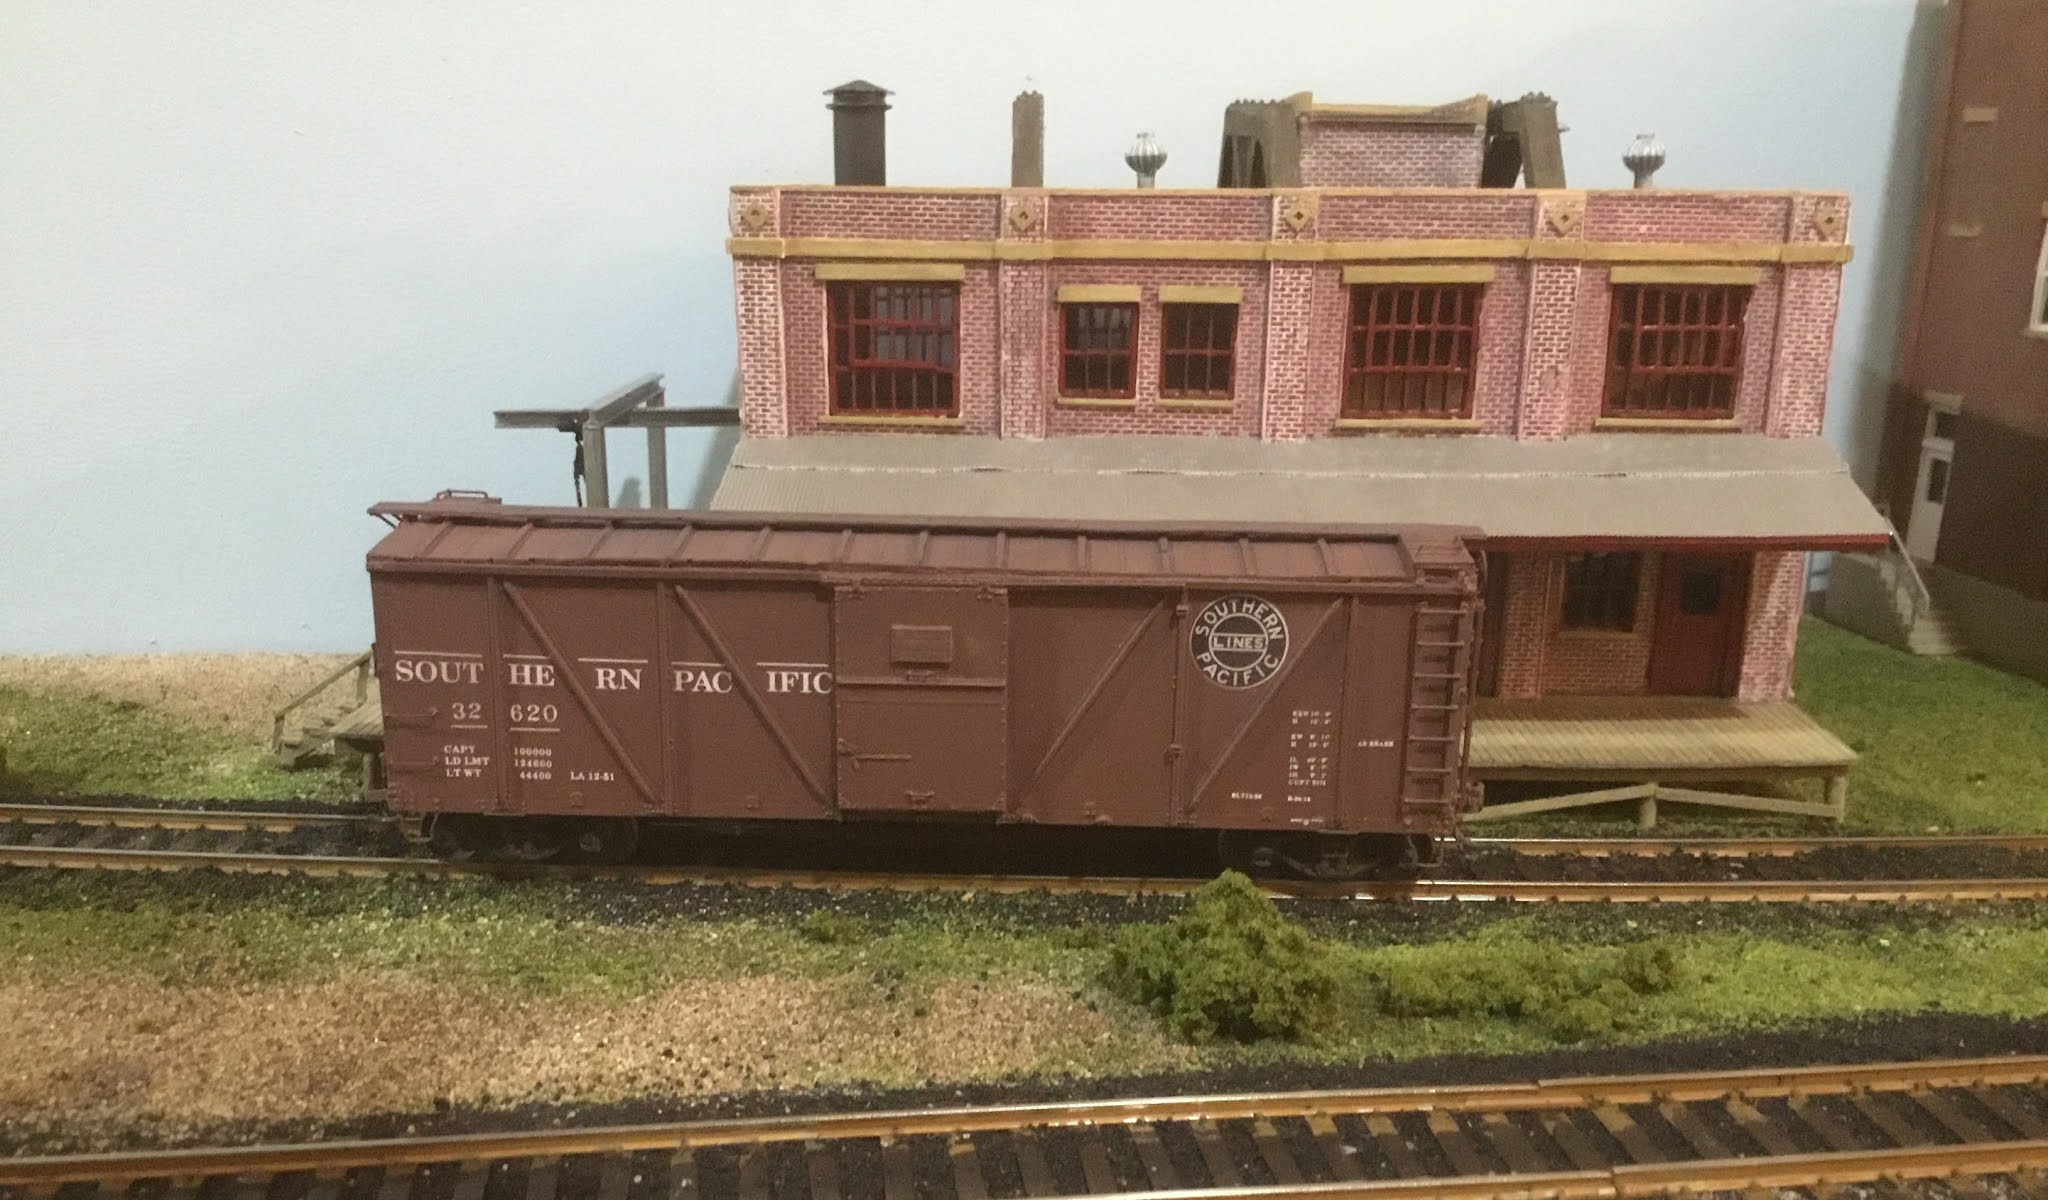
Southern Pacific SS box car 32620 with “Pratt” truss framing was ready for service on the Minneapolis & Northland Railroad Company, The Lakeland Route, “Serving today, Shaping tomorrow.” A car card was made for SP 32620, the final step to put the a car in service on the Minneapolis & Northland Railroad Company Railroad.
 |
| SP 32620 being unload at General Tire & Rubber. |
 | |
|
I want to say, “Thank You” to Bill Pardie for downsizing his freight car inventory and photo of SP box car 32178 to assist in lettering my build of SP box car 32620. And, a “Thank You” to Ted Culotta for his photo help with “B” end.
Thank You for taking time to read my blog. You can share a comment in the section below if you choose to do so. Please sign your comment with your name if you choose to leave one. Please share the blog link with other model railroaders.
Lester Breuer
.
Les, I always enjoy seeing your builds and learning from your techniques. Thanks for sharing. Ken
ReplyDeleteThank You for your kind words.
Delete