I purchased and put in inventory a National Scale Car mini-kit for a Chicago, St. Paul, Minneapolis & Omaha (CMO) 1937 AAR Modified Box Car 37640. When the following note was received from Bill Welch, my friend who died November 15, 2020, the build of CMO 37640 became the immediate project.
 |
| Email from Bill Welch (click or tap on this or any photo to enlarge) |
 |
| Bill Welch Chicagoland 2017 RPM |
Bill, a southern gentleman, an Ordained Minister, an excellent detail oriented modeler (extreme modeling) , inspired many modelers to improve their modeling skills, including me. After learning Bill moved to the hospital for cancer treatment, I was able to send in progress build photos to Bill prior to his passing. I am sad that Bill is no longer with us to view finished car photos or the car at a future RPM event. However, whenever I see CMO 37640 on the Minneapolis & Northland Railroad Company memories of times spent with Bill will come back. And, so will his words, "Model On Ya'll." Bill, my friend, Rest In Peace.
The National Scale Car mini-kit contains the following resin and photo-etched parts: 4/4 resin ends, Z26 Duryea underframe, slack adjuster, side sills, trust plates and Speedwitch Medial thin film decals. You install mini-kit items on an InterMountain Modified AAR boxcar you provide.
The prototype was built by American Car & Foundry in August 1945 for the Chicago, St. Paul, Minneapolis & Omaha (CMO) who assigned the first 300 cars to number series 37500-38098. The cars features included : a 10’ 6” interior height (AAR 1941/1942 revised/modified 1937 10’ 0” design), Murphy panel roof with Apex running board, 4/4 improved dreadnaught ends with poling pockets, Ajax brake type and unique Duryea Z26 center sill. The cars rode on ASF Ride Control (A-3) trucks. A photo of CMO 37836 is in the instructions. A photo of CMO 37662 with black ends appears in Steam Era Freight Cars Reference Manual, Volume One: Box & Automobile Cars (Speedwitch Media 2006,2007).
 |
| Ted Culotta Photo Collection. |
I began the build by removing the CB&Q lettering from the car body in the InterMountain modified AAR boxcar kit 41805-11 rather than stripping the paint. I used a scratch brush, 91% isopropyl alcohol and Walthers Solvet Set to to remove the lettering.
 |
| InterMountain kit I supplied with lettering removed. |
 |
| Tools for removing lettering. |
The next task was to remove car body sill tabs and install the resin sill tabs in the kit. The underbody work could now begin. I started by cutting molded plastic parts from bolsters and installing them. With the bolsters installed the Duryea Z26 center sill was built. I followed the instructions and photos to complete the Duryea Z26 portion of the build. After the center sill was finished the remaining underframe resin parts as cross bearers were installed.
 |
| Sill tabs, bolsters and Duryea underframe installed. |
I took a break from the underbody and installed the 4/4 improved dreadnaught resin ends in the kit. The ends should be installed before the draft gear boxes are mounted. With ends installed I went back to the underbody and I installed a train line, .019” diameter green colored floral wire. Next I installed the kit photo etched brackets for mounting brake components.
 |
| Kit provided sill tabs and ends installed. |
 |
| Brake component brackets installed. |
 |
| Better view of "Z" angles and brackets for brake cylinder pad. |
Now the parts I supplied were added beginning with brake components. I installed Tichy Train Group (Tichy) brake components from set #3013.
 |
| Brake components installed. |
After the brake components were mounted, the following parts were installed:
- Kadee #262 narrow whisker snap-together gearboxes with Kadee #142, overset shank whisker couplers, were installed with Fastenal 1/4” screws. If you want to use the normal #148 or #158 couplers you can by removing the square center plate on the bolsters. It also allows the car to ride lower to the tracks.
- Resin slack adjuster in the kit installed on the back of the brake cylinder
- Piping from the air reservoir to AB valve, Tichy #1101, .010” diameter phosphor bronze wire (PBW)
- Pipe from the back of the brake cylinder to the AB valve, Tichy #1106, .0125” diameter PBW
- Brake levers cut from Evergreen strip styrene, #8108 1” x 8” for brake cylinder lever and #8106 1” x 6” floating lever
- Brake lever hangers, plastic grab irons cut from other cars
- Brake rods, Tichy #1106, .0125” diameter PBW
- Turnbuckles, Tichy #8021 used for clevises on brake rods
- Chain, A-Line #29219, Black 40 links for inch
- Dirt collector, Tichy set #3013
- Kato ASF Ride Control (A-3) trucks with Fastenal 1/4” screws.
 |
| Brake details, draft gear, couplers and trucks installed. |
The floating lever could have the end under the slack adjuster moved toward the brake cylinder back creating a closer look to the prototype diagram.
With the underbody done I installed a Kadee #2000 Red Oxide Apex running board on the roof. Next, Grandt Line #5124 seven rung freight car ladders were installed. The ladders do not provide the exact prototype rung spacing which would require a custom built ladder. Ladder mounts made from Evergreen #8104, 1” x 4” strip styrene were used to mount the ladders. After install molded rungs were cut off and wire rungs, Tichy #1101, .010” diameter PBW installed in #79 holes drilled to accept them.
 |
| Grandt Line ladders with wire rungs installed. |
Once ladders were completed I continued to add the side details. I marked the holes for Kadee bracket grabs with a Yarmouth Models Works jig and drilled the mounting holes with a #75 drill and installed the Kadee bracket grab irons #2250. Sill steps, A-Line #29002, style C, were installed in #76 drilled holes. I installed the doors and extended the door rollers with scrap styrene so they would extend over the door guides as on prototype photos. The door frame on the left side was extended over the side sill as on prototype photos. The molded on door handles were carved off and wire door handles, Tichy #1101, .010” diameter PBW, were installed. The final tasks were the install of the kit provided trust plates (upper left corner) and placard boards on the doors.
 |
| Side details completed. |
Only the “B” end work is needed to finish the car body. On the “B” the following details parts were added:
- Brake step, Apex from Plano Model Products Set #11322
- Brake step brackets, Evergreen #8102, 1”x 2” strip styrene with MEK Goop (plastic melted in MEK) fasteners
- Brake housing, kit, with A-Line #29219 Black 40 links per inch chain
- Plate under brake rod on sill, cut from a piece of resin with rivets from parts box
- Bell crank, kit
- Brake rod between chain and bell rank, Tichy #1102, .015” PBW with clevis cut from removed kit plastic brake rod.
- Retainer valve, kit, the double look not correct so half cut off later
- Brake wheel, Kadee #2020
- Retainer line and brackets, Tichy #1100. .008” diameter PBW
- Sill grab irons, bent from Tichy #1101, .010”diameter PBW
- Grab iron, Kadee mounted on side to line up with Kadee bracket grab iron on side.
- Placard board, kit
- Uncoupling lever brackets, Yarmouth Model Works #507
- Uncoupling levers, bent from Tichy #1106, .0125” diameter PBW
 |
| "B" end progress. |
The paint brushed on the detail parts is a Vallejo mix of 75 % Model Air Brown RLM 26 #71.105 and 25% Model Color Calvary Brown #70.982 as a test to match the InterMountain factory applied paint. It acted as a primer for the Vallejo Model Color Black #70.950 to be sprayed later.
 |
| Detail parts painted. |
 |
| Uncoupling levers with Yarmouth Model Works uncoupling lever brackets installed. |
Once the “B” end was finished the car body was taped with 3M Scotch Blue painter’s and Tamiya masking tapes to spray the ends Vallejo Model Color Black #70.950 and under body Model Air Vallejo Dark Grey Blue 71.054.
 |
| Car taped to spray ends. |
 |
| Car ends sprayed black and tape removed. |
 |
| Car underbody sprayed. |
When the painted ends and underbody were dry the car ends were taped off with Taymia tape to spray the car body Vallejo/Micro-Mark Model Air Boxcar Red #29015X2.
 |
| Ends taped to spray car sides. |
 |
| Car sides sprayed Boxcar Red. |
After the car body was dry the car body sprayed Vallejo Gloss Medium #70.470 for a gloss base for decals. When the gloss base dry the Speedwitch thin film provided decals were applied. To set the decals Microscale Micro Set (blue bottle) and Micro Sol (red bottle) were used.
 |
| Decals applied on sides. |
 |
| Decals applied on ends. |
 |
| The front two colors of the Artmatic eye shadow makeup used for weathering. |
 |
| Weathered CMO 37640 prior to fading lettering. |
 |
| Weathered CMO 37640 prior to fading lettering. |
 |
| Weathered CMO 37640 with lettering faded. |
Chicago, St. Paul, Minneapolis & Omaha (CMO) boxcar 37640 with unique Duryea underframe was ready for service on the Minneapolis & Northland Railroad Company, The Lakeland Route, “Serving today, Shaping tomorrow.” A car card was made for CMO 37640, the final step to put the a car in service on the Minneapolis & Northland Railroad Company Railroad.
I can only hope Chicago, St. Paul, Minneapolis & Omaha boxcar, CMO 37640 with unique Duryea underframe would meet Bill’s approval. Bill, my friend, I hope I met the challenge.
 |
| CMO 37640 at Little Chicago Team Track. |
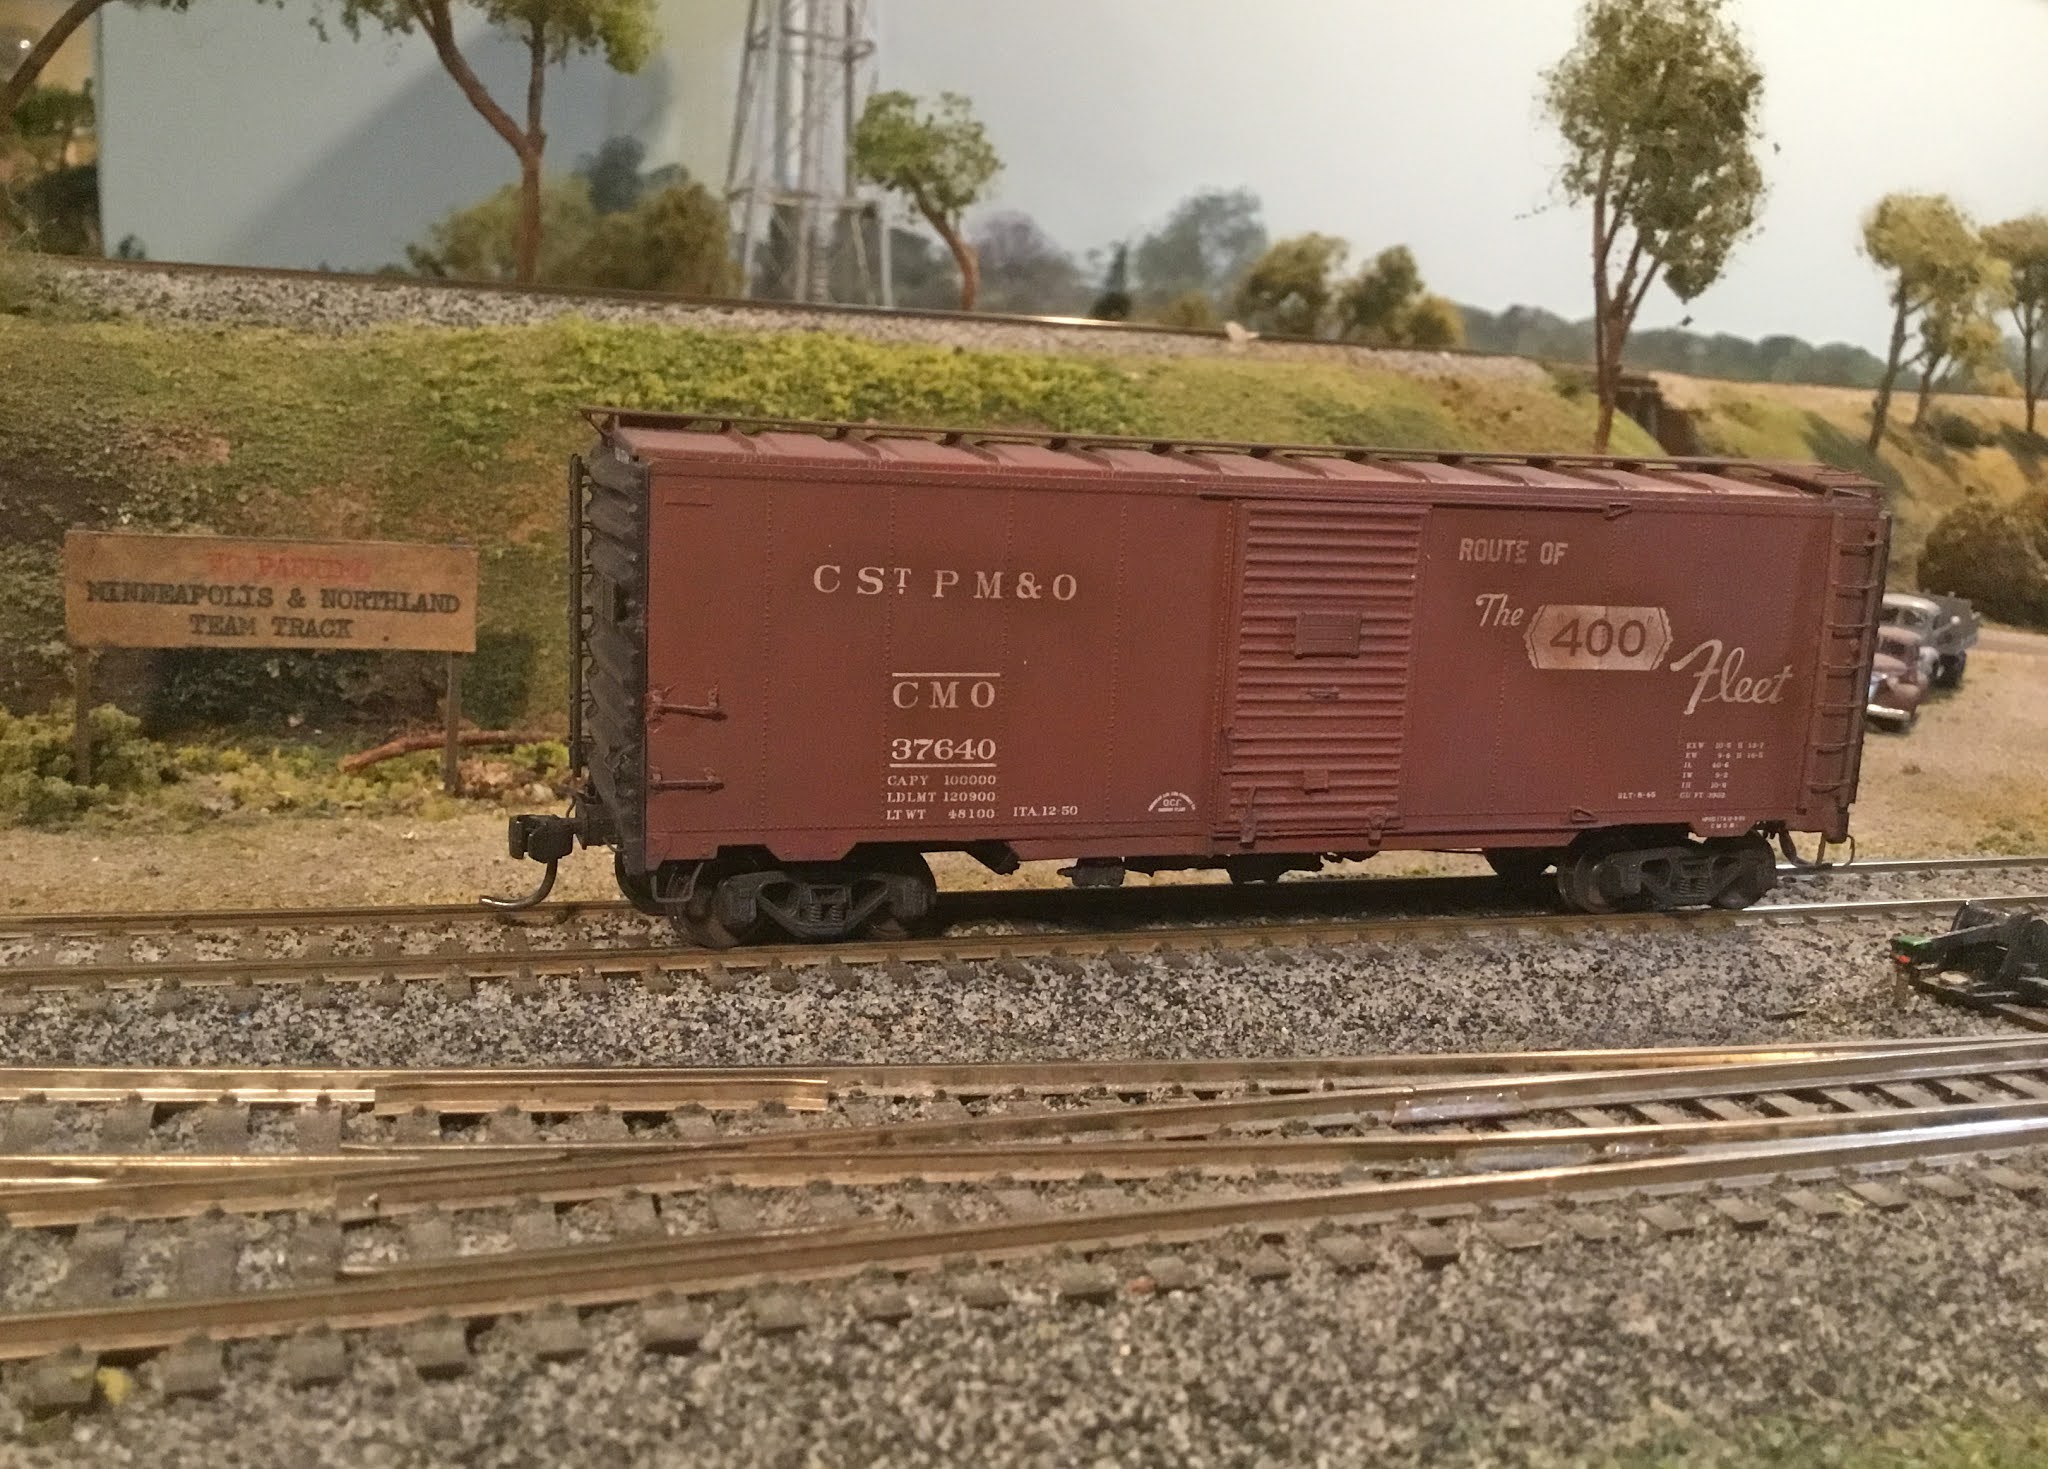 |
| CMO 37640 at Little Chicago Team Track. |
 |
| CMO 37640 at Little Chicago Team Track. |
I want say, “Thank You” to Ted Culotta for his prototype photo help and information regarding this build. Another "Thank You" to George Toman for providing underbody diagram and information.
Thank You for taking time to read my blog. You can share a comment in the section below if you choose to do so. Please sign your comment with your name if you choose to leave one. Please share the blog link with other model railroaders.
Lester Breuer
.
Les,
ReplyDeleteVery interesting. I picked up an Accurail 1937 boxcar with the same paint scheme. No major improvements other than metal grabs and some paint improvements. Now I am looking at the underbody. It never ends!
Jim Bernier
Lester nice work and nice write up about Bill..
ReplyDeleteRyan
Thank You Ryan for the kind words and Thank You for making the mini-kit available to make this CMO boxcar possible.
ReplyDelete