Sunday, September 29, 2019

Duluth, Missabe & Iron Range 3332 Box Car

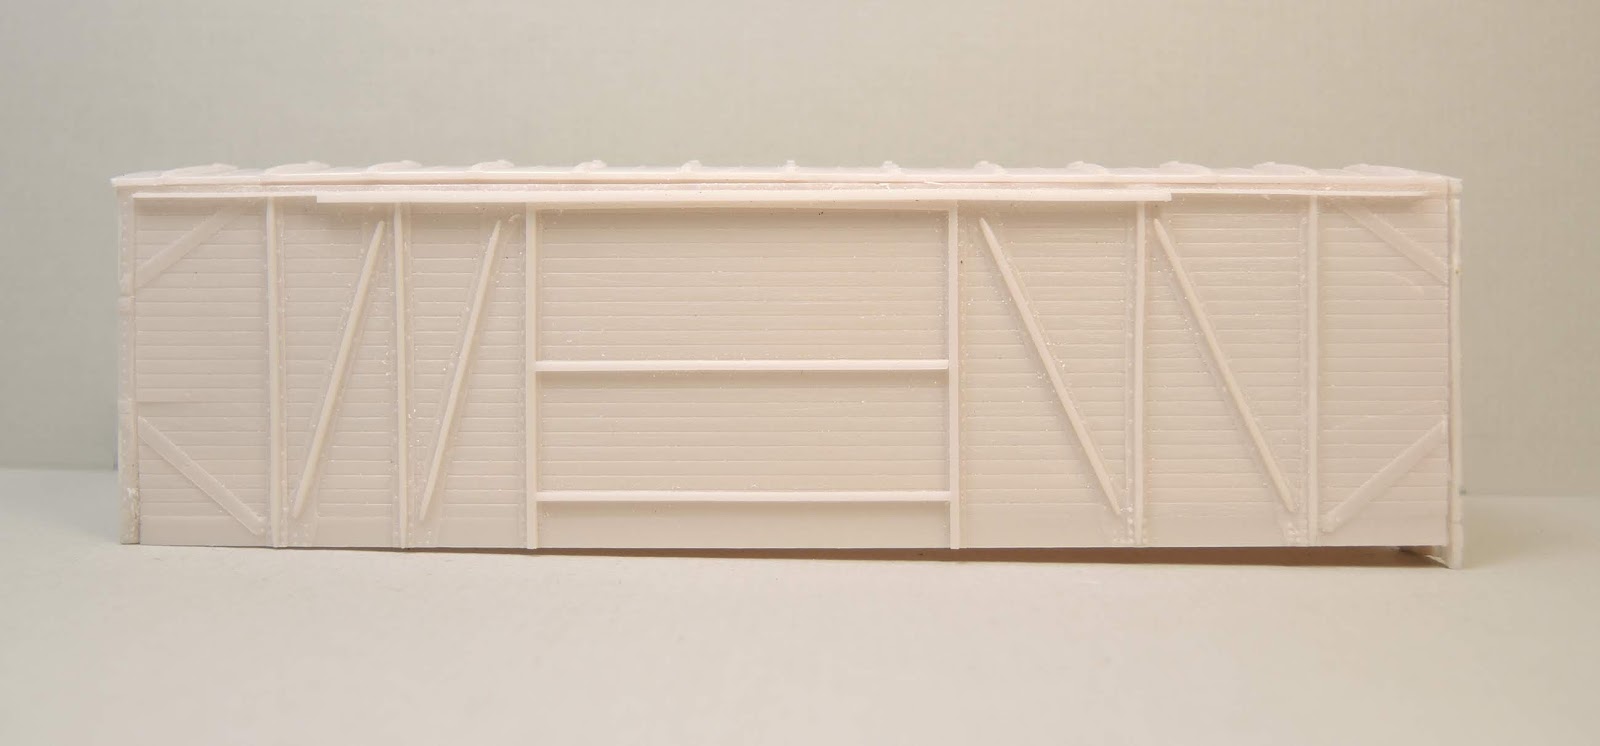
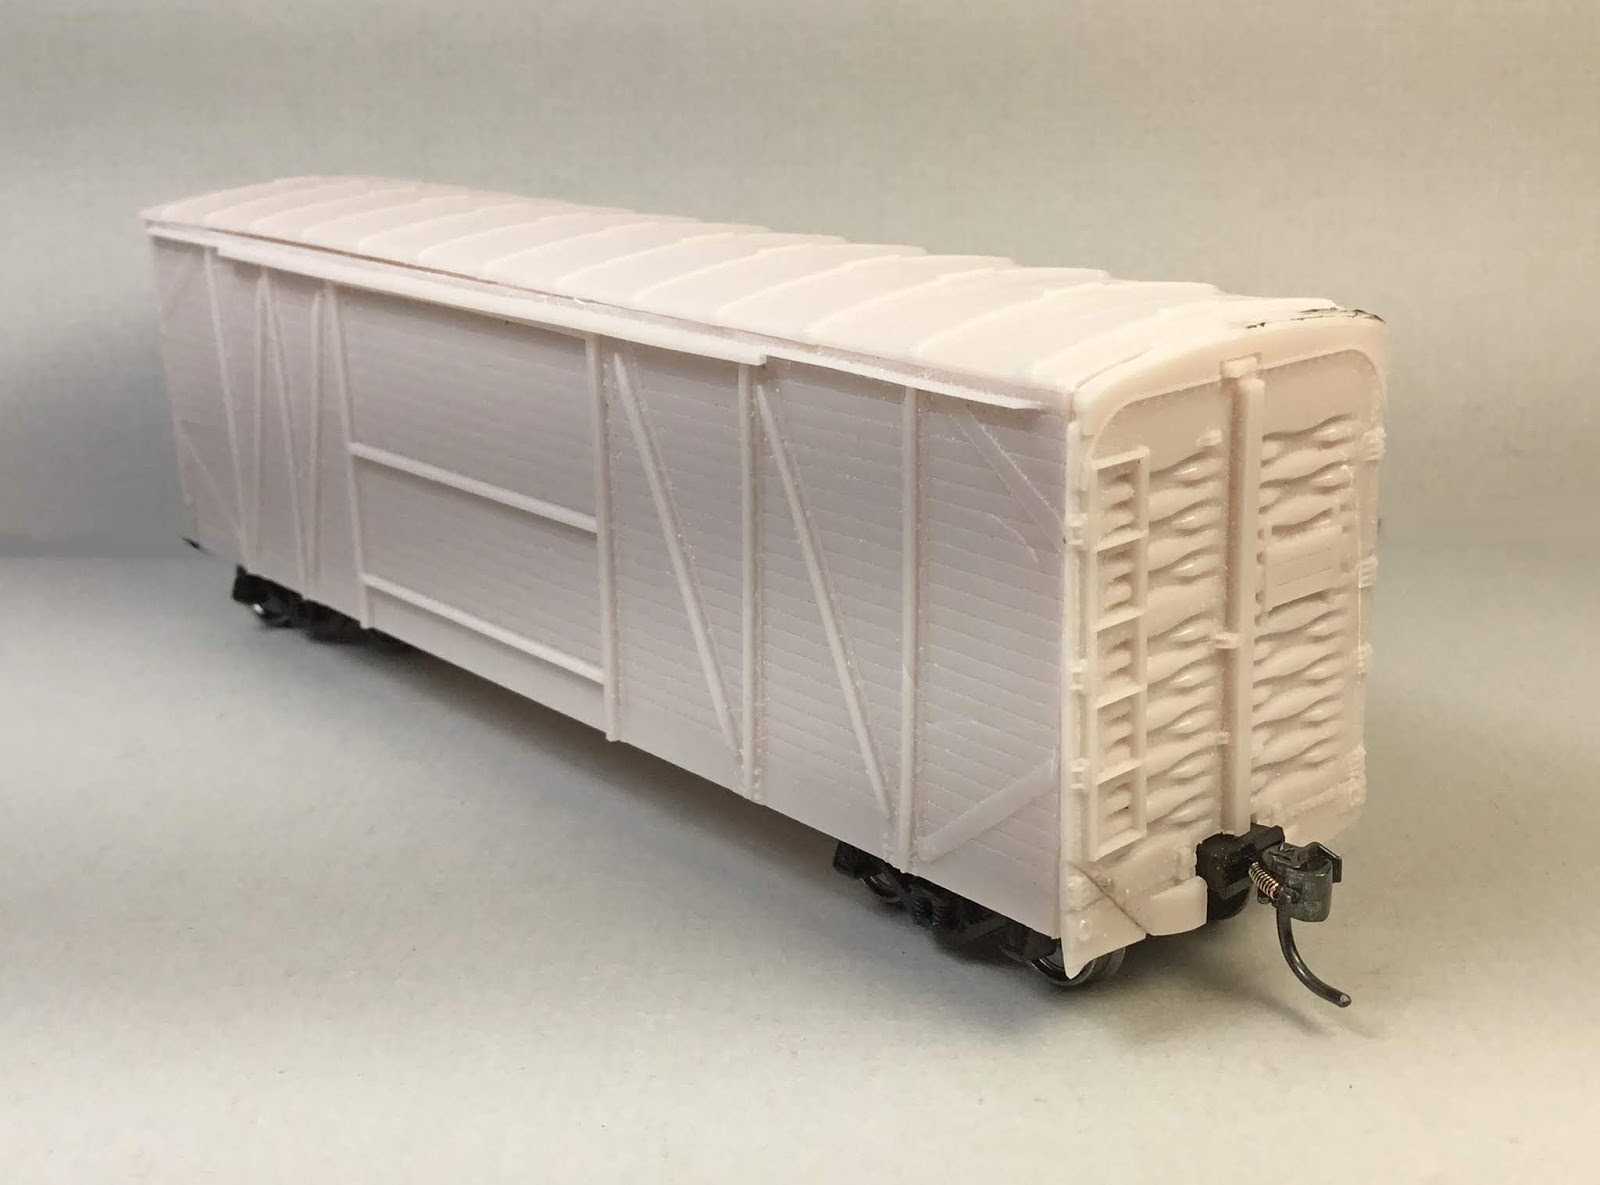
My latest roster addition is Duluth, Missabe & Iron Range, DMIR, boxcar 3332.  An Accurail boxcar, kit 4406, I purchased at a flea market in 2017 is built to serve customers on the Minneapolis & Northland Railroad Company.  The correctly lettered boxcar out of the box does require side and end work, specifically the removal of ladders and addition of details to match the DMIR prototype.

The prototype for this boxcar is a single sheathed Howe truss configuration boxcar with Murphy 7/8 corrugated steel ends and Hutchins roof built by American Car & Foundry in 1923 for the Duluth & Iron Range.  After the merger of the Duluth & Iron Range with the Missabe & Northern in 1938 creating the Duluth, Missabe & Iron Range, boxcar DMIR 3332, series 3300 to 3399, was classified as a DMIR class “P2” boxcar.  Other interesting features of the boxcar are grab iron drop type ladders, tow loops mounted on the outer side sill and in later years on inside of the side sill, door stops and fishbelly underframe.  A color photo of one of three cars on the Lake Superior Railroad Museum freight car roster appears in the Official Guidebook to the Lake Superior Railroad Museum and North Shore Scenic Railroad (Lake Superior Railroad Museum, 2013).  The three cars, numbers 3305, 3321, and 3374, were donated to the museum in 1975.


1988 photo from O Fenton Wells Collection


2008 photo from Kevin Dill Collection


DMIR car photo from internet with no photo credit.
(Click or tap on this or any photo to enlarge)

As with any plastic kit the under body was fitted first.  Since I like installing coupler pocket covers with screws the molded on plastic mounting pins were cut off.  The coupler pocket covers, coupler pockets and bolsters were drilled and tapped for 2-56 screws.  The coupler pocket covers were installed onto the coupler pockets, with Kadee #148 couplers inserted, with Fastenal 2-56 x 3/16” screws.  Trucks, Accurail cast ARA with spring plank provided in the kit into which I inserted InterMountain 33” metal wheels were installed with Fastenal 2-56 x 1/4” screws.  The steel weight provided in the kit was glued and clamped to the underbody inside with Formula 560 canopy glue to bring the car weight to 4.0 oz.  After letting the glue dry overnight, the underbody was glued into the car body.  

Next I added the underbody details.  First, the AB brake system components in the kit after drilling for piping were installed.  Needing mounting brackets for air reservoir, I cut the molded plastic sill steps off at this time and used two of  them for the mounting brackets for the air reservoir.  Tichy Train Group (Tichy) #1101, .010” diameter phosphor bronze wire (PBW) wire was used for the piping between the control valve and the air reservoir.  The pipe from the brake cylinder to control valve was bent from Tichy, #1106, .0125” diameter PBW.  Brake levers fabricated from Evergreen strip styrene, # 8108 1 x 8” for the brake cylinder lever and #8106, 1”x 6” for the floating lever were installed ( see “brake levers” under “labels” on sidebar for how made).  All brake rods fabricated from Tichy, #1106, .0125” diameter PBW with Tichy, #8021, turnbuckles for clevises were installed.  Chain in between brake cylinder lever and rod is A-Line, #29219, 40 links per inch.  A train line, .018” floral wire, was installed in holes drilled with a 4” long drill made from .032” piano wire.  A dirt collector from Tichy, set #3013, was added.  It was connected to the train line with a tee made from MEK Goop.


Underbody installed details ready for paint.

I worked on the car sides next.  The photos of this series of cars show grab iron drop type ladders; therefore, the molded on ladders had to be removed.  I carved off the molded on ladders and rungs with a custom ground Xacto #17 blade mounted in a #5 Xacto handle and with micro scalpel blades mounted in micro scalpel handles.  After carving was done the areas were sanded with sanding sticks.  I cut new board grooves with an Xacto knife with a #11 Xacto blade in areas where molded ladder had been. Definitely, the ladder removal was tedious and most difficult part of the build.


Custom ground blade on left and micro scalpel blades on right.


Molded on ladders carved off and some needed details installed.
The grab irons on left sided not changed to 24" yet.


Once board lines were cut, new upper corner braces cut from Evergreen .005” sheet styrene with a .048” width were installed.   Lower right triangle corner braces at sill were also cut from the .005” sheet styrene and installed.  An interesting type tow loop, again made from .005” sheet styrene was installed.  Tow loop fasteners made with MEK Goop were added.  Now Tichy #3015 18” drop type grab irons were installed to create the new ladders.  Molded on grab irons on the left side were carved off and new 24” grab irons made with Tichy #1101 .010” PBW were installed.  Sill steps cut off earlier were replaced with A-Line #29000, style steps.


Corner braces, lower door guide, and tow loop installed.
Grab irons not changed to 24" yet.


Next I added the door and associated door details.  A new lower door guide cut from Evergreen #8103 1 x 3” strip styrene was installed.  Styrene from the bits box was used to make new upper and lower door hangers.  Molded on door handles were carved off and new door handles, Tichy #1101 .010” diameter PBW, were installed.  The upper door stop was cut off and moved to it’s new upper location.  Styrene from the bits box was added to the existing molded door stops to make them look like the ones on the prototype.


Upper door stop moved to new location.
Note new gussets at side sill corners.
Grab irons have been changed to 24".

Door hangers from styrene bits  box added.

The roof work was done next.  I removed the running boards, milled them to .028” or 2 1/2 HO inches and reinstalled them.  On the longitudinal running board the end extension brackets were made with Evergreen #8102 1 x 2” strip styrene.  On the latitudinal running boards the molded on grab irons were carved off and holes were drilled using a #80 drill to mount new wire corner grab irons.  The corner grab irons were bent from Tichy #1101 .010” diameter PBW ( see “grab irons” under “labels” on side bar for bending) and installed with Yarmouth Model Works #356 eye-bolts with shoulder for corner legs.


Roof with milled running boards and new corner grab irons.


I only had the work on the ends left to finish the build.  As on the sides, molded on ladders and grab irons were carved off and areas sanded with sanding sticks.  A #79 drill was used to drill the holes for the drop grab iron ladder, end drop grab iron, and sill drop grab irons.  Again, Tichy #3015 18” drop type grab irons were installed. 

On the “B” end the brake step is in the incorrect location requiring the mounting hole to be filled. Per photos, the brake step was relocated between corrugated ribs six and seven and Evergreen #8102 strip styrene was used to make the brackets.  The brake shaft step molded closed was opened by drilling a #50 hole and cleaning it up to the edges with a broach and file.  After brake shaft step opening was acceptable, the back portion of the brake shaft step was cut off at the same angle as the front to create a strap looking brake shaft step matching the prototype.  A brake shaft cut from Tichy #1102 .015” diameter PBW was installed followed by a Tichy brake wheel from set #3013.  MEK Goop was used to create a brake shaft fastener above the brake wheel.  A Tichy retainer valve, set #3013, was installed followed by a retainer line, Tichy #1101 .008” diameter PBW.  Finally, uncoupling levers bent from Tichy #1106 .0125” diameter PBW with eye-bolt brackets bent from Tichy #1101 .010” diameter PBW were installed (for bending click "uncoupling levers").

Molded on ladder rungs carved off
and brake step moved.


"B" end details added except for uncoupling lever. 


Uncoupling lever added.


To finish the build the added details needed to be painted.   The underbody and trucks were hand painted Vallejo Model Color 70.862 Black Grey.   Car body added details were hand painted with a Vallejo Model Color mix of 75% (3 drops) 70.864 Mahogany Brown and 25% ( 1 drop) Calvary Brown.  In my opinion, a good match to the Accurail factory applied paint color.  The only decal I applied was the reweigh date for Duluth cut from the extra reweigh dates on a Rock Island decal sheet from Rocket Express.  The decal was applied with Microscale Micro Sol and Walthers Solvaset.  Once the decals were dry the carbody was sprayed using an air brush with Vallejo Matt Varnish 70.520 to provide a protective coat for handling and weathering.


Underbody hand painted.  Note the reworked brake shaft step
next to the coupler pocket on the right side of the photo. You
can see through it.


Side details hand painted.


Added details hand painted.

With the protective coat applied and dry, Pan Pastel weathering was applied with makeup brushes and micro applicators.  Paynes Grey Extra Dark 840.1 was applied to the roof.  Burnt Sienna Shade 740.3 was brushed on the sides and ends.  To fade the lettering Red Iron Oxide Extra Dark 380.1 was lightly applied over the lettering.  A final blending of the applied colors was done with a very light touch with the makeup brush loaded with a tiny amount of Paynes Grey Extra Dark.  The tiny amount was obtained by tapping the loaded brush on paper towel prior to remove most of the Paynes Grey Extra Dark.


DMIR 332 after weathering with Pan Pastels.


"B" end after weathering with Pan Pastels.


Since I do not apply a clear coat after weathering to any freight car, I printed a car card for Duluth, Missabe & Iron Range 3332 and placed the car in service on the Minneapolis & Northland Railroad Company.


DMIR 332 sitting at Little Chicago Freight House


DMIR 3332 sitting at Little Chicago Freight House.


I want to say, "Thank You" to O Fenton Wells and Kevin Dill for sharing photos they took of the DMIR cars with me and giving me permission to share them with you here on by blog.


Thank You for taking time to read my blog.  You can share a comment in the section below if you choose to do so.  Please share the blog link with other model railroaders.
Lester Breuer


Saturday, September 7, 2019

Rock Island Auto Box Car 160250

Rock Island 40 ft. double-door automobile boxcar 160250,  A.A.R. class XM, Rocket Express kit R1-1, a flat  resin kit, is now in service on the Minneapolis & Northland Railroad Company.  In 1930 Bettendorf delivered 350 single-sheathed automobile cars the Rock Island assigned to series 160250 to 160599.  The cars had a steel underframe, 3/3/3 dreadnaught ends on the fixed "B" end and a Union Metal Products dreadnaught end door on the "A" end, staggered double doors and a Murphy radial roof with wood running boards.  In the kit instructions, a prototype data car service years chart shows 333 cars in service  in 1952  and 158 in service in 1959.  A prototype photo of 160250 appears in the instructions.  Color photos of the previous series 159250 to 159899 with fixed/solid ends, otherwise similar features appear in the Rock Island Color Guide to Freight and Passenger Equipment (Morning Sun Books Inc., 1966).  Another excellent number of black and white photos including closeup photos showing details can be found in Focus On Freight Cars, Volume Nine: Single Sheathed Box & Automobile Cars 2, (Speedwitch Media, 2017).

Phil Weibler Collection, courtesy of Steve Hile


Being a flat kit, I began the build with what I term the “basic box” consisting of the car body.  I did not follow my normal assembly ( see resin car body assembly under “labels” on sidebar ) due to the auto door end.  I started with the fixed end and glued one side to it to form a “L”.   Rather than creating a “L” with the other side and auto end door, I took the second side and glued it to the already assembled “L”.  I now added the roof to the end with the two sides leaving an open end.   Next I cut off the roof flange on the open end as stated in the instructions with an UMM saw allowing the auto door end to be installed to complete the car body.  I built the car body in this manner as I felt getting the auto door end correctly installed was easier. 


Basic carbody assembled
(tap or click on this or any photo to enlarge)


Next I fitted the underbody via sanding.   I wanted supports for the underbody to rest on when inserted into the carbody so I cut two scrap resin sections from a resin frame surrounding resin parts in the kit  to the inside length of the car body and glued the cut strips inside the car body for the underbody to rest on when inserted. 

Underbody supports visible inside of carbody.


The underbody now could be inserted into the carbody for the remainder of the work required without falling into the body.  Following the instructions the fish belly center sill sides, cross bearer cover plates and bolster cover were installed.  The coupler pocket pads bolster center plates were  were drilled and tapped for 2-56 screws.  Kadee #262 coupler pockets with Kadee #148 couplers inserted were  installed with 2-56 screws.  Trucks, Accurail cast ARA with spring plank provided in the kit into which I inserted InterMountain 33” metal wheels were installed with Athearn 2-56 x 5/16” screws.  Weights, electrical outlet box punch outs,  were added to bring the car weight to 3.8 oz.

Kit parts listed above, couplers and trucks installed.


Car weighted to 3.8 oz  using electrical outlet box punch-outs.


Underbody installed into carbody with "A" end showing.


With the car body complete, the adding of details to the various carbody sections could be done.  On the sides, upper door rail ends of the upper door track, doors, side placard (tack) boards, lower door tracks, side brackets on sides of doors, and rivet plates on the lower left bottom side were installed.  Using prototype photos, kit provided ladders with seven rungs were installed on the sides and on the fixed end.  Later after receiving the photo of 160250 from Steve Hile included above,  I cut off a rung on the fixed end ladder to make a six rung ladder as on the prototype.  Prior to installing the side ladders scrap styrene from the bits box was used to make ladder mounts.  On the end door the ladder is part of the resin casting.  I carved off the cast rungs and installed wire rungs, Tichy Train Group (Tichy) .010” diameter phosphor bronze wire (PBW).  Grab irons were installed on sides and on the ends. After painting cast door handles were carved off and replaced with Tichy .010" diameter PBW.


Side details have been added.
Door handles not yet replaced with wire ones.


End door "A" end cast ladder rungs carved off
and replaced with wire rungs.


On the roof, the wood running boards were installed.  The longitudinal running board end brackets were made using Evergreen #8102, 1 x 2” strip styrene.  The latitudinal brackets are .005 x .030” brass strips cut from .005 thick sheet brass.  Roof grab irons are, Tichy  #1106, .0125 diameter PBW with corner legs, photo etched eye bolts with shoulder, Yarmouth Model Works, YMW 356, rather than those provided in kit.

Roof running boards, brackets, and grab irons installed.


On the “B” fixed end the kit provided Tichy, set #3013,  brake gear housing, chain, brake step (platform), brake step brackets, bell crank and retainer valve were installed.  I added triangular shaped side plates (as seen in prototype photo ) made from resin kit flash to the brake step brackets.  Brake rod is Detail Associates #2505, .015” brass wire.  Retainer line and brackets are Tichy #1100. .008” diameter PBW.  End placard  board (tack) provided in kit was installed with brackets made with Evergreen #8102, strip styrene and MEK Goop fasteners. A Kadee #2020, Ajax brake wheel installed. Uncoupling (cut) levers, Tichy #1106, .0125” diameter PBW with kit provided eye bolts were installed rather than using kit uncoupling levers.


"B" end details have been installed.
Ladder not yet shorten to a six rung ladder.


Rather than doing underbody detailing first as I usually do on a freight car builds, I did it last.  Tichy, kit provided brake components and brackets were installed after drilling parts with #79 drill for piping using diagram in kit instructions.   Piping from air reservoir to control valve, Tichy #1101, .010” PBW, and from brake cylinder to control valve, Tichy #1102, .015” diameter PBW,  was installed.  Brake Levers cut from Evergreen #8108, 1 x 8” and #8106, 1 x 6” strip styrene ( see brake Levers under “labels” on side bar ) were installed. Brake rods, Tichy #1106, 0125” diameter PBW, with Tichy #8021, turnbuckles used for clevises to attach the brake rods to brake levers were installed.  Chain between brake cylinder lever and brake rod is A-Line #29219.  The slack adjuster on the floating lever is made from material with holes  ( source unknown) from the parts box.  A train line, .019” diameter floral wire, was installed. The dirt collector, Tichy set #3013, installed with pipe connected to the train line with tee made with MEK Goop.


With the underbody work finished the car was moved to the paint shop.   In the paint shop the underbody, always sprayed first, was sprayed Vallejo Model Air, Black Grey RLM66.  The carbody was sprayed Vallejo/MicroMark Model Air Box Car Red, X290152X2.  Once the carbody was dry, the carbody was sprayed a Model Master Acryl 4638 Gloss Clear  to provide gloss surface for decal application.  Kit provided decals except for reweigh date from another Rock Island set were applied with Microscale Micro Set, Micro Sol and Walthers Solvaset.  Once the decals were dry the carbody was sprayed Vallejo Matt Varnish 70.520 to provide a protective coat for handling and weathering.


Rock Island 160250 out of the paint shop.
Note wire door handles.


Rock Island 16250 "B" end out of paint shop.
Note shortened ladder to six rungs.


After painting and lettering in the paint shop was completed the car was weathered using the following Pan Pastels: Red Iron Oxide Shade 380.3 and Burnt Sienna 740.5 on car body, Black 800.5 on roof and lightly on areas of car body such as ladders, and Payes Grey Extra Dark 840.1 on underbody.


Rock Island 160250 car body weathered with Pan Pastels.


Rock Island 16250 "B" end after weathering.


Rock Island 16250 "A" end after weathering.


Rock Island 160250 finished underbody.


After weathering was completed the car could enter service on the Minneapolis & Northland Railroad Company after a car card was made.

Rock Island 16250 at McGregor Team Track.


Rock Island 160250 at McGregor Team Track.


A  big “Thank You” to Steve Hile for the photo to help with build of this car and for permission to use photo in this blog post.  In addition, a “Thank You” to Steve Hile for his help and information provided to RonVon Werder to make this kit possible.


Thank You for taking time to read my blog.  You can share a comment in the section below if you choose to do so.  Please share the blog link with other model railroaders.
Lester Breuer


Sunday, August 18, 2019

Pennsylvania Container Flat car 473267

Rather than place recently purchased Funaro & Camerlengo Pennsylvania Railroad, PRR, container flat 473267, kit 8120, into inventory I decided to build it immediately as I have no container flats in-service on the Minneapolis & Northland Railroad Company.

The container flats with “merchandise” containers were one way to efficiently handle the LCL business being taken away by the trucking industry.  The Pennsylvania Railroad per the January 1953 Official Equipment Register had 73 cars, series 473000 to 473764, A.A.R. Class “LF”, PRR System class “Fm” in service. A photo and equipment diagram are available for view and download of the car and DD1 containers on the Pennsylvania Railroad Technical & Historical Society website.


PRR Container Flat
  Funaro & Camerlengo kit instructions photo
(Click or tap on this or any photo to enlarge)


I began the build with the underbody.  First, I drilled and tapped coupler pockets and bolsters for 2-56 screws. Kadee #148 couplers were installed in the coupler pockets with covers attached with 2-56 x 3/16” screws.  Accurail ARA cast steel trucks with 33” InterMountain metal wheels were installed with Atheran 2-56 x 5/16 “ screws.  Tichy plastic washer, set #3013, plus Trackside Specialties .020” brass washers were installed to obtain proper coupler height.  The resin cross bearer stiffeners in the kit and corner braces cut from Evergreen strip styrene from the bit box were installed.


I installed the resin brake component brackets in the kit followed by the Tichy Train Group (Tichy) brake components, set #3013, also in the kit.  The brake components were drilled with #79 drill to receive piping prior to install.  Due to the two cylinder brake levers I added the brake levers next.  I felt the kit resin casting for the brake levers and chain was poor so I used Tichy, set #3013, brake levers, chain, and Tichy, # 1101, .010” phosphor bronze wire (PBW) for the brake rod connecting the two brake levers attached to the brake cylinder.  The drawing in the kit instructions shows an open center sill; however, the kit has a covered center sill so the brake rods from the levers to the trucks in the center sill shown in the diagram were not modeled.  The only additional brake rod, Tichy #1106, .0125” diameter PBW installed was that from the second cylinder brake lever attached to the side sill.  Next the piping from the air reservoir to the control valve, Tichy #1101, .010” diameter PBW and from the back of the brake cylinder to the control valve, #1106, .0125” diameter PBW were installed.  Now, the train line .018” floral wire and Tichy dirt collector, set #3013, were added.  The tee to connect the dirt collector pipe to the train line was made with MEK Goop.  The holes in the underframe for the train line were drilled with a 4” drill made from K&S Engineering .032” piano wire.


Under body without levers into center sill as on diagram
as car has a fishbelly center sill with cover plate.


Finished underbody with retainer line.


When you look at the underbody photos you also see a retainer line, Tichy #1100, .008” diameter PBW, which was not added until side end wall container tie downs with cast on retainer valve was installed.


Funero & Camerlengo kit instructions photo
showing retainer line on end wall container tie down
and along edge of side above truck.


With the underbody work done it was time to add the resin .020” floor. Since the kit had no weight to add to the car I cut one from .020” thick sheet lead the exact size of the floor and using Permatex, clear RTV silicone, I attached it to the resin cast floor creating a .040” floor sandwich which I glued to the car body.

Note the .020" sheet lead under resin floor


The car body was now ready for details.   The end wall container tie downs were installed at the ends of the car with the panel having the retainer valve located on the “B” end followed by the cast gussets and riveted angle attached to them. The wire between the end wall container tie downs is .017” diameter floral wire provided in the kit.  All PBW wire grab irons provided in the kit were installed on the end wall container tie downs and sill ends next.  Placard (tack) boards were installed. Finally, tow loops made from Tichy #1101 .010” diameter PBW were installed.


End wall tie downs installed.  Note  end wall with
retainer valve on "B" end.


The next step was the install of the stake pocket with container guide on back.  Yes, as the instructions state this step was the fussiest of the build.  I first glued the container guides to the back of the stake pockets and let them dry.  I did not follow remaining instructions for this step which had you counting boards, etc. to locate the stake pockets with container guide.  I removed flash from the containers and placed them on the floor without gluing them as I wanted them to be removable. With the five containers positioned I test fit the stake pockets to the car sides with the container guide inserted between the containers as shown in the diagram.  If it fit and looked fine to me I glued them at this time.  Several of the container guides on the back of the stake pockets were too thick to go between the containers so I had to thin several of them to fit.  I thinned them with a single edge razor blade and sanding.  A-Line #29000, style A, wire sill (stirrup) steps were installed rather than the resin cast steps. 

Stake pockets installed.  Note container guide on back.

Stake pockets with container guides on back were installed
with containers sitting on flat car to to locate them.

Stake pockets with container guides on back were installed
with containers sitting on flat car to to locate them.


On the “B” end the ratchet in the kit to hold the brake shaft and brake shaft, Detail Associates #2504, .015” diameter brass wire, were installed.  The brake shaft step, an A-Line #29000, sill (stirrup) step was installed prior installing the brake shaft.  A Tichy brake wheel, set #3013, was added.  End resin cast placard (tack) boards in the kit were installed.  Finally Yarmouth Model Works, YMW #400, Carmer uncoupling levers were installed using a pin made from .010” diameter brass wire.  The resin cast fragile Carmer uncoupling levers were not used for if installed they would be broken quickly on an operating railroad.


"B" end with details added.  Note the sheet lead added
weight shows well.

I wanted the DD1 containers to be a removal load so the containers were never glued to the flat car floor.   I did arrange the DD1 containers on the flat car deck and marked them A thru E on the bottom with a felt tip marker with A starting on the "A" end.  For easier install I glued A and B, and D and E together leaving C in the middle free. When installing load A and B and D and E are installed on each end and finally C is installed in the middle.


DD1 containers are not glued and yet stay in place due to
end wall tie downs and stake pockets with with container guides.

DD1 containers are a removable load.


With the car construction finished, I moved the car to the paint shop.  I sprayed the underbody Vallejo Model Air 71.055, Black Blue Grey.   I used the same color to hand paint the trucks.  The side and ends of the car were hand painted Vallejo Model Color 70.818, Red Leather. And, the floor was hand painted Polly Scale Depot Buff, F414278. The floor after drying was brushed with four plus coats of dirty Dio-Sol thinner to provide weathering.  The dirty Dio-Sol is used thinner after cleaning solvent based paints. The car body was than sprayed with Model Master Gloss Clear Acryl 4638 to provide a gloss base for decal application.

Decals provided in the kit were applied with Micorscale Micro Set and Micro Sol.  and several coats of Walthers Decal Setting Solution.  Once the decals were dry the car body was spayed with Model Master 4636 Flat Clear Acryl.  Once dry, a light weathering with Pan Pastels using Burnt Sienna Shade 740.3.


Car with decals and clear coat applied.  No weathering.


Car decals, clear coat, and weathering applied.


DD1 containers have no decals or weathering.


Under body after paint.


PRR 473267, was now ready for service on the Minneapolis & Northland Railroad Company once a car card and shipment card was printed.


PRR Container flat 473267 sitting on GN Interchange.

"B" end of PRR container flat 473267
sitting on GN Interchange.


I want to say,  “Thank You.”  to Tim O’Conner for providing me with photos to assist with the build.


Thank You for taking time to read my blog.  You can share a comment in the section below if you choose to do so.  Please share the blog link with other model railroaders.
Lester Breuer