While looking through the Bowser hopper kits in the to build cabinet I pulled Chicago Great Western (CGW) 70 Ton 2 bay covered hopper. I could use another hopper in service on my newest Chicago Great Western Interchange. When I compared the Bowser hopper to prototype photos of CGW hopper 70044 in Railway Prototype Cyclopedia 28 (RP CYC Publishing Company, 2014) I found the car body and lettering were an excellent match to the prototype. I felt Chicago Great Western 70 Ton 2 bay covered hopper, numbered 70057, a custom Bowser hopper produced for C&NW Historical Society and sold at a combined convention with the Thousand Lakes Region of the NMRA in 2005, was a good choice to build.
The prototype hopper was one of 75 cars built in 1949 by General American Transportation Corporation (GATC) that the Chicago Great Western assigned to series 70026-70100. Railway Prototype Cyclopedia 28 states hopper features included: “flat plate welded roofs, type 1b hatch covers and locking bars. Equipco power hand brakes, U.S. Gypsum running boards and brake steps, and Barber S-2 trucks.”
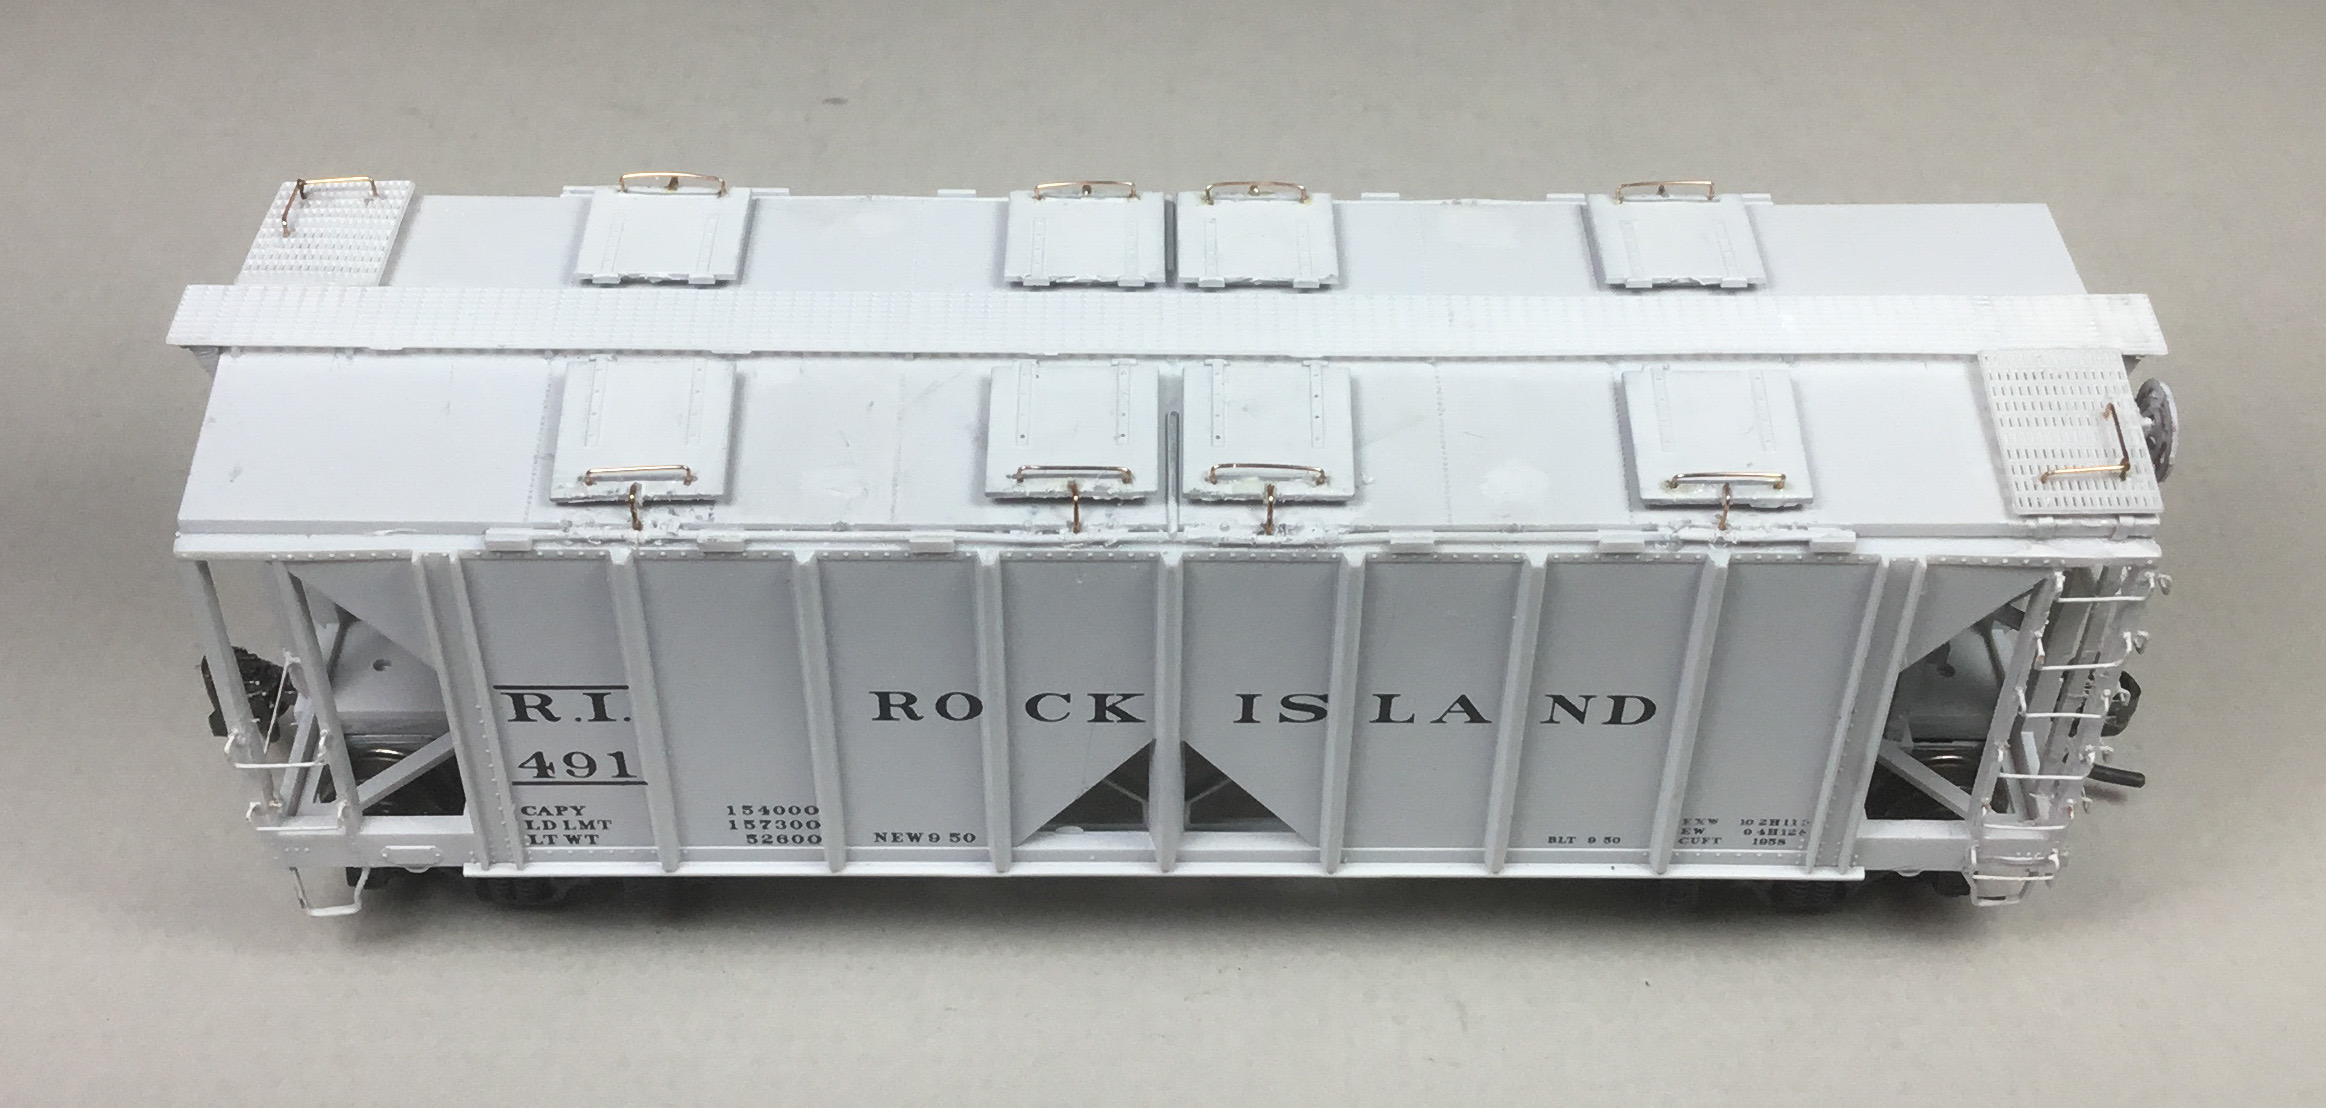
The car bodies were painted gray with black hopper bottoms. On the side, the Corn Belt Route herald in black and white colors is located in the second plane from the left. Color photos of CGW 70045 and 70089 are found in Chicago Great Western Color Guide to Freight and Passenger Equipment (Morning Sun Books, Inc., 1998). When repainted the color of hopper bottoms was the same as the car body as in the color photos.
I built the CGW hopper using the instructions; however, making some changes. The first step in the instructions is to “install brake gear to underframe.” Since I wanted to add brake component piping I drilled all brake components with a #79 drill to accept piping and I installed the kit provided brake components. Next I installed the piping as follows:
- piping from air reservoir to AB valve, Tichy Train Group (Tichy) .010” diameter PBW
- Piping from brake cylinder to AB vale, Tichy .0125” diameter phosphor bronze wire (PBW)
With piping complete it was back to the instructions to install the brake lever (kit) and end braces (kit). I also installed the kit provided Equipco brake wheel. Now the underframe was installed into the car body.
Drilling and tapping of truck kingpins and coupler pocket covers for 2-56 screws followed. I installed Kadee #148 couplers and kit trucks with InterMountain 33 inch metal wheels installed. Coupler pocket covers and trucks were installed with kit provided screws.
 |
| Piping and Equipco brake wheel installed. (click on this or any image to enlarge) |
The kit weights were installed with Permatex Silicone clear adhesive sealant and the roof was installed; however, not glued as the car I felt needed more weight. The car was put on a postal scale and as I suspected the car was light. So I added weight using metal electrical box punch outs again attached with Permatex Silicone clear adhesive to bring the car weight to 3.8 ounces. Now, the roof was glued on. On the roof I installed the roof hatches and the kit provided Apex running boards.
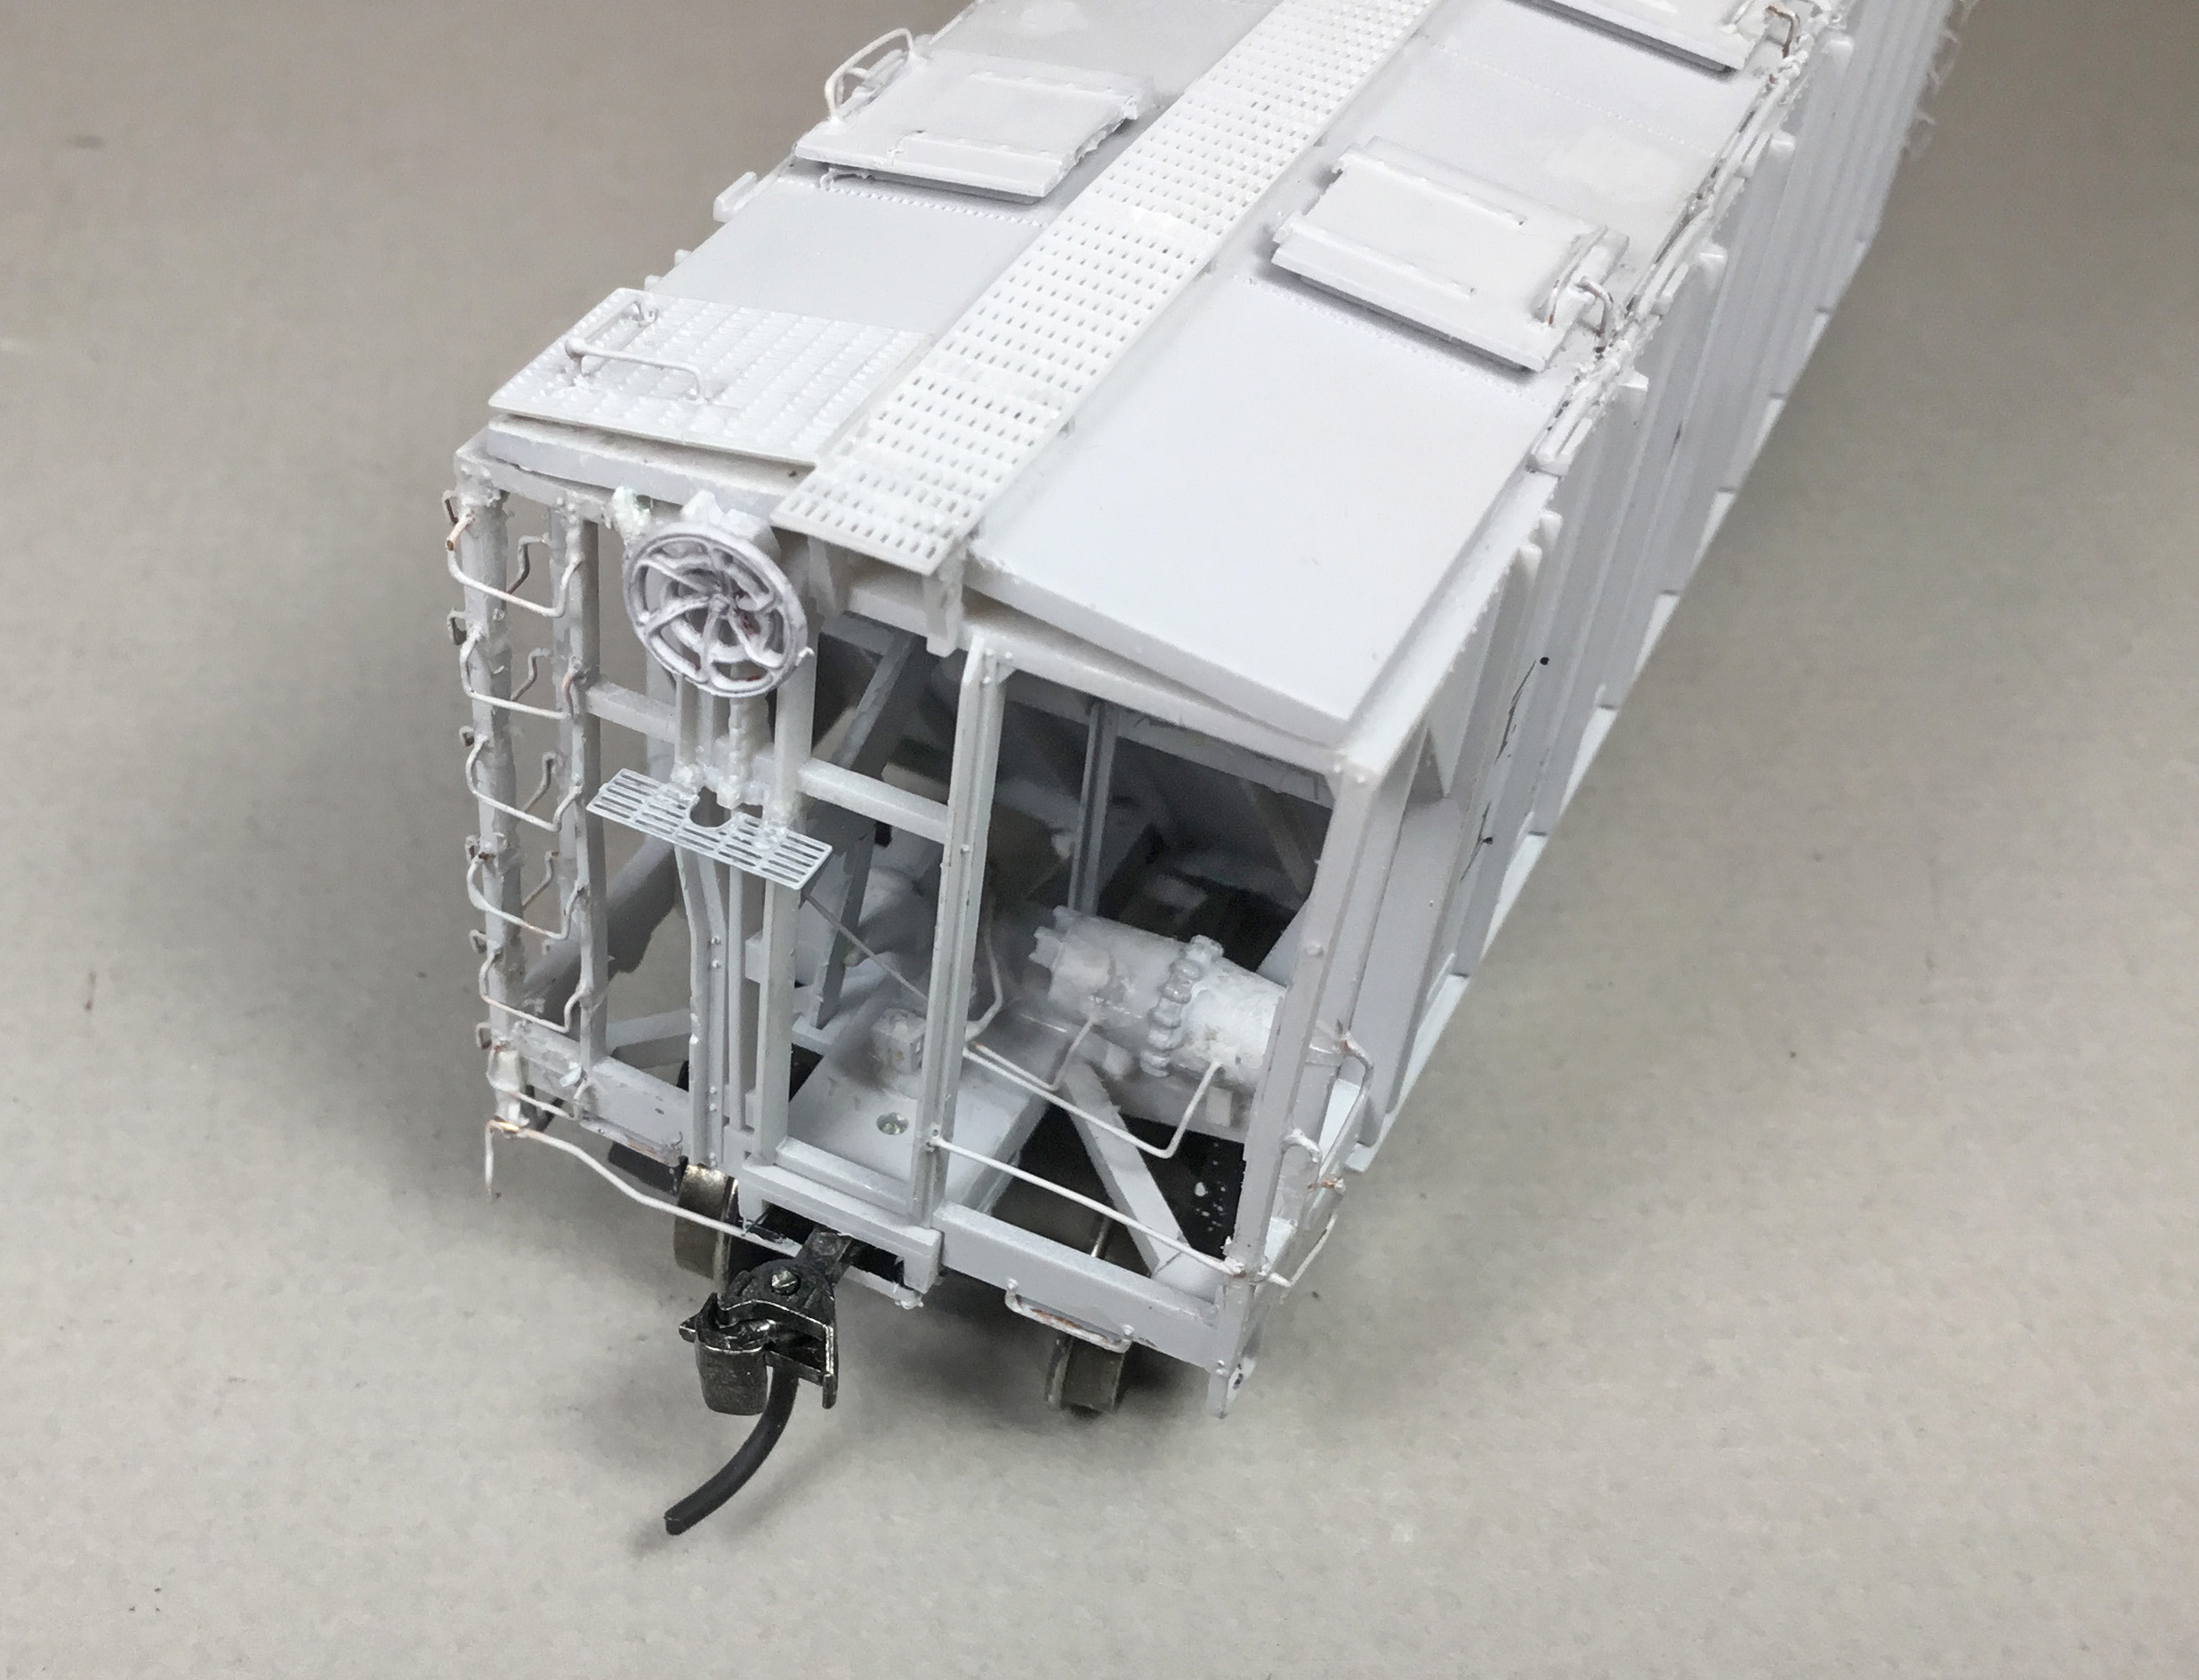
I went back to the “B” end and installed a Precision Scale # 31796 resin retainer valve and retainer line, Tichy #1100, .008” diameter PBW.
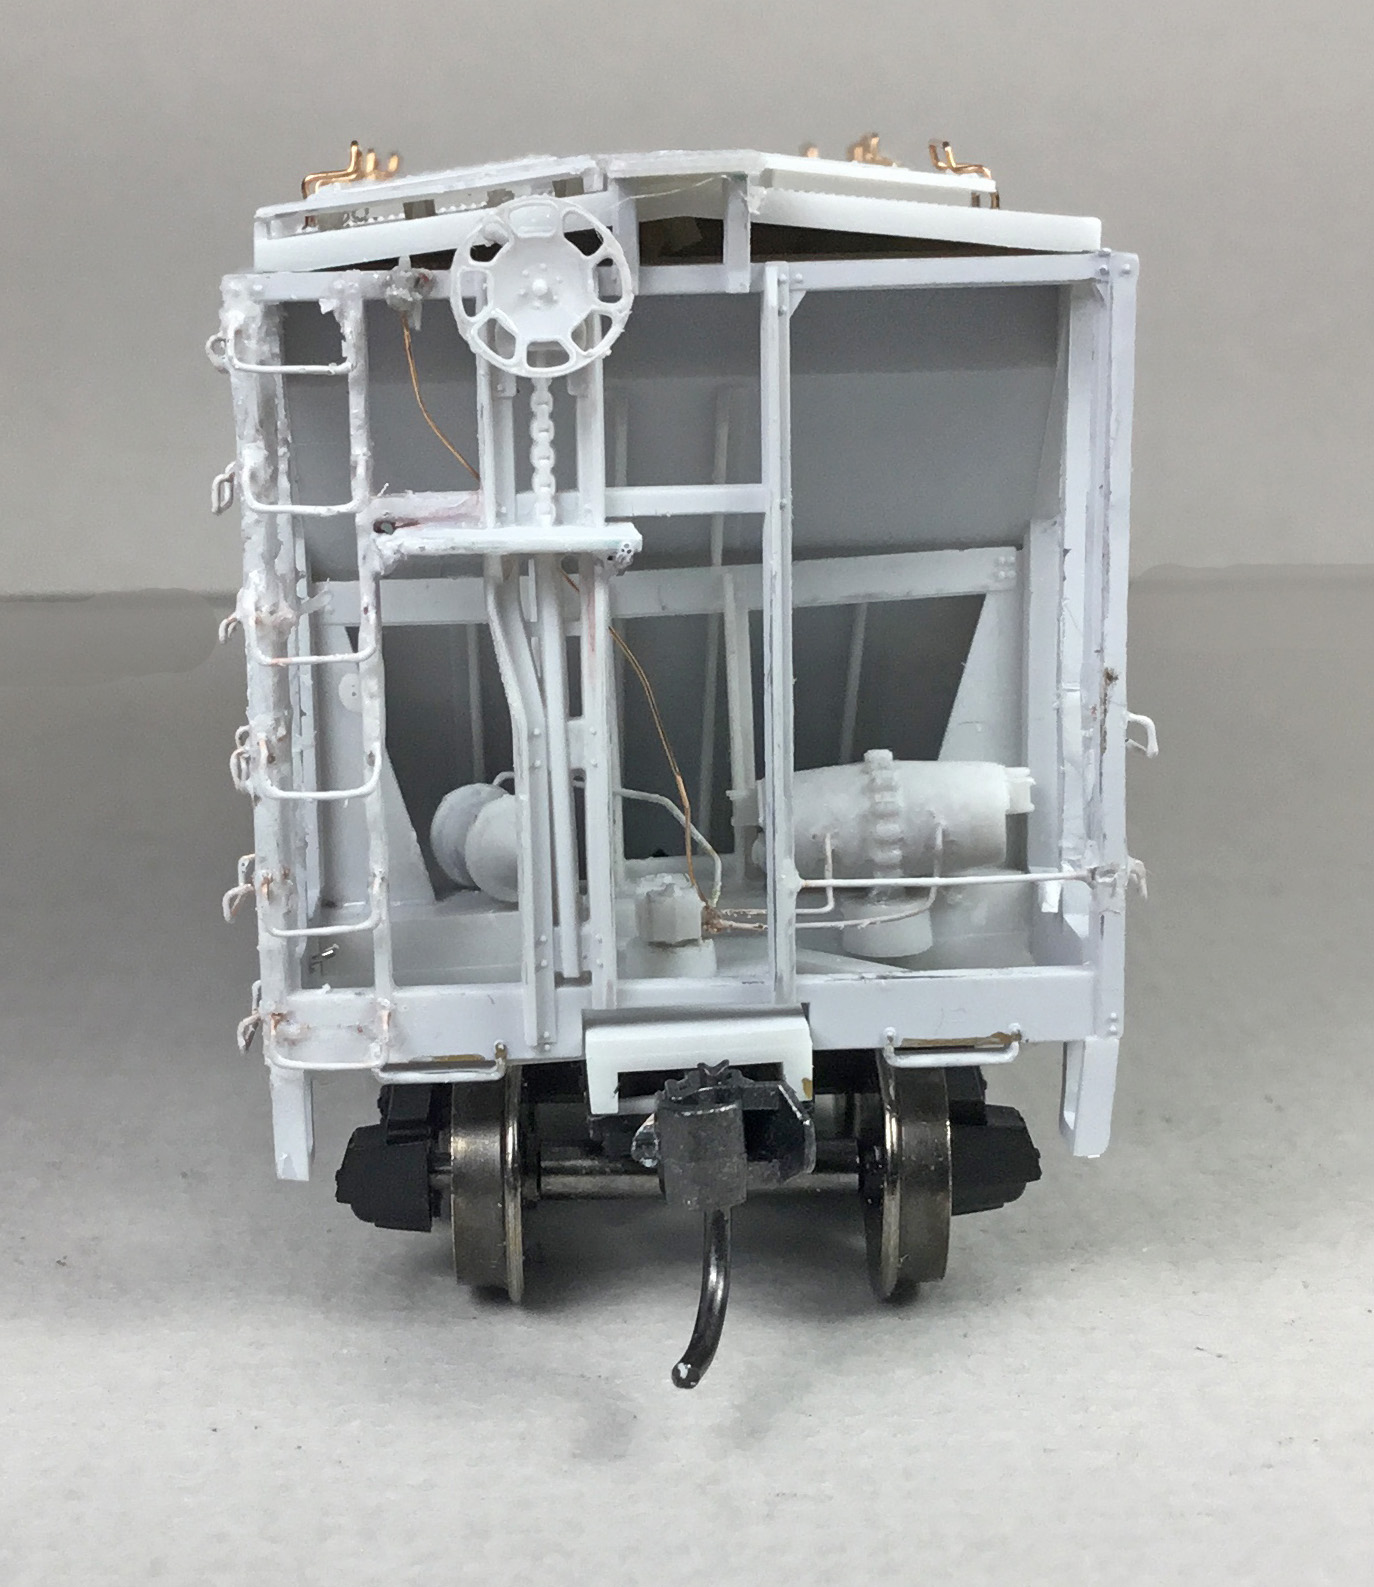 |
| Retainer valve and retainer line installed. |
On the underbody hoppers the hopper trim rings (kit) and hopper gates (kit) were installed.
 |
| Note hopper trim rings and gates installed. |
Next the most difficult part of CGW hopper 70057 upgrade; the grab irons and ladder rungs install. All the molded on grab irons and ladder rungs were removed with micro shear flush cutter and single edge razor blade (SERB). I do not remove the all the ladder rungs at once. Rather I remove one on the side and replace it with a wire one and then on the hopper end I remove the next one down and add the wire one. A #80 drill chucked in a #4486 chuck on a 8050 Micro Dremel is used to drill the holes for the new grab irons. When drilling the stiles on ends you have to be very, very careful as they will break easily. Therefore, you are removing and replacing every other ladder rung to help maintain ladder stile strength. New grab irons and ladder rungs were bent from Tichy #1101, .010” diameter phosphor bronze wire (PBW).
 |
| Grab irons and ladder rungs installed. |
 |
| Grab irons and ladder rungs installed. |
With grab irons and ladder rungs installed I went back to the roof to to give the hatch covers the type 1b look. The molded on hatch latches were carved off with a chisel blade. New hatch latches using Tichy #3015 18” drop grab irons with the legs bent to go over hatch cover sides were installed.
 |
| Wire hatch latches installed. |
The hatch bar locking lever brackets in between the hatch covers were cut from Plastruct #90502, 1/16” styrene angle and the locking bar was bent from Tichy #1106, .0125” diameter PBW.
 |
| Hatch bar locking levers and brackets installed. |
Molded on running board grab irons were cut off with a single edged razor blade (SERB). New wire grab irons were bent using Tichy #1101, .010” diameter PBW with Yarmouth Model Works eye bolts without shoulder installed.
 |
| Running board grab irons installed. |
After having completed some of the difficult steps of the build, I worked on the easier install of sill steps next. I cut off the molded on sill steps. New sill steps, A-Line #29002, style C sill steps, were installed in holes drilled with a #76 drill.
 |
| Metal sill steps installed. |
Back to the “B” end to install uncoupling lever brackets. The brackets were cut from Plastruct #90502, 1/16” styrene angle and installed. And, the molded on sill steps were cut off and replaced with A-Line #29002, style C sill steps.
 |
| Uncoupling lever and bracket installed. |
 |
| Uncoupling lever and bracket installed. |
With the car body changes done it was onto the underbody changes. Brakes levers cut from Evergreen strip styrene were installed. The brake cylinder lever was cut from Evergreen #8108 1” x 8” and the floating lever was cut from #8106 1” x 6”. Brake lever hangers and plastic grab irons were installed. And, the brake rods cut from Tichy #1106 .0125” diameter PBW installed. MEK Goop (plastic melted in MEK) was used to make the brake rod connecting clevises. The molded on ends of the train line were cut off and the curved portions of the the train line (prototype) from side sill to the center sill were installed. The curved wire train line portions were bent from wire on hand matching the size of the molded on train line.
 |
| Underbody details installed. |
During the build as I installed various detail parts as wire grab irons and ladder rungs I hand painted detail parts installed with Vallejo/Micro-Mark Undercoat Light Gray #29013X2. Therefore, the car body was already painted.
 |
| Added details were hand painted as build progressed. |
With the car body and underbody work done only the underbody needed to be painted. The underbody was airbrushed with Vallejo Model Color Black Grey 70.682. The trucks and wheels were hand painted with the same color as the car underbody.
 |
| Under body airbrushed. |
 |
| After underbody airbrushed. |
 |
| After underbody airbrushed. |
 |
| After underbody airbrushed. |
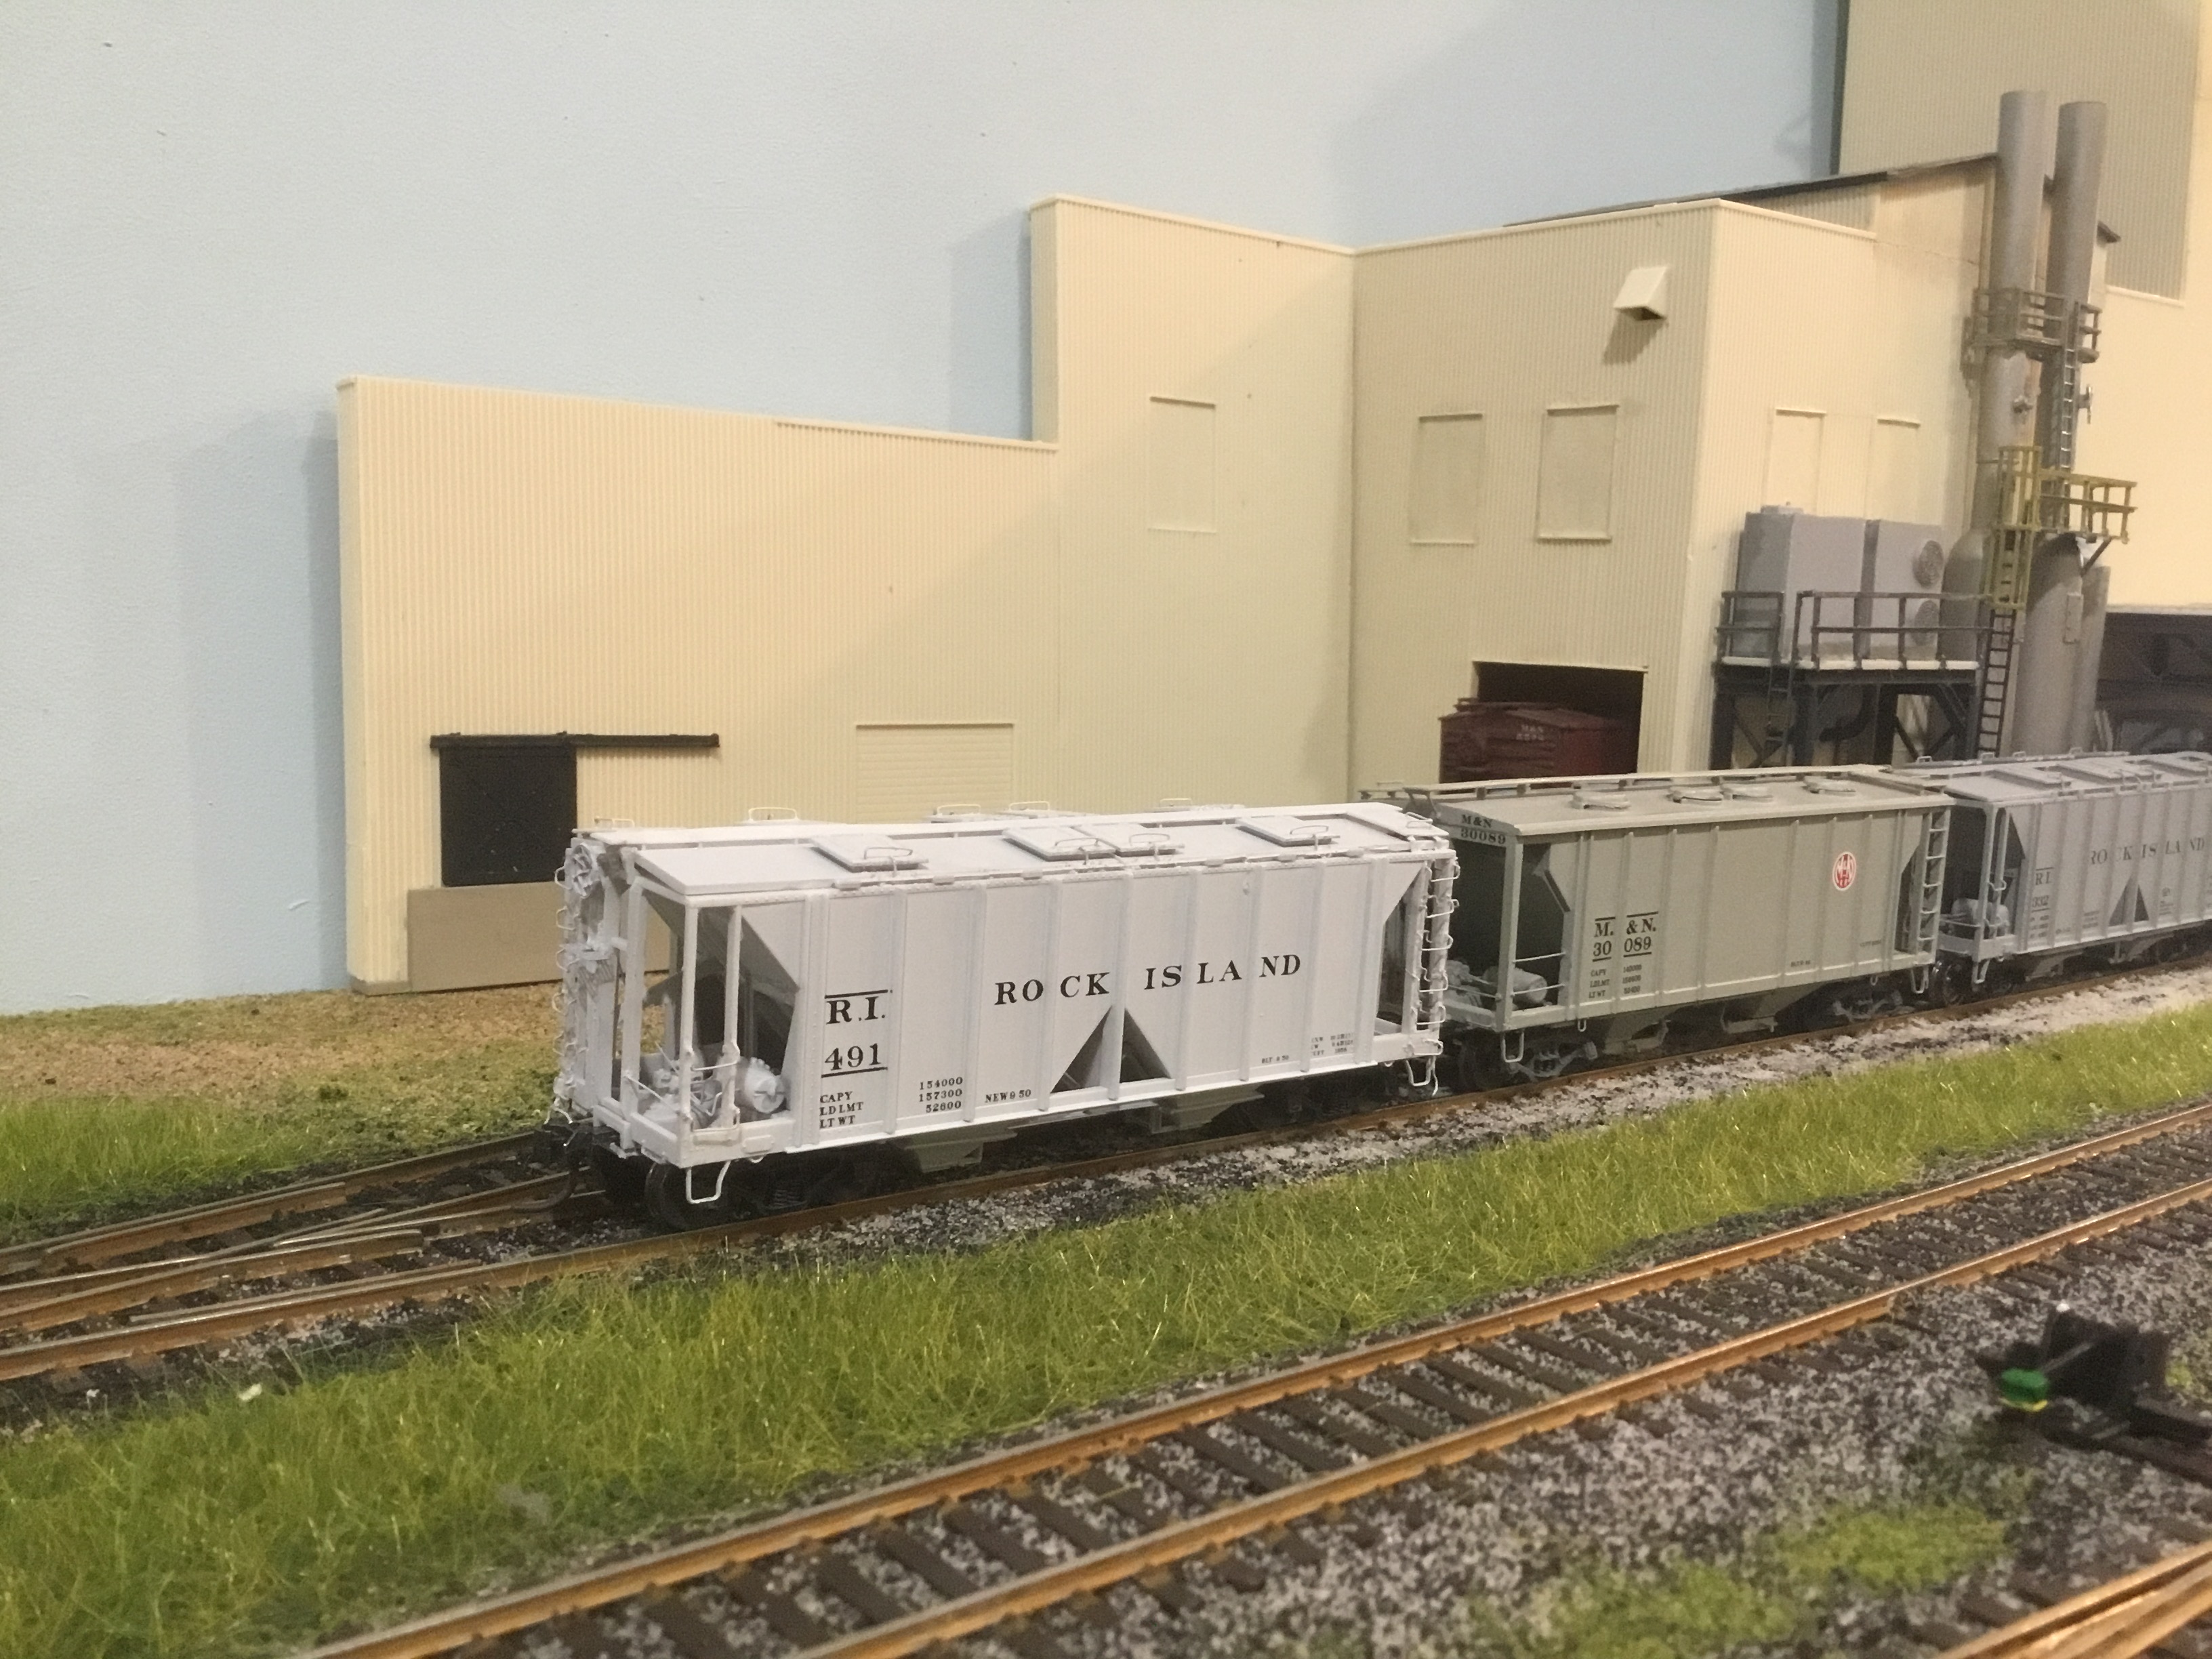
Chicago Great Western covered hopper 70057 was ready for service on the Minneapolis & Northland Railroad Company (M&N), “Serving today, Shaping tomorrow.” A car card was made for CGW 70057, the final step to put the cars in service on the Minneapolis & Northland Railroad Company Railroad. CGW 70 Ton covered hopper 70057 would serve in cement service on the M&N as the prototype did on the CGW.
 |
| CGW hopper 70057 spotted at Schwenke Cement in Minnepolis, Minn. |
 |
| CGW hopper 70057 spotted at Schwenke Cement in Minnepolis, Minn. |
 |
| CGW hopper 70057 spotted at Schwenke Cement in Minnepolis, Minn. |
Thank You for taking time to read my blog. You can share a comment in the section below if you choose to do so. Please sign your comment with your name if you choose to leave one. Please share the blog link with other model railroaders.
Lester Breuer
.