With the Randolph expansion benchwork, track work and basic scenery done, I began working on replacing cardboard rectangles representing industries with the final industries. I began with the easy one first - the Wildung Team Track. The remaining industries are kit bashed or modified kit structures.
I said the Wildung team track is easy as in Randolph no dock required so only fine shifted sand from a local road in my area and some sifted grey black dirt ( shifted black dirt from a local park baseball field home plate area) both applied with wet water ( Elmers white glue 25%, tap water 75% and a few drops of liquid dish washing soap). I put down the wet water from the Elmer’s glue bottle and use a throw away brush to to spread it in the area I will cover with the sand and dirt. I first apply the sand with a coffee strainer and tea strainer and then a little dirt here and there with the only tea strainer. I added Woodland Scenics blended grass and a few bushes at end of track to complete the scene for now. I will put down static grass such as on the left side of the photo below at a later time.
 |
| Wildung Team Track ( click on this or any photo to enlarge) |
 |
| Tools for adding basic scenery |
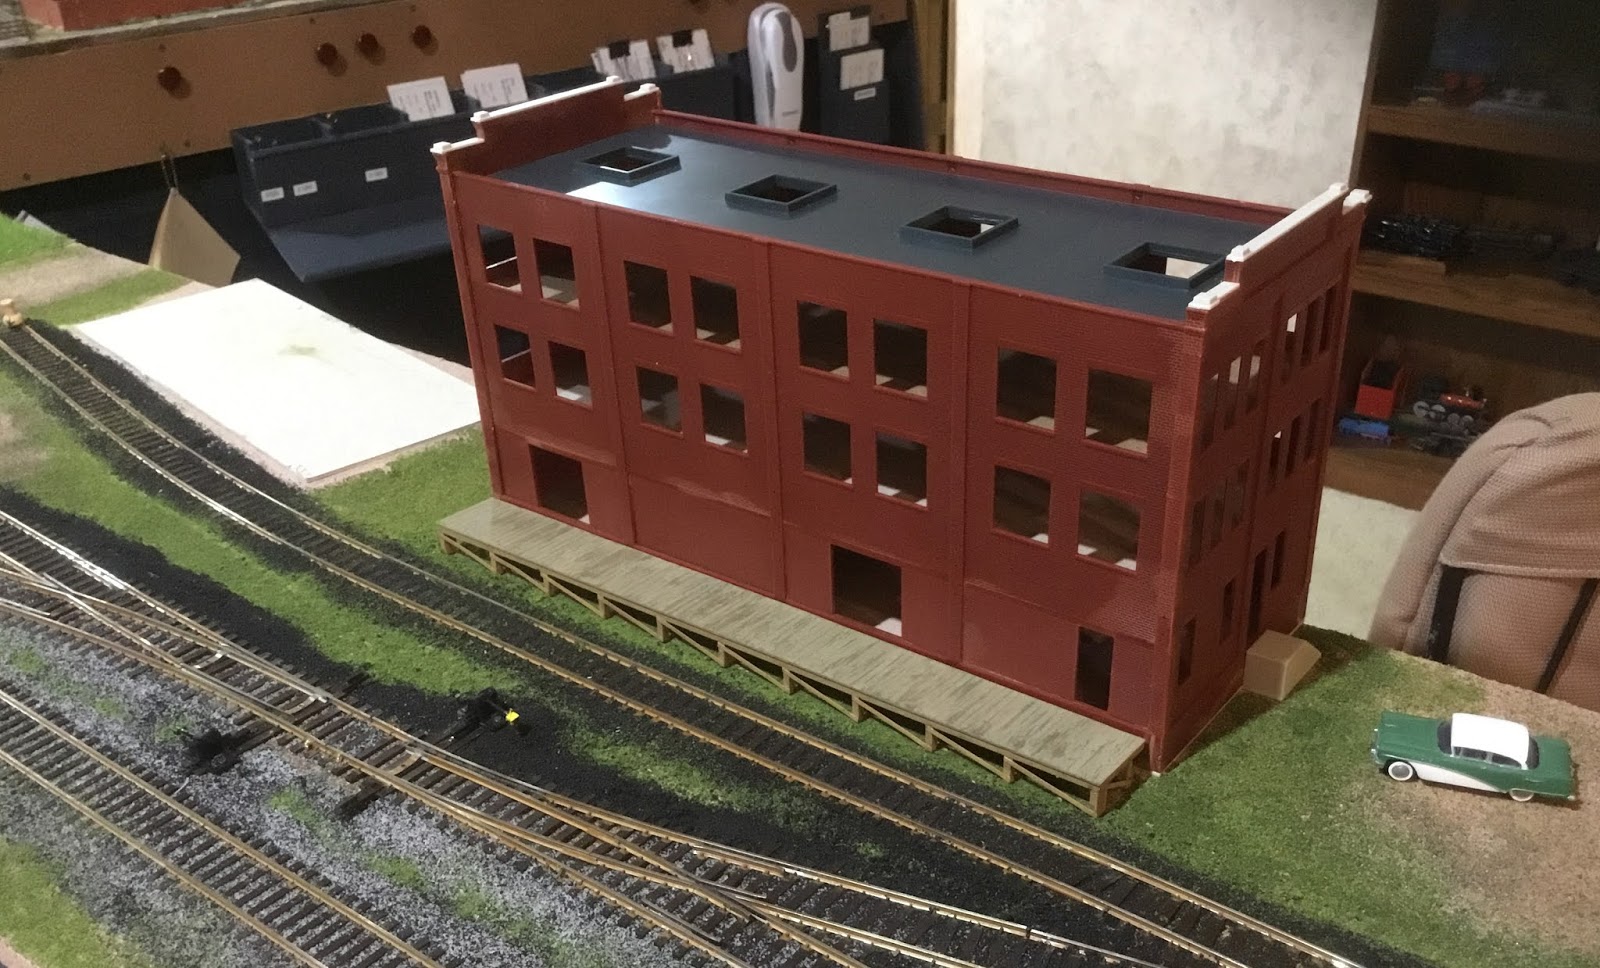
The next industry, Food Producers, a little more difficult as a structure was needed for customer to occupy. I chose the Walthers Cornerstone Trackside Post Office, kit 933-4063, for the structure. I first assembled the dock. I removed the boards that enclosed the bottom and added strip wood bracing to the posts. The dock being plastic was hand painted with PollyScale Depot Buff. Once dry the dock was brushed with Floquil Oak (S123) Flo-Stain. Again once dry, a coat of dirty thinner gunk, the residue that collects on the bottom of the bottle filled with Dio-Sol ( I mix my own as Dio-Sol is out of production) used to clean brushes after using Floquil or other solvent based paint, was applied. The basic building was assembled per instructions with the exception of exchanging the front and rear wall for the orientation I wanted on the railroad.
 |
| Walthers kit used for Food Producers. |
 |
| Food Producers basic building and dock |
At this point, I moved on to getting the basic structure in place for Randolph Anchor Glass Plant. I chose the Walthers Cornerstone Kraft Mill, kit 933-3902, for the materials to kit bash the Anchor Glass Plant. The prototype for the kit bash was the Shakopee Anchor Glass Plant just outside of Shakopee in the industrial park where I grew up. Of course, my Randolph space required using selective compression and using only the key features of the prototype.
 |
| Aerial view of Anchor Glass Plant in Shakopee Industrial Park |
 |
| Walthers kit used for Anchor Glass Plant kit bash. |
I cut, fitted and glued together the kit walls or parts of kit walls to get the basic structure. Evergreen strip styrene was used where roof support was needed. I did add a freight car loading entrance not on the prototype. Just a feature I added as I wanted to have one building on the railroad that allowed spotting of freight cars inside.
 |
| Anchor Glass Plant kit bashed basic building. |
 |
| Basic building of Randolph Anchor Glass Plant. |
Next I installed removable roofs on Randolph Anchor Glass Plant. I now could proceed to complete work on the two buildings. In this case, it was nice to have the two buildings to work on at the same time as when I tired of work on one or I was waiting for glue, etc. to set I could work on the other. I went back to the Food Producers building and added removable interior floors and walls that I made using heavy cardboard. The middle floors are cut/split in the middle to allow removal after doors and windows were installed.
 |
| Randolph Anchor Glass Plant roofs installed. |
 |
| Food Producers interior floors |
I painted the doors and windows attached to cardboard with masking tape with a rattle can using Rust-Oleum Gloss Protective Enamel. Once dry the windows were installed and the kit window glazing was installed using Formula 560 Canopy glue. On the exterior the window lintels were hand painted Polly Scale Depot Buff.
 |
| Food Producers windows spray painted |
With windows installed, the roof was covered with black #320 wet/dry sandpaper, fitted and installed. I did not like the roof sky lights on this building so I added roof details I liked and thought were more appropriate. I scratchbuilt the “dog house” from Pikestuff wall parts left over from another project to allow access to other roof mechanical items. The other roof items came from Walthers Cornerstone Roof Details kit, #933-3733.
 |
| Food Producers roof with kit sky lites. |
 |
| Food Producers with changes made to roof. |
Now the building was ready for its exterior finish. I applied a coat of hydrocal tinted with dry tempera paint pigment. When dry, I added the kit roof dock which was hand painted Model Master #1780 steel. A color I am going to miss with Testors removing Model Master paints from the market.
 |
| Food Producers with colored hydrocal finish applied. |
Time to get back to the Anchor Glass Plant details. A nice prototype feature was that many of the details were on individual concrete slabs sitting on a concrete slab the length of the building allowing me to build the side details as modules.
 |
| Shakopee Anchor Glass Plant with various details on individual bases. |
First, a unloading grate for unloading sand in hoppers was installed in the track and the canopy was built from some trusses from the parts box, Evergreen #274 I-Beam and sheet styrene, and kit sprues for posts and base posts are attached to. The furnace stacks were made using marker portion for the bottom and the lower barrel from a ball point pen turned upside down for the exhaust stack with an Evergreen styrene tube connecting the two pieces. Next, the air exhaust blower module next to it was built with styrene tubes and the blade hub from an helicopter model for the blower.
 |
| Unloading canopy and furnace stack started. |
 |
| Basic furnace stacks and exhaust pipes with blower and AHM door and concrete dock added under canopy. |
I installed the small windows in the tower next. The small windows came from my left over windows and doors parts box. Following window install, I built the gable roof portion behind the furnace stacks of the glass plant to add character to the model. I added the maintenance platforms to the furnace stacks. The remaining details on scratch built styrene stands were made from parts in the Walthers Cornerstone Roof Details kit, Walthers Styrene Steps & Ladders kit, #1602 and below on concrete slab AHM detail parts. Finally I added the section of the Randolph Anchor Glass Plant to the left of this building.
 |
| Small windows installed on tower of Anchor Glass Plant. |
 |
| All details including platform railings, ladders and unit next to dock door under canopy for the side of Anchor Glass Plant completed. |
 |
| Randolph Anchor Glass Plant windows and additional section added. |
The Anchor Glass Plant still has details that I want to add such as the leg on the roof, weathering and the maybe the unit on the gable roof section if there before 1955. I will add these when I need another break from building freight cars. And, I need to add the photo backdrop behind the plant and other structures. That, will happen when I will go back next spring to photograph and use the photos to create.
The last structure for Randolph will be General Tire And Rubber I will cover in Part II. And, I will also cover adding a backdrop for the new Randolph expansion in Part II.
 |
| General Tire And Rubber building will replace the last cardboard rectangle on the siding beyond Food Producers. |
Thank You for taking time to read my blog. You can share a comment in the section below if you choose to do so. Please sign your comment with your name if you choose to leave one. Please share the blog link with other model railroaders.
Lester Breuer