Tuesday, January 1, 2019

Rock Island Shop Made Covered Hopper Roof

While at a friend’s house for our weekly Tuesday night round robin railroad meeting, I saw a unique covered hopper on his modeling bench.  Upon asking my friend about it he told me it was an Athearn upgraded offset-side peaked end hopper with a Sunshine Models resin mini kit providing the resin covered hopper roof.   He showed me the instructions that had a photo from Bob’s Photos and a short history of the Chicago Rock Island & Pacific covered hopper prototype.  The instructions stated Bob Massey made the master for the Rock Island covered hopper roof which was to be installed on a Athearn offset-side hopper.  I took a couple of photos to aid me to build a similar covered hopper car.  


Sunshine Models mini kit instructions with Bob's Photo.
(click or tap on any photo to enlarge)

The  next day I began to research the prototype.  In Railway Prototype Cyclopedia 9, page 60, I found a photo of RI hopper 89589 from series 89500-89599, after the homemade covered roof was added by the Rock Island Shops in 1945.  Steve Hile provided me with a Rock Island Lines shop diagram for the 50 ton 33 ft. covered hopper cars.  The diagram shows the shop made roof with three hatches and the 9-10 inch diameter holes for grit loading that were later covered with circular plates.

Steve Hile Collection


In response to a post on RealSTMFC regarding Rock Island hopper decals, I learned about and found the article by Martin Lofton in July 1987 Mainline Modeler with prototype history, photos and how-to steps for scratch  building the roof.  After reading the article I decided to make a roof master as Bob Massey did and make a rubber mold of the master to make a resin cast removable roof rather than make a permanently attached plastic covered car roof as Martin described in his article.  A removable roof would allow me to run the hopper car as a A.A.R. class HM hopper without the roof and a A.A.R. class HMR, later changed to LO, hopper with the roof.  The roof would sit on an upgraded Athearn hopper kit obtained at a local train show.  The upgrade of the Athearn hopper car is described in a January 2019 post on my blog titled, “Rock Island Hopper 89502.”

I used a box car with a Murphy panel roof panels to make the master , a rubber mold, and a resin casting of the roof.

Plastic master and resin casting of the master.

Triangular brace extensions on the roof sides supporting the roof on the hopper sides were cut from Evergreen, #8210, 2x10” strip styrene.  A Northwest Short Line chopper was used to cut 10x10” squares from the Evergreen strip.  The squares were then cut from corner to opposite corner with a  single edge razor blade (SERB) creating a triangle side brace extension.  The triangle brace extensions are glued on the roof sides in line with the roof ribs.  The triangular brace extensions support the removable roof when placed on the open top hopper.

I added rivets on roof ends with Archer 5/8” rivets, AR88026, using Future floor finish and CA to secure them.


Triangular brace extensions on roof sides added to support roof
and Archer rivets applied to ends.

Resin running boards from the parts box were installed.  Longitudinal running board extension brackets were made from Evergreen, #8103, 1x3” strip styrene.  Prior to install, latitudinal running boards had mounting brackets cut from .005”x .030” shim brass glued to the back with extensions on the back side for gluing under the longitudinal running board and extensions on the front edge for bending over the roof edge.  And, before install, I added corner grab irons bent from Tichy Train Group (Tichy), #1100, .010” diameter phosphor bronze wire (PBW) with Yarmouth  Model Works shoulder eyebolts, YMW #356, for corner brackets.  Installing the grab irons on the latitudinal running boards prior to install makes it easy to cut off any wire protruding through the back flush with the backside.


Resin running boards installed.


Roof hatches cast from resin using Sunshine Models PFE Reefer hatches from kit 46.4 for the master were installed.  A Grandt Line Std. Guage Reefer Hardware set, #5106, contains hatches that could be used. Next each hatch received a handle bent from Tichy, #1101, .010” diameter PBW and a wood hatch rest next to the handle made from scrap strip styrene.  Roof hatch rests, wood on the prototype, were made from Evergreen, #8202, 2x2” strip styrene.  The 9” hole covers were cut from a 9” diameter kit sprue with a single edge razor blade (SERB) and sanded to final thickness before install. 


Hatch covers with details and  9" hole covers (black circles).

The covered hopper roof was now moved to the paint shop where it was sprayed with a Vallejo mix of two parts Model  Color Black red, 70.859, and one drop Model Color Flat Yellow, 70.953.  Once dry, I sprayed the roof with Model Master Flat Clear Acryl.  After drying I weathered the roof with Pan Pastels: Burnt Sienna, 740.5 and Payne’s Grey Tint, 840.7.  I do not spray any protective coat to protect the weathering as I have found it is not necessary after seeing cars handled in numerous operating sessions with no finish problems.


Removable covered hopper roof painted and weathered.


Painted removable roof added to open top hopper to have a covered hopper.


The Rock Island hopper removable roof can be put on open top RI hopper 89502 to turn it into a covered hopper, A.A.R. class HMR, later changed to “LO.”


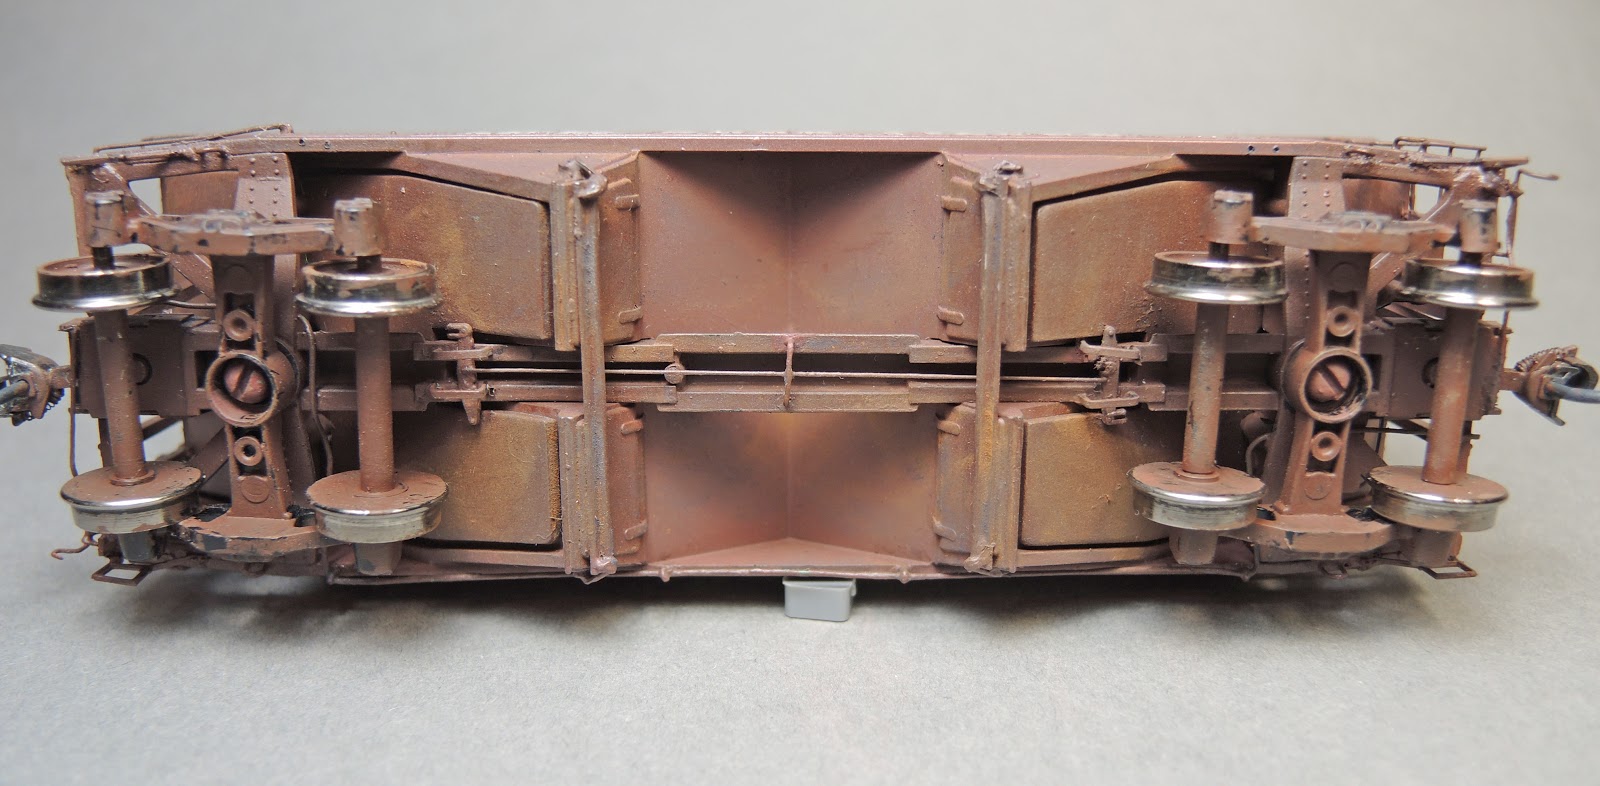
Rock Island hopper in service as an open top hopper.


Removable roof added to have covered hopper.


I want to thank Steve Hile for sharing the Rock Island diagram for 50 ton 33 ft. Covered hoppers with me and allowing me to share it with you in this post.


Thank You for taking time to read my blog.  You can share a comment in the section below if you choose to do so.  Please share the blog link with other model railroaders.
Lester Breuer

Rock Island Hopper 89502

When at a friend’s house for our weekly Tuesday night round robin railroad meeting, I saw a unique covered hopper on his modeling bench.  Upon asking my friend about it he told me it was an Athearn upgraded offset-side peaked end hopper with a Sunshine Models resin mini kit providing the resin covered hopper roof to build a Chicago, Rock Island & Pacific covered hopper.  I decided to build one to run on my Minneapolis & Northland Railroad Company Railroad.  I will cover the upgrade of an Athearn offset side peaked end hopper here.   I describe the build of the removable covered hopper roof for this hopper in another blog post titled, “Rock Island Shop Made Covered Hopper Roof” posted this month.


John Hotvet model.
(click or tap on all photos to enlarge)


In Railway Prototype Cyclopedia 9, page 60, I found a photo of Rock Island hopper 89500 from series 89500-89599, built in January is 1942 by American Car And Foundry Co. and a photo of 89589 after the homemade covered roof was added by the Rock Island Shops in 1945.  The photo captions state the hoppers received Ajax power hand brakes, wine door locks and  Viloco brake steps and A.A.R. spring-plankless-trucks.  To build this hopper and maybe more, I purchased an Athearn ATSF offset-side hopper kit, #5401 and two built Athearn ATSF hopper cars at a local train show.

I began the Athearn hopper  upgrade with the brake components.  I started by installing air reservoir brackets (cut off molded sill steps from other cars), moving control valve to a new location above the coupler pocket, adding piping, Tichy Train Group (Tichy), #1100, .010 diameter phosphor bronze wire (PBW) and brake lever, Evergreen, #8108, 1x8” strip styrene, glued to the brake cylinder piston rod clevis.  The last detail I added before installing the underbody into the hopper car body was to glue the top angle brace, a piece of Plastruct, #90501, 3/64” angle strip styrene,  in the middle of each slope sheet to which slope sheet angle braces are attached later.


Air reservoir mounting brackets, piping, and brake lever installed.


Once the under body was installed I installed two brake levers, Evergreen, # 8106, 1x6” strip styrene, a brake rod and bracket, Tichy, #1106, .0125” diameter PBW.  Brake lever hangers, molded plastic grab irons cut from another plastic car, were glued in place.  A door bar , Plastruct, #90501, 3/64” angle installed across hopper doors for the wine door locks.   A train line, a must detail on a hopper car in my opinion, was bent using .018” floral wire  and installed with Detail Associates, #2206, eyebolts for mounting brackets.  Kadee #148 couplers were installed in the coupler boxes.  Finally, Accurail trucks with InterMountain 33” wheels were installed.  The installed  Accurail trucks with spring plank are not correct for this hopper and need to be replaced with correct trucks A.A.R. spring-plankless trucks.  A Rock Island shop diagram for this hopper shows Barber stabilized S-2 trucks are correct for this covered hopper.  The diagram can be found in the “Rock Island Shop Made Covered Hopper Roof” post.

Brake levers, brake lever hangers, brake rod, train line
 and hopper bars for wine door locks added.


I  removed lettering including reporting marks, herald, and railroad name with  a nylon scratch brush and a cotton swab dipped in Walthers Solvaset decal setting solution.  Later I removed additional lettering such as the build date that would look better done with decals.  Molded on grab irons were carved off and replaced with Tichy, #3015,  18” drop grab irons or custom bent straight ones from Tichy, #1100, .010” diameter PBW.


Some lettering removed and grab irons installed.

Tow loops bent from, Tichy, #1100, .010” diameter  PBW were installed on the sill angle section near each end of the car.  Wine door locks were scratch built with a circle cut from a sprue with a single edge razor blade and cut again  to the form of the letter “D” and glued in place.  The “D” form was  drilled with a #80 drill to create a hole for a Thicy, #1100, .010” diameter PBW with a right angle bend to go into the hole in the “D” form and a  hook formed on the other end to go around the hopper door bar installed earlier.  Westerfield Models wine door lock parts, set #2190, could be used rather than fabricating them.  Tichy, #3043, double offset bottom mount sill steps were installed after molded on ones were cut off.


Tow loops, wine door locks and sill steps installed.

Now the “B” end details were installed. First, the Tichy, #3015, 18” drop grab irons.  I still need to add one on the right side on the sill.  Next, the slope sheet braces, fabricated from Plastruct, #90501, 3/64” angle strip styrene, were installed attaching the top of each to the angle glued earlier to the slope sheet and the bottom to the end sill.  The molded one piece slope sheets braces from a Westerfield hopper car details set, #2190, could be used instead.  The molded on brake rod and chain were removed as was the surrounding plastic to create the opening between structural members to install a new chain and bell crank, Tichy, set #3013, and brake rod, Detail Associates, #2505, .015” diameter brass wire.  The brake wheel was removed to allow easier install of a Sunshine Models resin retainer valve from the parts box followed by a retainer line, Tichy, #1100, .008” diameter PBW.  It can take some time to get the bends made correctly to attach it to the control valve.   A Kadee, #2030, Ajax brake wheel was installed replacing the Athearn removed brake wheel.  Uncoupling levers, bent from Ticy, #1106, .0125" diameter PBW, were installed in brackets made with scrap styrene and an eyebolts bent from Tichy, #1101, .010" diameter PBW.

The "B" end details getting close to finished.


The new “B” ends details and areas where lettering was removed were brush painted with a Vallejo mix of two parts Model  Color Black red, 70.859, and one drop Model Color Flat Yellow, 70.953. Once dry, the car body was sprayed with Model Master,#4638, Gloss Clear Acryl for a decal base.


Hopper after paint and weathering applied.


Decals applied to this hopper car came from various decal sets or ones I made as I had no one set to do the lettering.  Lettering was done as follows: the white 1” stripes are Champ Decals, No. S-52, railroad name, reporting marks and number are from a Rock Island flat car set I purchased from Steve Hile, build date and cubic feet are dry transfers from a Clinchfield set made by Campbell Road , Inc. applied to decal paper and coated with Microscale Liquid Decal Film and end reporting marks and number are from an old Ulrich set, N-09.  The end decals are not railroad Roman Roman; however, I chose to live with them rather than create them with dry transfers on decal paper.  Once decals which are not perfect were dry, the car body was sprayed with Model Master, 4636, Flat Clear Acryl to protect the decals.  I hope that a Rock Island set of decals I have been told may be available in 2019 becomes a reality for the next Rock Island covered hopper I do so the lettering can be done with one accurate decal set.

The hopper was weathered with Pan Pastels: Burnt Sienna, 740.5 and Payne’s Grey Tint, 840.7.  I do not spray any protective coat to protect the weathering as I have found it is not necessary after seeing cars handled in numerous operating sessions with no finish problems.


Lettering is original lettering plus lettering from various decal sets
 and dry transfer lettering applied to decal paper.


Rock Island hopper 89502 is now in service on the Minneapolis & Northland Railroad Company as an open top or covered hopper.  It has a couple of items that are incorrect that I will live with; however,  I will correct then on the next hopper I build if a Rock Island, decal set becomes available.


Rock Island open top hopper in service.

Hopper can be used as an open top hopper.

Hopper can be used as a covered hopper with roof added.
Note train line.


 As stated above, I describe the build of the removable covered hopper roof for this hopper in another blog post titled, “Rock Island Shop Made Covered Hopper Roof” posted this month, January 2019.

I want to thank Steve Hile for making Rock Island flat car decals available for purchase to assist lettering this hopper.


Thank You for taking time to read my blog.  You can share a comment in the section below if you choose to do so.  Please share the blog link with other model railroaders.
Lester Breuer