After building an Atchison, Topeka And Santa Fe (ATSF) stock car, I wanted to build a stock car that would be seen often in the Midwest. I decided to build a Great Northern (GN) stock car that I numbered 55756. The Accurail kit, number 4799, car painted oxide red with data only lettering, was in the to build inventory since 2002. I had built the same kit in 2001 that was put in service as GN Stock car 55762. It was time build the second kit with improved modeling skills and additional data.
The prototype Great Northern stock 55756 was in GN assigned series 55750 to 55849. The latter series of cars was built by the Mt. Vernon Car Company in 1919 as box cars and converted by the GN to stock cars in 1955/1956. The stock car has Pratt Truss design wood slat sides, steel Murphy 5/5/5 ends and Murphy steel roof. Other features of these cars included wood running board, metal brake step, Universal power handbrakes, AB brakes, no slack adjuster and cast steel trucks. Prior to 1956 the stock cars were painted mineral red with either a mineral red or aluminum roof and after 1956 a majority were painted vermilion red.
Photos of these Great Northern stock cars can be found in Stock Car Cyclopedia, Vol. 1 (Hundman Publishing, 2007) and GN Equipment Equipment Color Pictorial, Book 1 - Box Cars & Stock Cars (Four Ways West Publications, 1995). The Stock Car Cyclopedia, Vol. 1 also contains a GN diagram of this series of GN stock cars. When you compare the Accurail GN stock car to these photos it is an excellent match including the data only lettering. Therefore, I wanted to save the lettering knowing the stock car would have to be repainted mineral red since the kit body was oxide red. Of course, if the molded on details are replaced and additional work is done on the “B” end and underbody, a better model can be produced.
 |
| Stock Car Diagram for Great Northern Car Nos. Series 55750 to 56049 GNRHS Archives Courtesy of Rich Remiarz |
As with many kits I began the build with the underbody. On the underbody I installed the fish belly center sill. Coupler pocket cover install pins were cut off. The coupler pocket covers and bolster king pins were drilled and tapped for 2-56 screws. Kit gear boxes with Kadee #148 couplers and kit Accurail trucks which are ARA cast steel with spring plank with InterMountain 33”metal wheels installed were installed with Fastenal 3/16” screws for gear boxes and 1/4” for trucks. (see underbody photo below).
Only the kit provided weight was installed on the inside of the floor with Permatex, a clear silicone adhesive sealant, bringing the car weight to 3.8 ounces. Formula 560 canopy glue could also have been used to attach the weight. After the Permatex silicone had dried the underbody was installed into the car body.
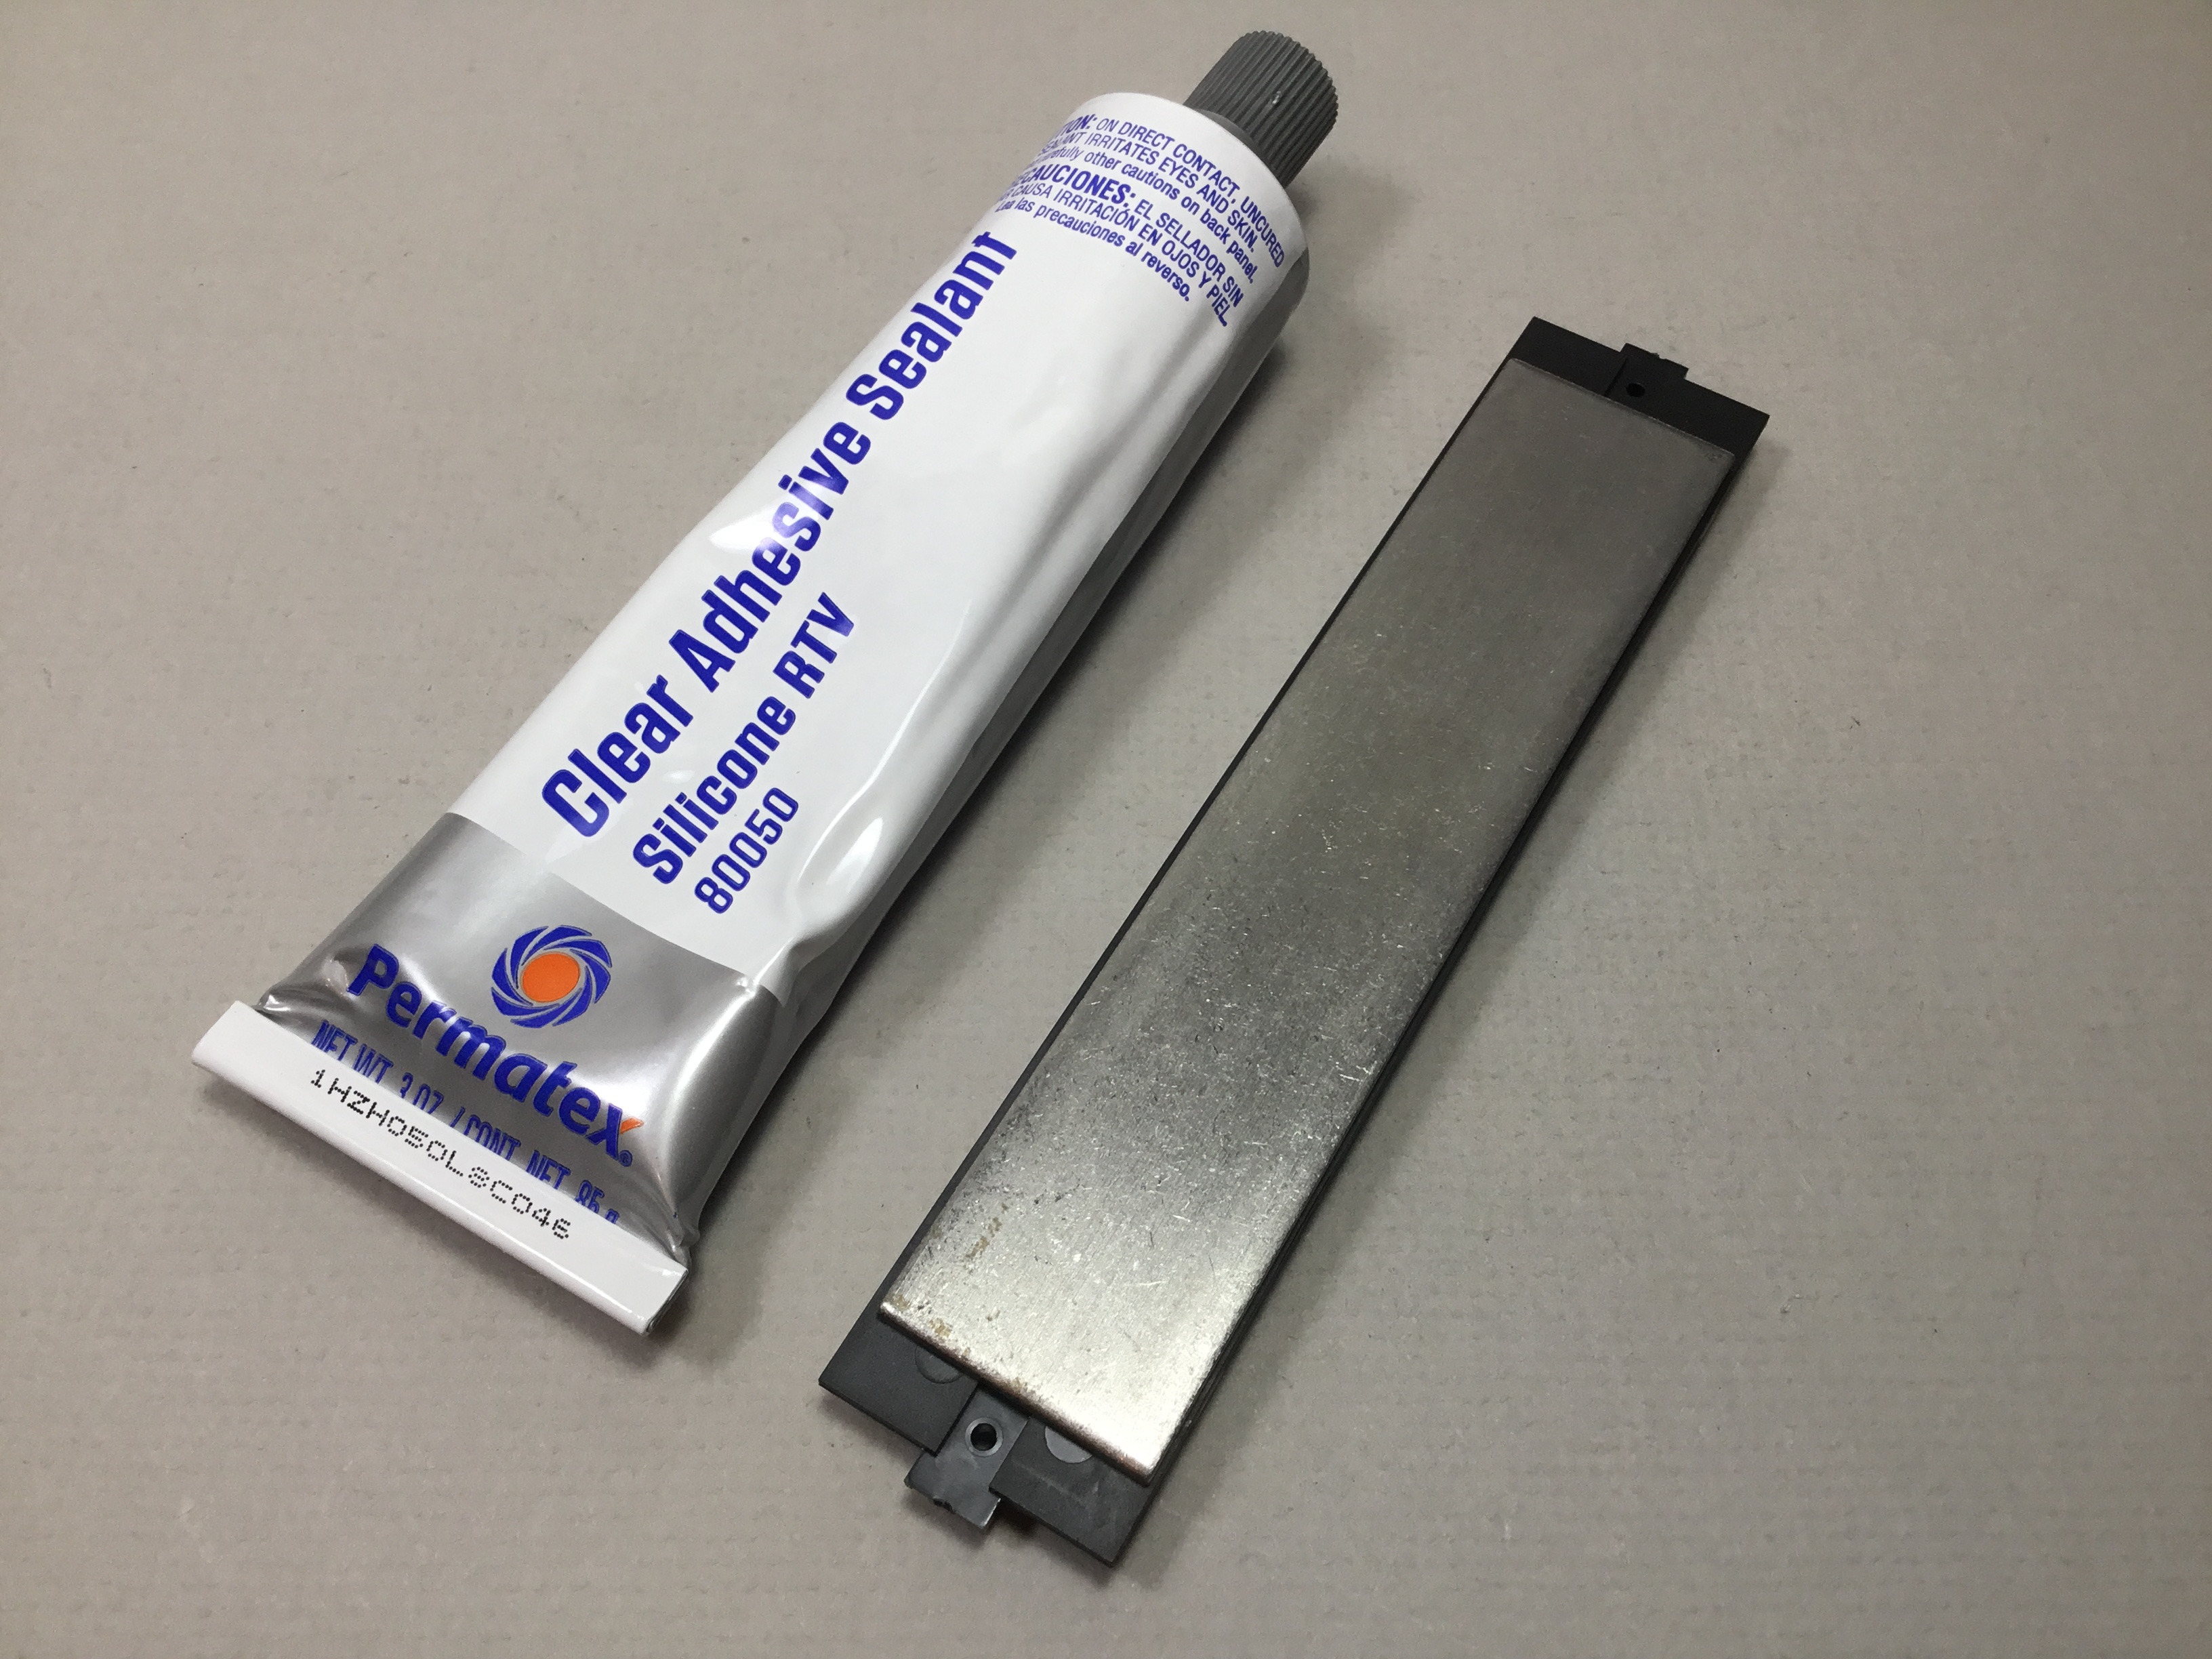 |
| Kit weight was installed with Permatex. |
Once the underbody was installed. I installed the kit running boards to finish the easy work on the car. Now the most difficult part of the build, the carving off of molded on details on the car body including grab irons, ladder rungs, door handles and running board supports were done. On the “B” end the brake step hole was filled with MEK Goop ( plastic melted in MEK).
 |
| Side molded on details carved off. (Click on this or any image to enlarge) |
 |
| End grab irons and ladder rungs carved off. |
When the carving was done I went back to the roof. On the longitudinal running board I added the end brackets using Evergreen #8102 1 x 2” strip styrene. On the latitudinal running boards (laterals, corner walks) I installed wire grab irons bent from Tichy Train Group (Tichy) #1101 .010” diameter phosphor bronze (PBW) wire with Yarmouth Model Works etched eye bolts without shoulder for corner legs. On the sides the grab irons, ladder rungs and door handles as the roof grab irons were bent form Tichy #1101 .010” diameter PBW and installed.
 |
| Grab irons and ladder rungs installed. |
I continued the install of grab irons and ladder rungs on the “B” ends. Now I went to work on the “B” end details. I installed a resin Universal brake housing cast in the M&N Shops using a Moloco brake housing for a master. A brake step, from Tichy set #3013, with brackets cut from Evergreen #8102 1 x 2” strip styrene was installed. I cut off the brake shaft sill bracket. A bell crank and brake rod clevis, both from Tichy set #3013, were installed. The brake rod clevis is the remaining portion of the long brake cylinder rod piston, from Tichy set #3013, after the rod portion is cut off with a PBL nipper. The brake rod cut from Tichy #1102, .015” PBW was installed. A retainer valve resin cast in M&N Shops was installed followed by the retainer line and brackets, Tichy # #1100 .008” diameter PBW. Now the Kadee #2023 Universal brake wheel was installed.
 |
| "B" end details installed. |
 |
| "B" end details installed. |
Next I moved to the underbody to add details needed there. On the GN stock car using prototype photos in above mentioned book, you can determine all brake components are mounted on one side of the center sill. Underbody details were added as follows:
- Brake components: brake cylinder, air reservoir and AB valve (all kit)
- Brake components predrilled for piping with #79 drill
- Brake component brackets: air reservoir cut off sill steps, Sunshine resin parts for others
- Brake cylinder lever, cut from Evergreen #8108, 1 x 8” strip styrene
- Brake floating lever, cut from Evergreen #8106, 1 x 6” strip styrene
- Train line, .018” diameter green colored floral wire
- Brake piping from air reservoir to control valve, Tichy #1101, .010” diameter PBW
- Brake pipe from brake cylinder to control valve, Tichy #1106, .0125” diameter PBW
- Brake rods, Tichy #1106, .0125” diameter PBW
- Brake rod clevises, Tichy turnbuckles #8021 and MEK Goop
- Chain, A-Line #29219, black 40 links per inch
- Dirt collector, resin cast in M&N Shops using master from Tichy set #3013
- Dirt collector pipe to train line, Tichy #1106, .0125” diameter PBW
- Bell crank, Tichy set #3013
 |
| Underbody with added details before paint. |
 |
| Underbody after paint. |
After finishing the underbody, I went back to the sides and installed the kit provided number boards for the reporting marks and car number. Next I cut off the molded on sill steps and installed A-Line #29000 sill steps. At this time I also began hand brushing added detail parts with test paint mix of Vallejo Model Color Black Red 70.859 (75%) and Flat Yellow 70.953 (25%). It was darker than desired; however, after thinner would be added for air brushing the color would become lighter.
 |
| Sill steps replaced and test of Mineral Red Mix on grab irons and ladder rungs. |
While the paint was drying the hand brushed detail parts I installed the uncoupling levers on the “B” end. The uncoupling levers were bent from Tichy #1106, .0125” PBW with eye bolt brackets bent from Tichy #1101, .010” diameter PBW.
 |
| Uncoupling lever installed. |
 |
| Uncoupling lever installed. |
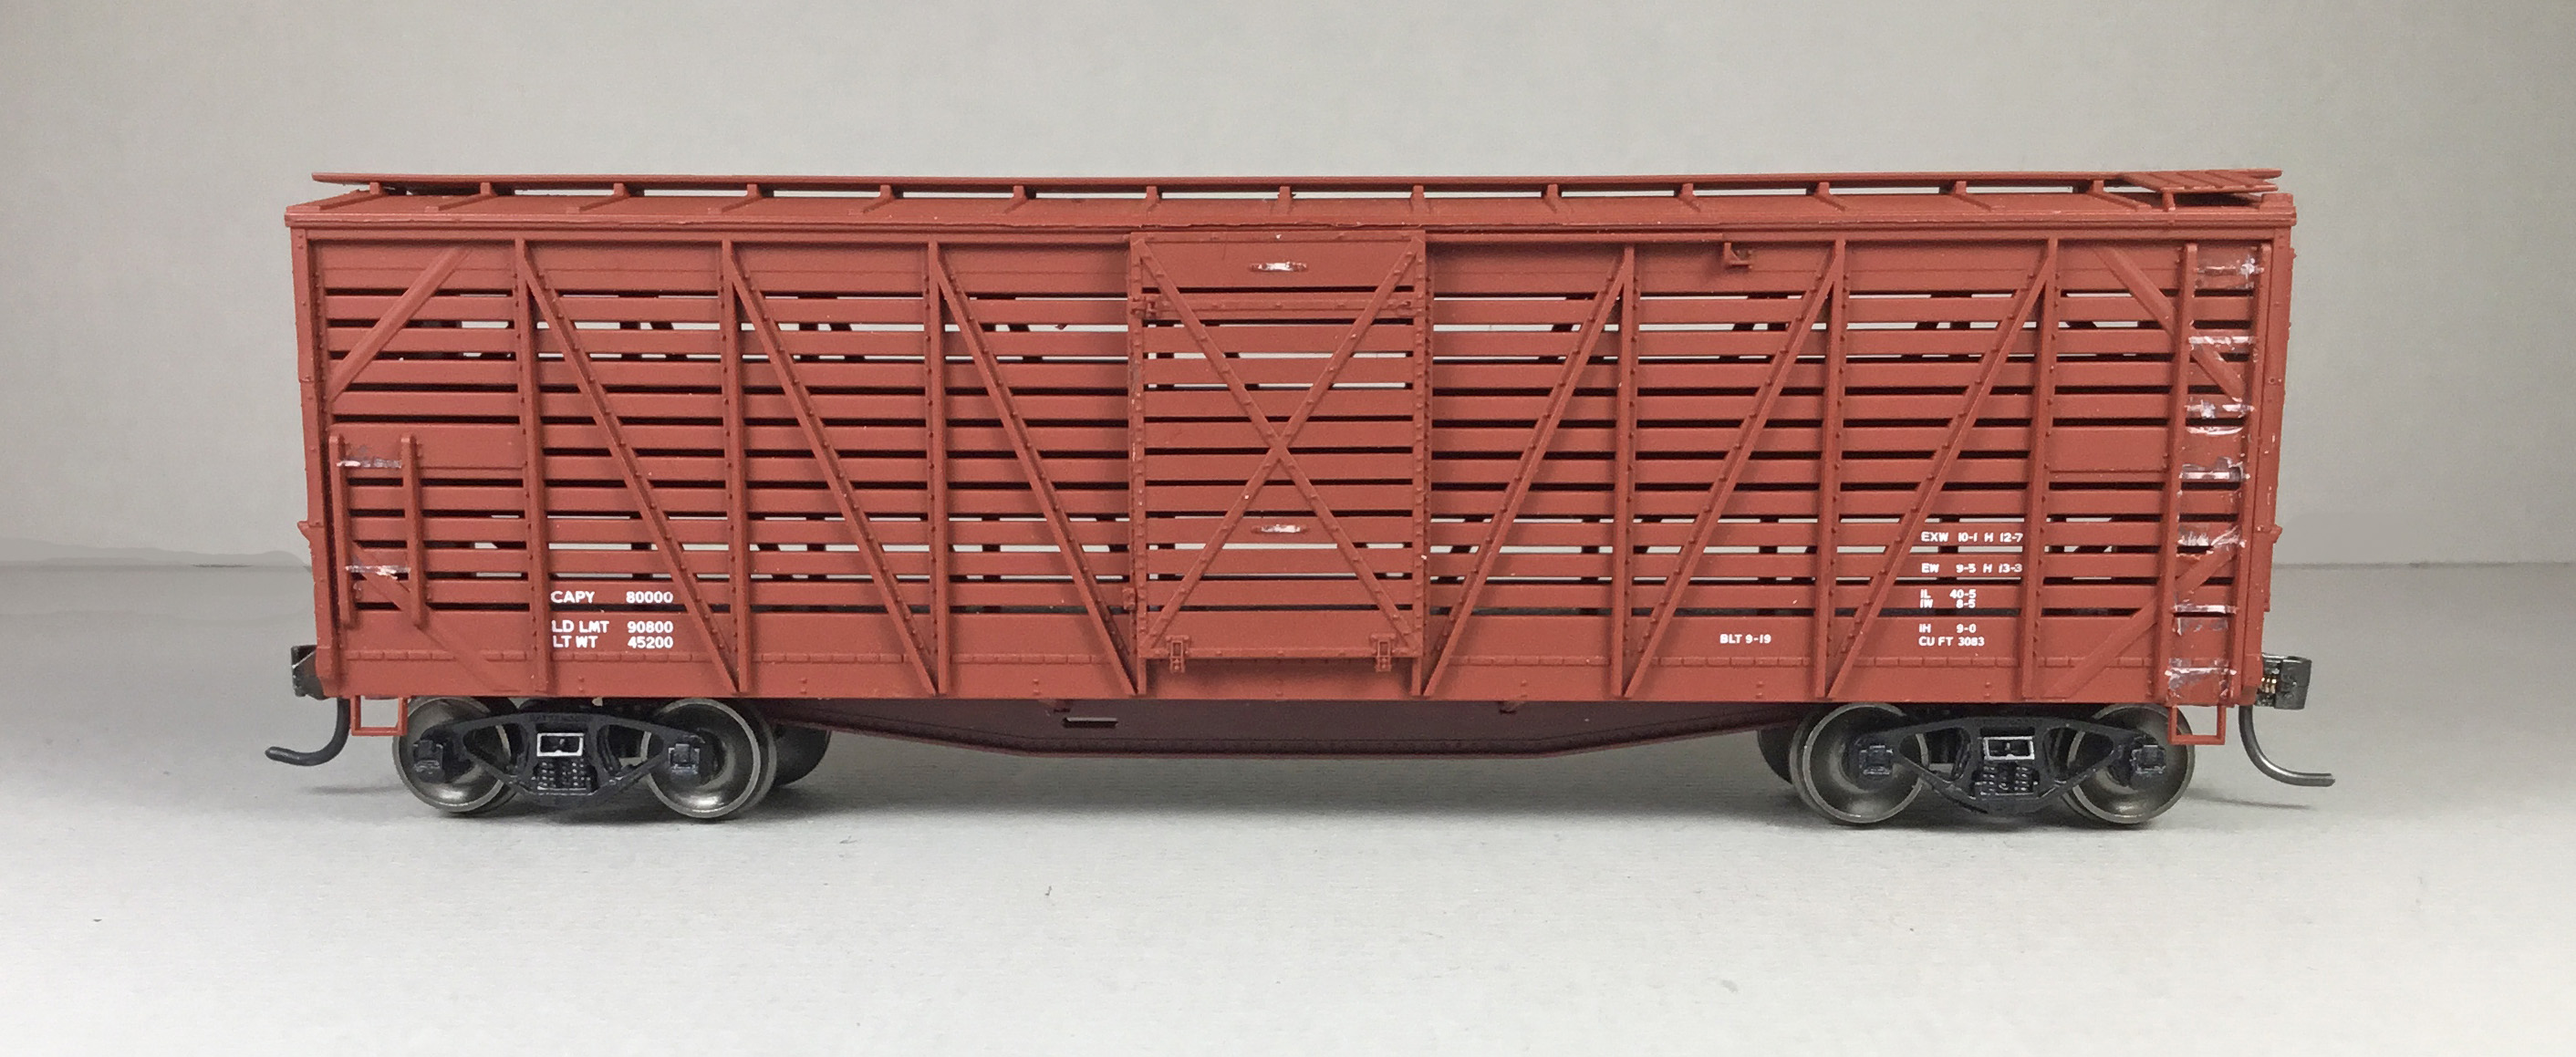
Now the stock car was moved to the paint shop for paint and lettering. The Great Northern painted the car body, underbody and trucks mineral red prior to 1956. Since my Minneapolis & Northland Railroad Company period is spring 1955, I needed to airbrush the Accurail applied oxide red mineral red. The capacity, weight, and dimensional data were taped off with Taymia tape to save them as they were accurate when compared to prototype photos. With tape in place, the stock car was airbrushed with a paint mix of Vallejo Model Color Black Red 70.859 (50% or 30 drops), Flat Yellow 70.953 (17 % or 10 drops) and a custom mixed thinner (33% or 20 drops). My custom thinner mix is 50% distilled water, 25 % Vallejo airbrush thinner 71.161 and 25% Vallejo Flow Improver 71.562.
Once the paint was dry the tape was removed and areas between data were hand brushed with the unused portion of the airbrush paint mix saved for that purpose.
 |
| Car airbrushed mineral red. |
 |
| Car airbrushed mineral red. |
Once the paint was dry, the car body was sprayed Model Master Gloss Clear Acryl, #4638, to have a gloss base for decal application. While the gloss finish was drying I reviewed the Champ decals and Letraset Railroad Model Heralds dry transfer set I had in my decal stock to choose car number 55756. I also contacted Rich Remiarz, a GN modeler, for available decal or lettering sets. He made me aware that C-D_S Lettering Ltd. had a dry transfer set specifically made for lettering this car. He also said he had a couple of extra sets I could purchase. I did purchase them.
 |
| Champ decals and Letraset Lettering. |
 |
| C-D-S Lettering Ltd. dry transfer set |
After gloss finish was dry, decals were soaked off in distilled water and applied to the car body where MicroScale Micro Set had been applied with a brush. After decals were applied in the Micro Set and positioned, the edges had MicroScale Micro Sol and Walthers Solvaset applied. Any excess solution was sucked away with the torn edge of a paper towel. Lettering applied was as follows:
- Great Northern name on sides is Letraset Railroad Model Heralds dry transfers applied to decal paper
- Reporting marks are C-D-S dry transfers, GN 40’ stock car set HO-410, applied to decal paper
- Dry transfers applied on decal paper were coated with MicroScale Liquid Decal Film to create water slide decal
- Numbers on sides and ends, reporting marks on ends, class “SM” on sides, and repack data are Champ Decals from Great Northern Stock Car set HC-111
 |
| Decals applied. |
 |
| Decals applied. |
When dry, car body was airbrushed with Model Master Gloss Clear Acryl #4638, to better hide decals edges. Finally, the car body was sprayed with Model Master Flat Clear Acryl, #4636, flat to protect decals and provide a flat finish for weathering when applied.
 |
| Car body airbrushed with Model Master Gloss Clear Acryl. |
One last check of the GN stock car diagram for features before putting GN stock car 55756 in service. I am glad I did as I found I had missed a metal brake step. So, one more time back the “B” end to change ( dislike the term “rework”) the brake step. I removed the Tichy brake step and replaced it with one cut from a lateral Kadee running board.
 |
| Metal brake step installed. |
My last step before putting Great Northern stock car 55756 in service was to weather the car with Pan Pastels. Pan Pastels Red Iron Oxide Shade 380.3 was applied to sides, ends and roof, Netural Grey 820.5 on running and placard boards and Paynes Grey Extra Dark 840.1 was used on the car body roof and lightly over safety appliances on car body.
 |
| Light weathering with Pan Pastels applied. |
 |
| Light weathering with Pan Pastels applied. |
Great Northern stock car 55756 was ready for service along with GN stock car 55762 on the Minneapolis & Northland Railroad Company, “Serving today, Shaping tomorrow.” A car card was made for GN stock car 55756, the final step to put the cars in service on the Minneapolis & Northland Railroad Company Railroad.
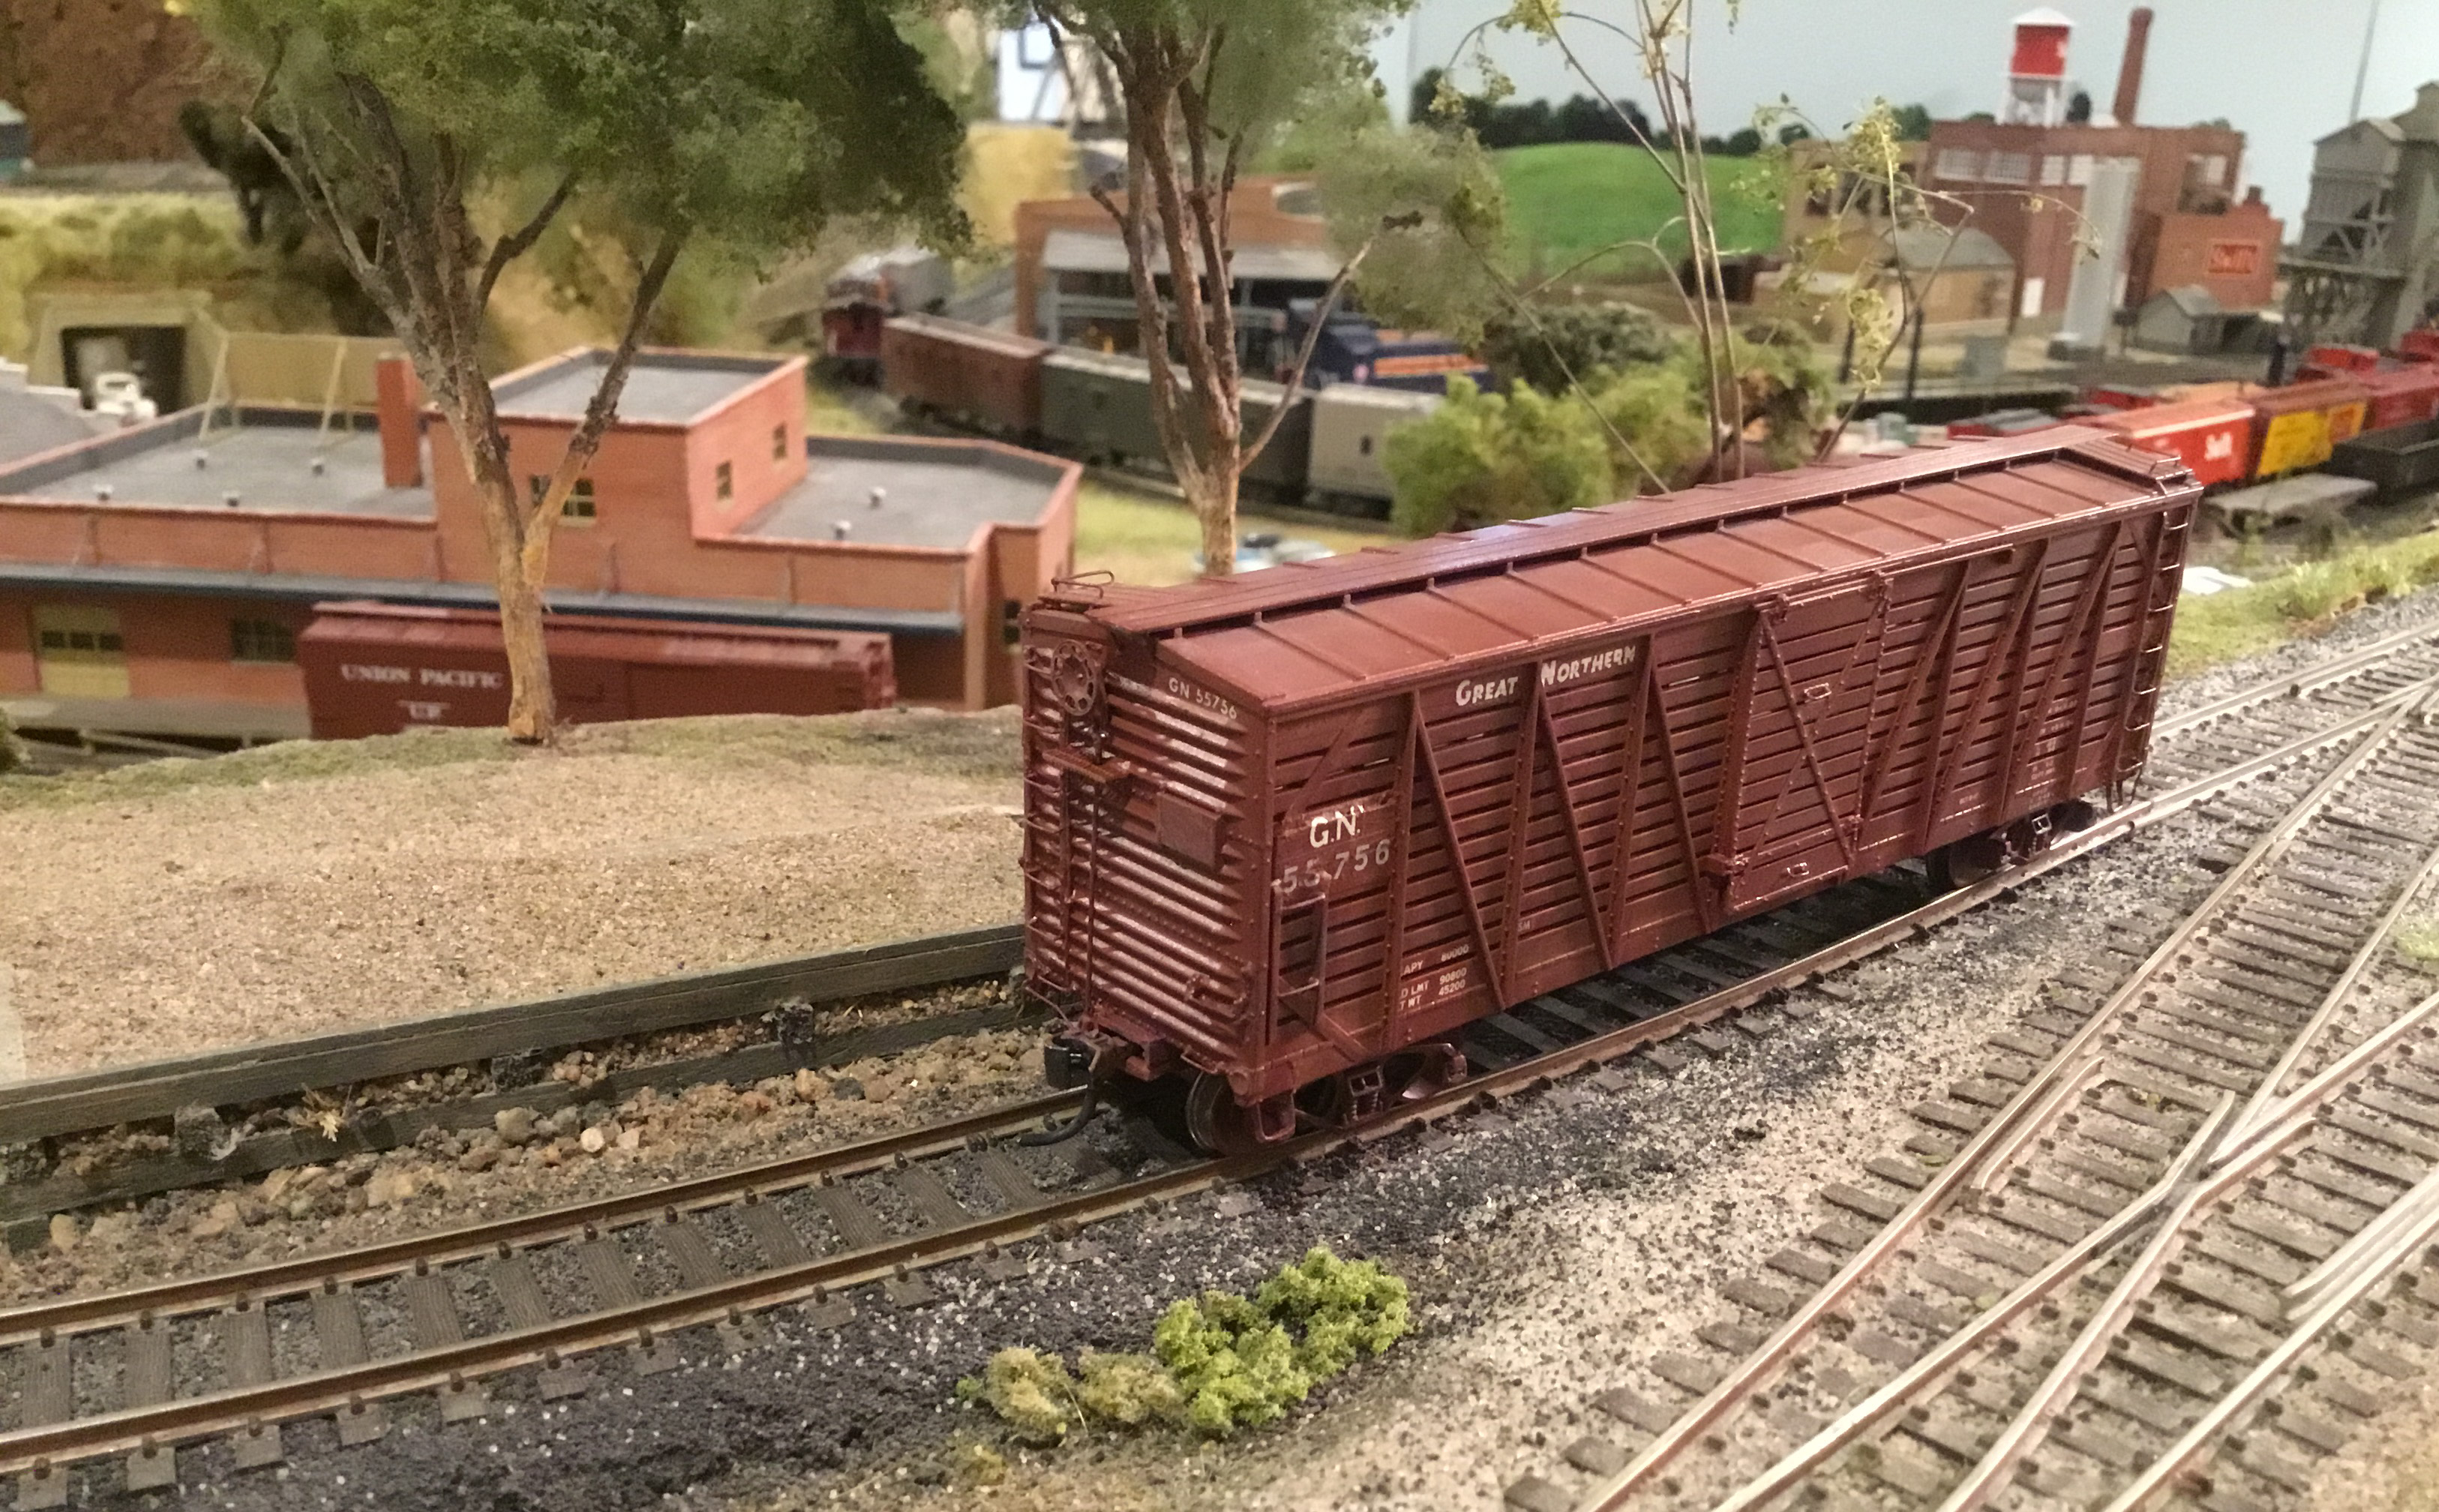 |
| GN 55756 spotted at portable cattle loading ramp in Sussex, Minn. Ramp not visible in this photo. |
 |
| GN 55756 spotted at portable cattle loading ramp located Sussex, Minn. |
 |
| GN 55756 spotted at portable cattle loading ramp. in Sussex, Minn. |
 |
| GN 55756 and GN 55762 stock cars sitting on Dawkins siding next to GN Interchange in Minneapolis, Minn. |
I want to say, “Thank You” to Rich Remiarz, GN modeler and GNRHS Modeling Coordinator, for providing information with this build and upgrade. Definitely appreciated as without his help this build would have been much more difficult.
Thank You for taking time to read my blog. You can share a comment in the section below if you choose to do so. Please sign your comment with your name if you choose to leave one. Please share the blog link with other model railroaders.
Lester Breuer
.
No comments:
Post a Comment